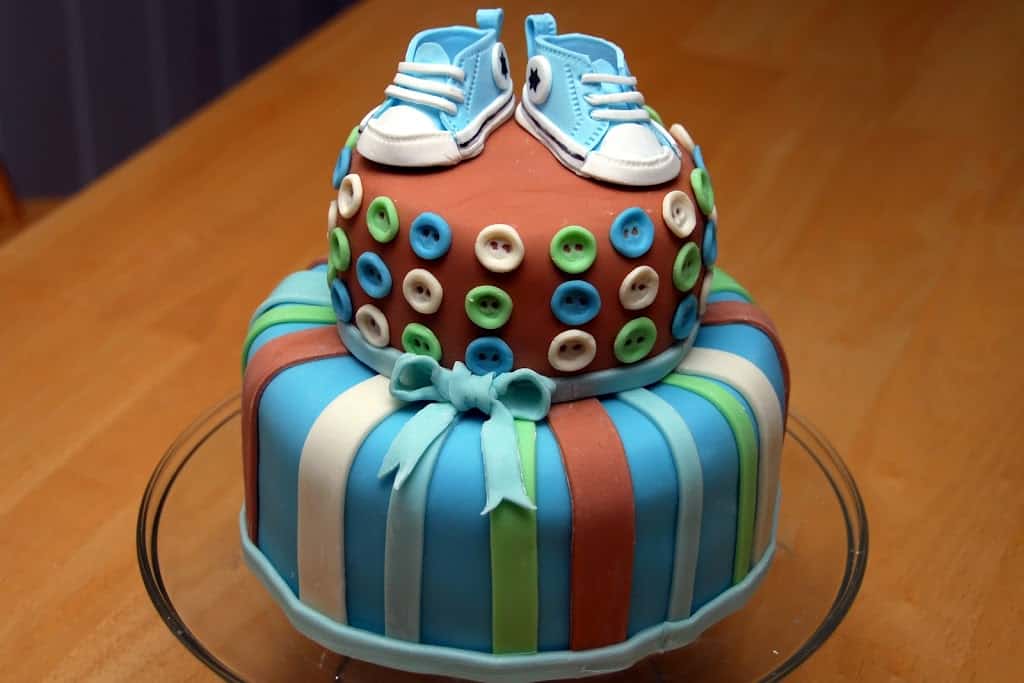
I had done a post called Cake Making 101, and I promised there would be a follow up. Here it is. I was hired to make the following cake for a baby shower. Cakes are basically a hobby for me, but I do agree to do one for a friend every once in a while. The theme of the baby shower was “Cute as a Button.” Please see my cakes tab to discover more creations. Hopefully you will notice the progress I have made there. From the time I made this cake to all my future cakes, you should see an improvement. With practice and experience, I’m convinced I’ll continue to refine my craft.
* Affiliate links provided for your convenience. Anything you purchase through these links helps to support Meaningful Mama and the free resources I provide. Thank you for choosing to support us.
Tip #1: Buy the Right Fondant. If you have never attempted a fondant covered cake, I was going to break it down for you here. Hopefully, a basic tutorial will encourage you to try it. First of all, let me tell you the products I like. I have purchased my fondant from Wilton and from a baking supply warehouse. Wilton I personally do not like. I did like the wholesale fondant I bought in huge tubs, but my supplier stopped selling it.
The most success I have found lately on a retail level has been with Duff’s product line. It ends up being the same price as I was buying wholesale. It tastes more like marshmallows, and it has been a good product to work with. I also did the little converse shoes with Wilton’s gum paste. It was my first real success with gum paste, so I highly recommend it.
Tip #2: Don’t over knead the fondant. If you are using Duff’s fondant, follow microwave instructions on the back. You are then ready to knead the fondant. You want to be careful not to over-knead. It’s hard when you are adding color since you are trying to get a consistent color. I do use Wilton’s or AmeriColor gel food coloring, which has worked really well.
Tip #3: Wear disposable gloves when kneading in color. I wear disposable rubber gloves so that my hands don’t get stained. I also have a fondant mat so things don’t stick. You add a desired amount of the color you want and begin to knead it into the fondant.
Tip #4: Establish the amount of fondant needed. The amount of fondant needed will be based on the size of cake you are making. Here’s a simple table:


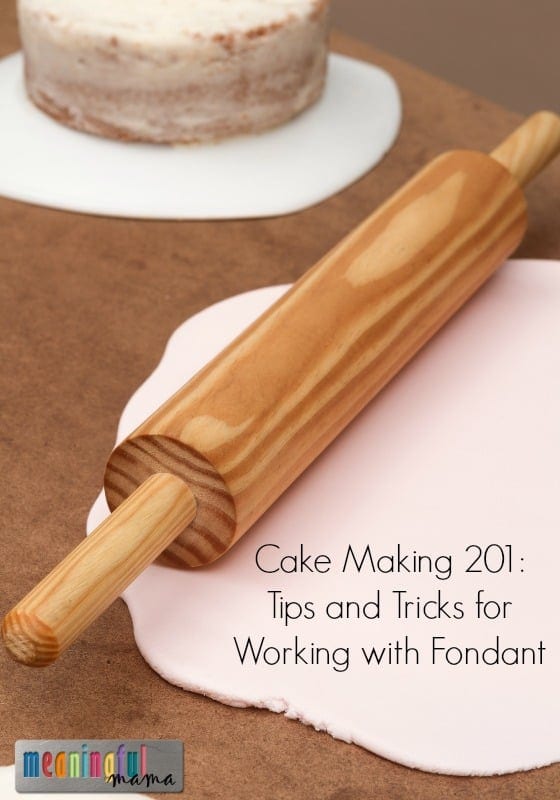
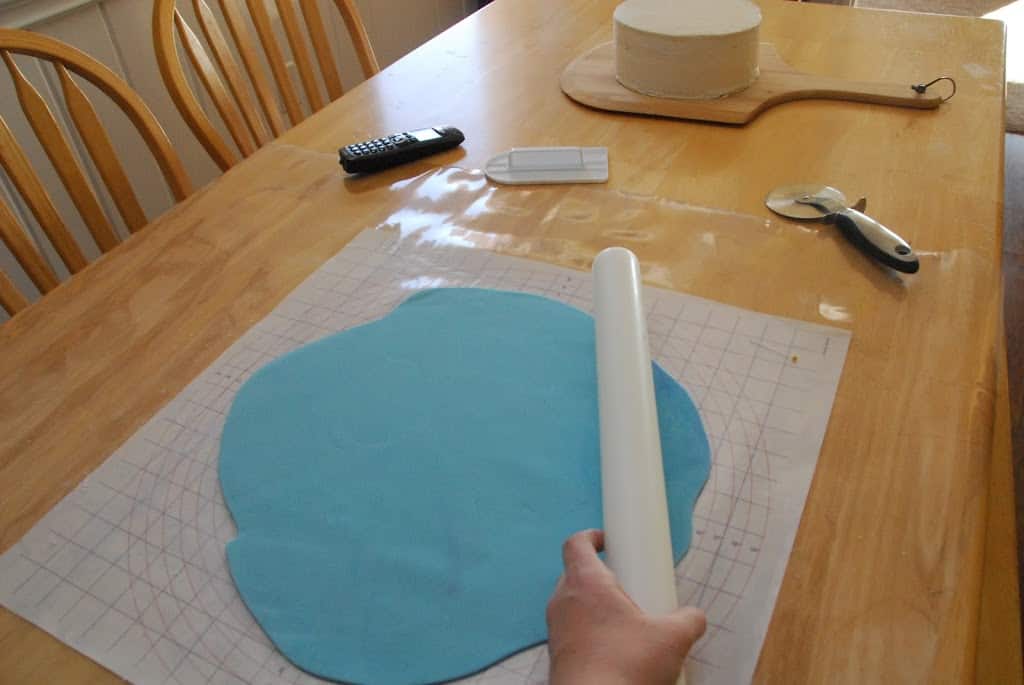
Tip #5: Choose a non-stick option for rolling out fondant. Next, I roll the fondant out. I have a great fondant rolling mat, which is non-stick and helps me have guidelines for the different sizes of cake circles. I use corn starch as my non-stick medium. I spread it lightly over the working surface as well as the top of the fondant as I roll it out. A lot of people on Cake Central who use powdered sugar (confectioners sugar). I have only used corn starch, but confectioners sugar is another option.
Tip #6: How to roll out fondant. You want to roll your fondant 1/4 inch thick to prevent tearing and cracking. I put two wooden dowels that are 1/4 inch thick on either side of my large fondant rolling pin and that helps me have a consistent thickness where I don’t have to eye ball or get out a ruler and measure constantly. You should roll out your fondant a bit, pick it up and rotate it and then keep going. This is so the fondant doesn’t stick to the rolling mat. Do this a few times until you reach your desired thickness. You will want to measure the diameter of your cake and add that to the 2x the height of the side to get the overall diameter of the fondant you need to roll out.
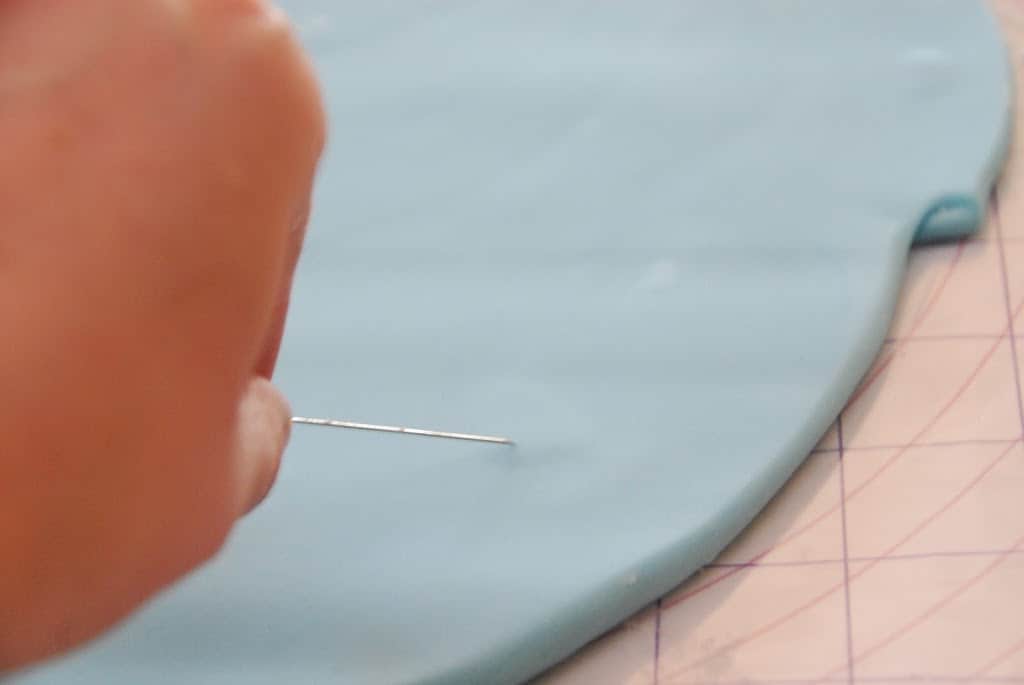
Tip #7: What to do with air bubbles. Because of the kneading, air bubbles may occur. If you find an air bubble, pop it with a pin and use two fingers in a circular motion as you press lightly until the fondant is laying smooth in that area.
Tip #8: Transferring fondant to the cake. Once the fondant is rolled to the desired size, you can roll the fondant back up onto your rolling pin and transfer it to your cake.

Tip #9: How to Smooth Fondant. This is the hardest part part that takes a lot of practice to get down. Once the fondant has been transferred to your cake, work quickly. It will drape naturally around the cake, but you will have to work with your hands and a fondant smoothing paddle to create the smooth appearance. You will want to lightly pull up on the edges – lifting and tucking around until it begins to lay flat against your cake. Continue to work around the edges until the whole cake is covered and the edges are smooth and laying flat against the cake. Continue to smooth with your cake paddle.
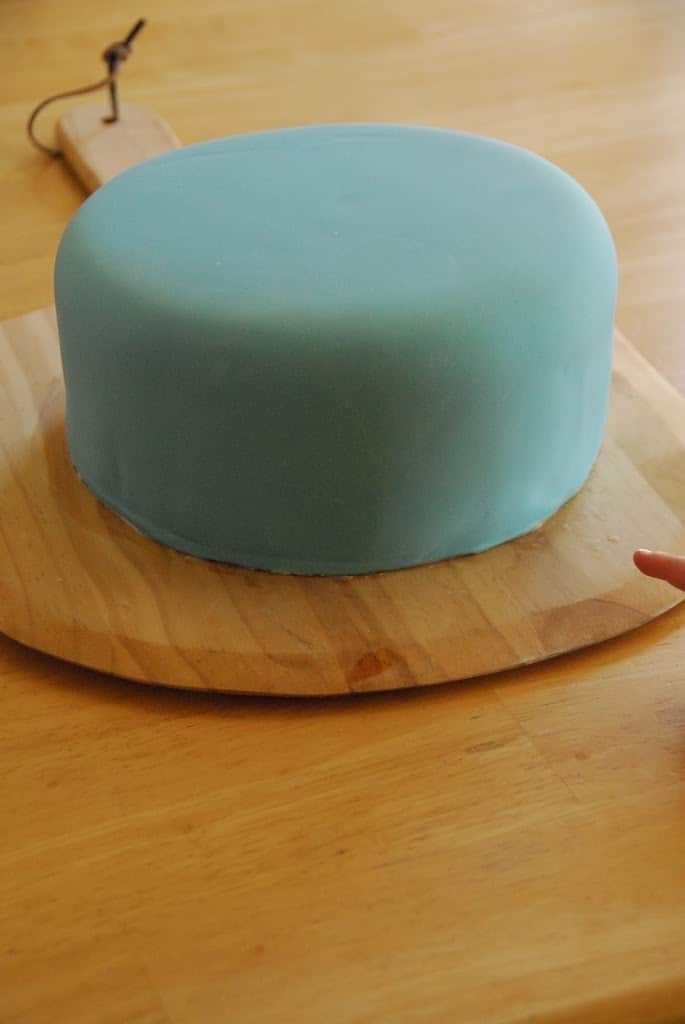
Tip #10: Trim off the excess fondant. Use a pizza or fondant cutter to trim off the excess fondant from the base of the cake.
Tip #11: Watch a YouTube tutorial. There is a good YouTube video on the process. When she uses piping gel on the frosting layer, I actually spray it with a water spritzer. This helps the fondant adhere to the cake. I also use corn starch rather than powdered sugar. Overall, it is a very clear tutorial on covering a cake. Once it’s covered you can decorate.
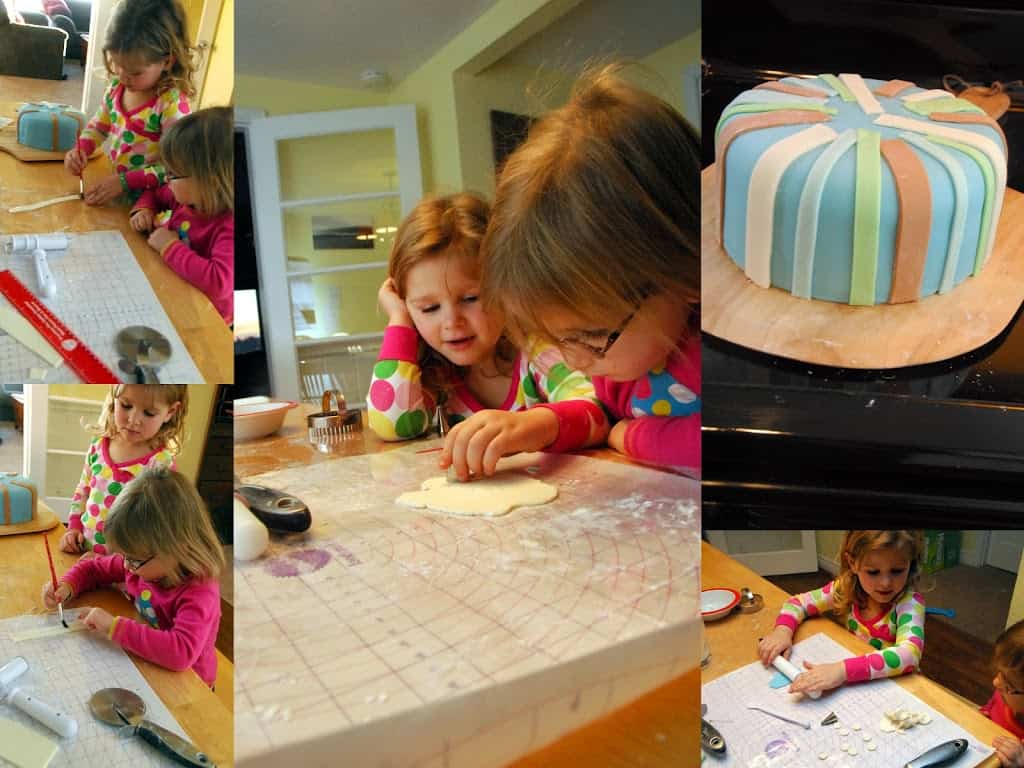
Tip #12: Decorate. In the past, I have had decorating as my thing. The kids are down for a nap or at grandma’s house while I’m trying to bang out the cake. However, I’ve realized, as I’m being more intentional in my parenting, that this is an activity they can actually help me with and really enjoy. So, I am trying to embrace their help. They can help roll out the fondant using my favorite rolling pin for the smaller details. It has rubber guides you stick on the end to help create an even thickness while you are rolling out your fondant. The kids can help cut out the fondant strips using a straight edge and a ruler or a handy dandy fondant strip roller. They would dip the brush in a bit of water and paint the strips. Then, I would attach them to the cake. For the buttons, they cut out the circles using our circle cookie cutters. Then, I pushed the center of them down with a dowel and cut out the two holes using an decorating tip #2. They would paint the back of the buttons and help me put them on the the cake. They loved seeing the finished product after we had worked together.
The shoes on top of the cake are a different story. I did those with Gum Paste and followed a YouTube tutorial. I did these by myself.


WOW! Love your tutorial and the cake is darling! Hugs and blessings, Cindy
This comment has been removed by the author.
How can you be intimidated by macaroons and make something like this? It is stunning!
thanks for visiting my blog, I am your newest follower and would be honored if you would like to follow back. no hard feelings if not 🙂
Thanks for commenting, Cindy! I really love getting feedback.
Fantastic cake – great tutorial! Love that you linked it to some youtube videos. Helps to get lots of input and step by step instructions.
Amazing! What a beautiful cake
I adore your creativity
Thanks, Winnie. It’s such a fun hobby to have.
Great post! WOW, you are really creative.
Mrs. Delightful
ourdelightfulhome.blogspot.com
It’s a great outlet. I kind of a purger, so cakes are perfect. Create and then eat. 🙂
You are the best! Thanks for sharing all of your sweetness on my blog this week and I look forward to having you back with more! Love, love love this! Did I tell you I need a wedding cake,? lol:D Your skills are amazing. Happy Weekend:D
LOL – I’ve done a couple wedding. Oh, the pressure. It’s so fun though. Thanks for the comments.
I definitely could have used this before I made my daughter’s 2nd birthday cake. It was my first time using fondant and I researched like crazy. I had butterflies while making it because I was afraid of ruining it. If you get a chance stop by http://www.thenymelrosefamily.blogspot.com/2011/12/rileys-2nd-birthday.html. Thanks for sharing.
That was your first attempt? You did such a great job. I hope you do more. It’s so fun. I absolutely love the whole party too…especially the Mickey Mouse Ears. Excited to be following you now.
Your tutorial is great! I’ve never heard of Duff’s so thank you soo much for the recommendation! I made a homemade fondant cake for my daughter’s 1st birthday 2.5 years ago and well…I haven’t used it since! haha But after seeing your tutorial I may have to give it a try again here soon! Thanks for the inspiration!
gatheredinthekitchen.com
I hope you do try it again, Stephanie. If so, let me know. I’d love to see the results. It’s definitely a skill to be developed.
Oh my!! This is adorable!! Hope you can link this up at my turquoise lovin’ party!! http://www.sweetlittlegals.com/2012/02/turquoise-lovin-25.html
I linked up, and I’m happy to be a new follower. Thanks for stopping by and letting me know about it.
Wow!! Seriously adorable!
New follower here… thanx for visiting mine 🙂
–The Mommies Made Me Do It
Thanks for following. I’m glad we found one another.
I love this tutorial!!!!! You make it seem to simple!!!
If you have a few minutes… I would love it if you linked up at The DIY Dreamer!
http://thediydreamer.blogspot.com/
Thanks so much. It’s been a crazy day, but I’m heading over there now. 🙂
great tutorial. you’re giving me confidence to give it a whirl… 🙂
You have such amazing creations on your site. You definitely have the skills to try it.
This cake is beautiful!! Great work!!
Thank you for your comments. I really appreciate it.
Your cake looks great! I love the shoes on top. I love making fondant cakes! I graduated school w/ my pastry arts degree and from there i decorated cakes for a few years..now I just do it on the side for fun as well! Thanks for sharing
You’ve got some tasty looking things going on at your site. I would love to go to cooking school some day. I can see you have the knack. Thanks for the kind words. I’m just self taught. Fun hobby though.
Oh my gosh! That cake is awesome!
Thanks so much. It’s a huge compliment.
Wow! This is so cute and the fondant looks amazing. 🙂
Thank you. It was a fun one to do.
That is a gorgeous baby cake! I made fondant not long ago for a cake, it turned out alright for my first try. I’ll have to check out the fondant you mentioned next time I try it.
Becca @ Crumbs and Chaos
Yeah – I’ve had hit and miss success with making my own fondant. I like that I can find a product to rely on so I don’t have to worry about it. Thanks for your comments.
What a great tutorial! You have inspired me to try it one of these days. Thank you for sharing at Sharing Saturday!! I hope you will share with us again this week!
Let me know if you do try it. I would love to see the results.
Cute cake and helpful info. Thanks.
Thank you so much.