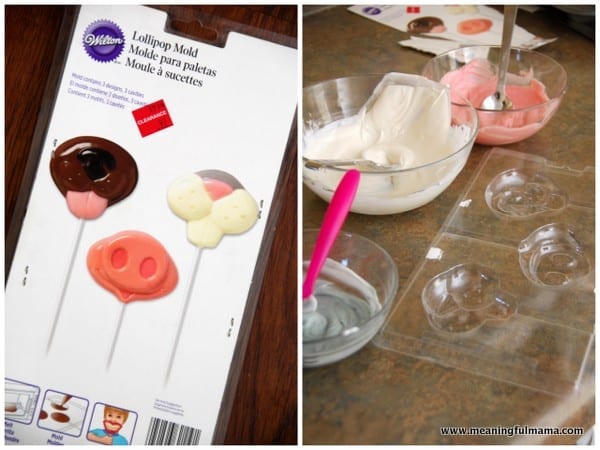
I was excited to find these fun chocolate face molds on clearance at Michael’s. I love working with Candy Melts. It’s so easy. I generally have used a double boiler to melt the chocolates, but the last two times I’ve used Candy Melts I’ve embraced the microwave directions, and I’m really glad I have. It’s so easy. Are you intimidated to try these out? Don’t be. You’d think they’re a sponsor for my blog, but I guarantee you they are not…yet. Maybe I should contact them. They’d probably turn me down since they’re getting a bunch of advertising for free all ready. I thought this would be a really fun Easter treat for the kids. They were pretty excited about these after I made them.
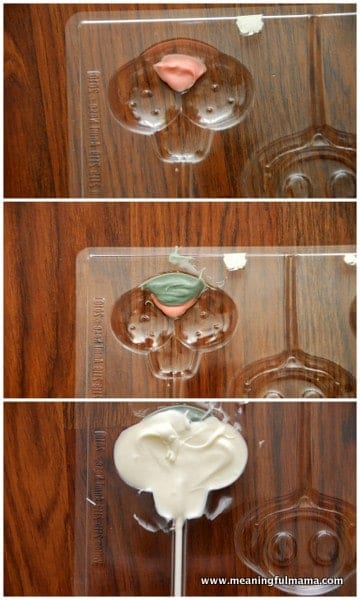
Candy melts come in different colors. I melted some of the pink and more of the white. I added black food coloring to the white to get that gray color. As pictured above, I put a bit of pink in the mold, then added in the green, and I finished up with the white. You do not firm them up in between colors. You will just layer the colors, being careful to stay in the area you want. If you accidentally go out of the lines then just wipe the chocolate away. It’s that easy. Don’t forget to add in your sucker stick. Look underneath for air bubbles and tap the side of the plastic mold until the air bubbles disappear. Finally, stick them in the refrigerator or freezer until they firm up completely. This actually is a fairly quick process.


Those make such cute photo props! Love them. The pig face is a hoot too.