I’m excited to provide you with step-by-step instructions for making an inexpensive DIY pirate’s treasure chest for kids. This tutorial will help you create a treasure chest for your next party, prop in a play, simple toy for kids, or escape room.
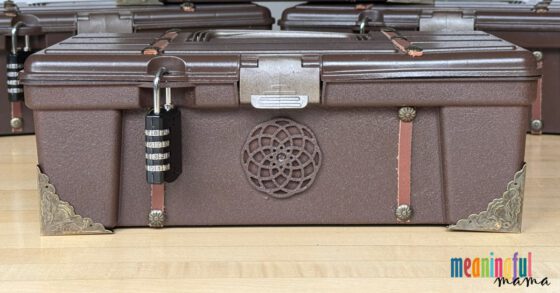
These treasure chests were made for this pirate-themed escape room.
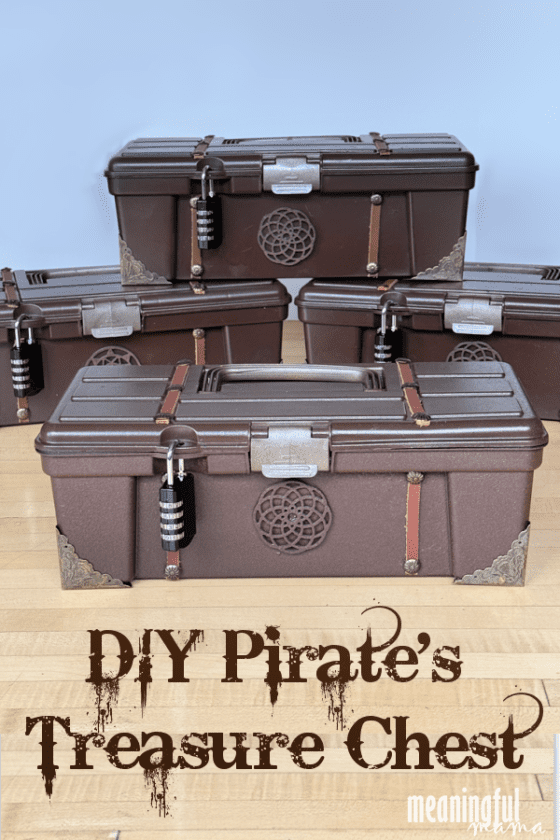
DIY Pirate’s Treasure Chest
I was in charge of putting together a pirate-themed escape room for the winter camp for our church high school group. Using a MysteryLocks kit as my base, I used 3D props to help it come alive.
Knowing that budget was an issue, I wanted to find an inexpensive way to create the 9 pirate treasure chests I needed for the experience. This is a pirate chest with a flat top rather than a rounded one. Today, I am going to provide you with step-by-step instructions for making your own DIY treasure chest.
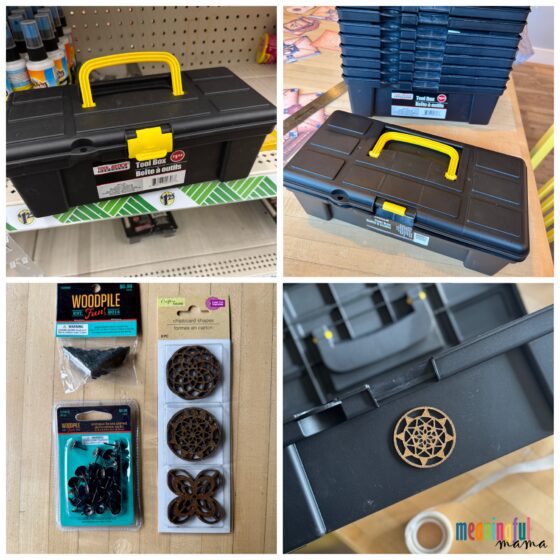
Materials Needed for These Locking Pirate Treasure Chests
For your convenience, the following contains Amazon affiliate links. I utilized Dollar Tree, Amazon, and Hobby Lobby for my purchases, but I tried to find comparable items on Amazon. I have indicated which store I shopped at for each item.
- Mini Tool Box (Dollar Tree)
- Brown Textured Spray Paint (Amazon)
- Silver Spray Paint (Amazon)
- Wooden Medallions (Dollar Tree)
- 1/4″ Flat Leather Chord (Amazon)
- Copper Thumb Tacks (Amazon)
- 4 Digit Locks (Amazon)
- Corner Brackets (Hobby Lobby)
- Glue Dots (Amazon)
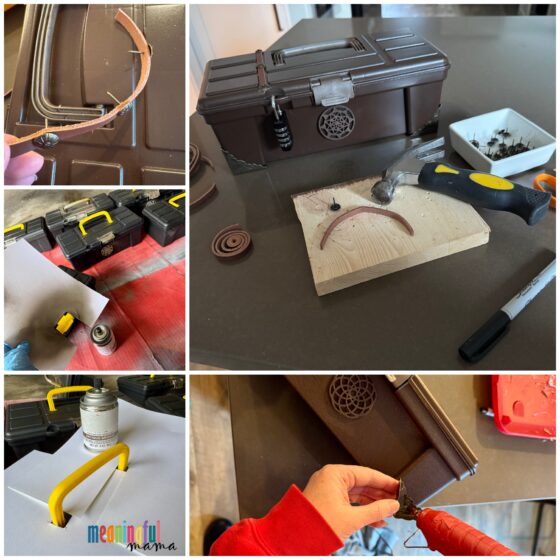
How to Make a DIY Pirate’s Treasure Chest
- Scuff the surface with sandpaper to promote grip.
- Depending on how long you need this to last, you could use a spray primer first. I skipped this step since I didn’t need the durability,
- Spray paint the entire toolbox with the brown paint, applying thin layers with smooth strokes across the surface. Allow it to dry between coats.
- Once the box is completely covered in brown paint and dry, block off the treasure box portion so you can only spray-paint the handle and closure with the silver spray paint. I used stock paper, making a template with a notch in it for the closure, and covering the top with layered paper to block the top. You could make a template for that too. Allow to dry completely.
- Spray paint your wooden medallions in the same brown color.
- Attach the corner brackets and medallions using glue dots. You see me using hot glue above, but that didn’t work. I found glue dots to be the key.
- Cut the leather straps to size by measuring accordingly.
- Pre-hammer or poke the copper thumbtacks (actually furniture tacks) into the leather strips. This was harder than I thought, so I got a wooden block to protect my table and used an actual small hammer to get the thumbtack through the leather. You can see I did one tack on each end of the front straps and three tacks on the two straps on the top of the box. How you design the straps will just depend on the look of your box.
- Then, hammer or poke the straps into place.
- Set your lock in place, and you officially have a DIY locking treasure box.
Note: the tacks did stick through the plastic. To prevent injury, add foam or cork on the end of the tacks.
I love creating posts that might be helpful for someone in the universe. I recognize this is a random little project, but I have also been encouraged by how many people have found my posts about how to make a fake palm tree, a large Olympic torch, or a Truffala Tree. There are people out there doing fun, creative, imaginative things in this fun fairy world we’ve been given.
I hope you found this DIY pirate’s treasure chest tutorial helpful.
Want More Fun Ideas?