
This science object lesson that teaches flexibility is another lesson in my character-building series. Teaching kids to be flexible is important because life can throw us curveballs, and developing the ability to adjust both our expectations and our reactions helps us and others thrive.
Want more lessons on flexibility? Here’s our initial lesson.
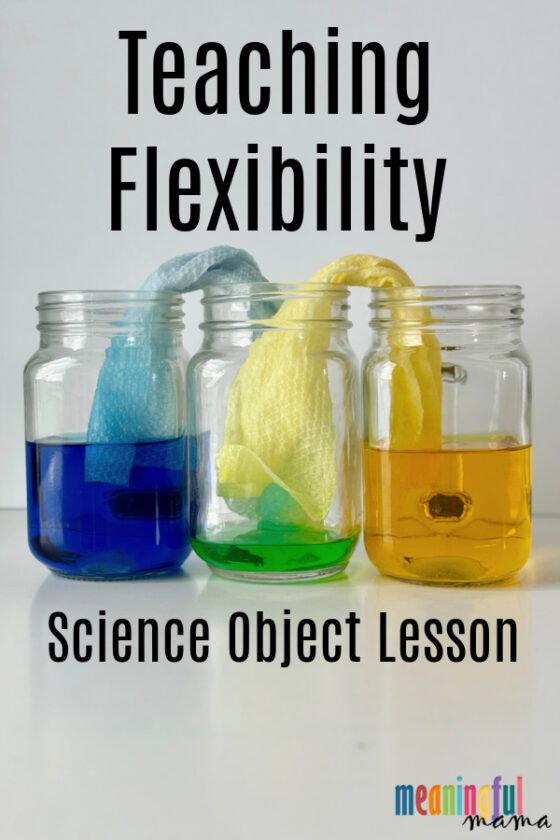
Science Object Lesson that Teaches Flexibility
Welcome to my character-building series. I will share more about this series at the end of this post, but first, I want to share with you today’s lesson that focuses on teaching kids to adapt.
Teaching flexibility to kids is important because life doesn’t always go the way we expect it to. Plans change, things don’t work out, and sometimes we have to try a different way. When kids learn to be flexible, they become better at handling those little disappointments without getting completely overwhelmed.
It also helps them become more open-minded, patient, and willing to try new things. Flexibility doesn’t mean kids have to be okay with everything—it just teaches them that when things don’t go as planned, they can take a breath, adjust, and keep going.
Today I chose a fun science experiment about absorbency to help teach more about flexibility.
Lesson Plan for Teaching Flexibility to Kids
Subject: Flexibility
Objective: Kids will understand that flexibility helps objects—and people—adapt to changes without breaking, and will be able to identify at least one way they can demonstrate flexibility when faced with a change or challenge.
Flexibility Bible Verse: “Set your mind on things above, not on earthly things.” – Colossians 3:2 – This verse was chosen because when we focus on the hiccups of earthly things and don’t adjust, we often don’t see how God promises to use all things together for good and for His purposes. When we adjust, we are looking for God’s purpose in the things we can’t control.
Ask:
- How would you define flexility?
- What are the benefits of being flexible?

Materials Needed for this Lesson on Flexibility
- 3 clear glasses
- Liquid Food Coloring – Blue and Yellow
- Paper Towels
- Water
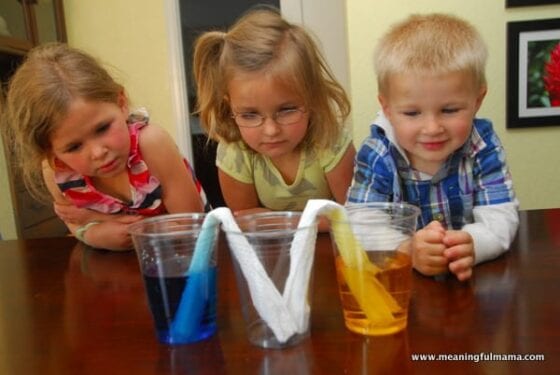
How to Do this Science Object Lsson That Teaches Flexibility
- Fill two glasses with water. Place 3 clear glasses close to each other, with the empty glass in the middle. Let kids help with the entire process.
- Drop blue food dye into one of the water cups at the end and yellow in the other.
- Take a paper towel and fold it or twist it. Place one end of the paper towel in the blue dye and the other end in the empty cup. Repeat the process with the yellow cup.
- As the colored water is absorbed by the paper towel and moves toward the center cup, explain the word picture created by this science experiment: The water was not stagnant. It was moving, changing, and adapting. Just like the water creates something new and beautiful as it adapts, when we can remain flexible with a good attitude, we get to look for the positive in a situation and bless others because of it. Just like the water, we become more flexible, and incredible things can happen as we learn to go with the flow.
- Ask kids for personal examples of showing flexibility. One example I gave was reminding them of something fun we had planned as a family, but someone called us and really needed our help. We had to adapt our plans, letting go of our own desires, to be willing to do something good for someone else.
Explain the Science Behind the Walking Water Experiment that Teaches Flexibility
So, what’s actually happening? Paper towels are made of lots of tiny fibers with very small spaces between them. When the paper towel touches the water, the water sticks to the fibers and begins moving through those tiny spaces. This movement is called capillary action.
The water can actually travel upward through the paper towel, even though gravity is pulling it down. As the water moves through the paper towel, it eventually reaches the empty cup and drips into it. The colored water from each side continues moving until the two colors meet in the middle. When the blue and yellow water mix together, they create green.
Blue and yellow are both primary colors. When we mix two colors together, we get a new color. Blue mixed with yellow makes green. It’s a little bit like making a new color by combining two colors we already have.

Video Lesson: Walking Water Experiment Teaches Flexibility
Want More Character-Building Science Object Lessons?
Science Object Lesson About Forgiveness
Science Object Lesson that Teaches Leadership