If you’ve been here for a while, you will know I love to do cakes, and I generally do fondant cakes. Please visit my cakes tab to see more. However, it was time for time for my daughter’s carnival at her school and the infamous “Cake Walk.” I wasn’t convinced that kids would be all that impressed with a fancy fondant cake. I tried to consider what would be appealing to kids. No brainer – right? Candy. I thought it would be fun to come up with some sort of design with M&M’s. I considered doing a paisley-type design. I considered different size stripes. I considered wavy lines or even angry birds. However, I really have fallen in love with the Chevron design, and I decided that I wanted to create a chevron M&M cake. I came up with a simple way to get this design. Even the decorator with the most elementary skills should be able to repeat the process to produce a really great cake.
![]()
My Cake Making 101 post taught you how to freeze cakes. I am glad I do this because I had a bunch of cake and cupcakes in the freezer available. These were just made from extra batter I have had after making other cakes. I stick the extra cakes or cupcakes in the freezer and next time I need one, I can just pull them out. When wrapped well, they can last for a few months in the freezer. They needed a lot of cakes for the cake walk, so I pulled out a set of mini cupcakes, a set of regular cupcakes, a two layer cake and a one layer cake.
![]() How did I go about making the Chevron pattern? I had no desire to eyeball it. What I did was find a chevron pattern I liked online. I found the size I thought would be good at the Dizzy Daisy. My cake was an 8″ cake. I copied and pasted that image into a Word document. I then printed it out. I put wax paper over the top of the printed image and traced over it with a thin Sharpie. I put my M&M’s on top just to make sure this size would work well, and it did. I then cut out the Chevron pattern on the wax paper.
How did I go about making the Chevron pattern? I had no desire to eyeball it. What I did was find a chevron pattern I liked online. I found the size I thought would be good at the Dizzy Daisy. My cake was an 8″ cake. I copied and pasted that image into a Word document. I then printed it out. I put wax paper over the top of the printed image and traced over it with a thin Sharpie. I put my M&M’s on top just to make sure this size would work well, and it did. I then cut out the Chevron pattern on the wax paper.
![]() All you do is lay the wax paper down on the cake and trace the pattern on the cake with a toothpick. As you can see, I knew the top would be layered with M&M’s, so I didn’t worry about getting the top too smooth. I do wish I had paid more attention to the sides, but I wasn’t think I was going to leave them blank. I ended up liking the look with the blank sides and felt like adding more would get cluttered.
All you do is lay the wax paper down on the cake and trace the pattern on the cake with a toothpick. As you can see, I knew the top would be layered with M&M’s, so I didn’t worry about getting the top too smooth. I do wish I had paid more attention to the sides, but I wasn’t think I was going to leave them blank. I ended up liking the look with the blank sides and felt like adding more would get cluttered.
![]() If you remove the wax paper, you can see the there is a perfect pattern for you to be able to stick your M&M’s.Just repeat this pattern along the entire cake.
If you remove the wax paper, you can see the there is a perfect pattern for you to be able to stick your M&M’s.Just repeat this pattern along the entire cake.
![]() As I was drawing the pattern into the cake the kids set out sorting M&M’s. I quickly learned that Corban can actually tell the difference between colors, which he hasn’t really demonstrated before. I was excited about that. I still wasn’t sure what my color combination would be, so they were sorting them all. Corban wanted to just sit and eat them all. He quickly learned that if he dropped them on the floor they would break and would no longer be available for the cake. I had to stop that process pretty quickly. He had to take some time off of “helping” for a while. I had purchased two large bags of M&M’s. I did have to open them both. I could almost cover it with one bag, but I was a little short. Remember, I was only using two colors.
As I was drawing the pattern into the cake the kids set out sorting M&M’s. I quickly learned that Corban can actually tell the difference between colors, which he hasn’t really demonstrated before. I was excited about that. I still wasn’t sure what my color combination would be, so they were sorting them all. Corban wanted to just sit and eat them all. He quickly learned that if he dropped them on the floor they would break and would no longer be available for the cake. I had to stop that process pretty quickly. He had to take some time off of “helping” for a while. I had purchased two large bags of M&M’s. I did have to open them both. I could almost cover it with one bag, but I was a little short. Remember, I was only using two colors.
![]()
It is easy to just build the pattern up on the cake.
![]() The kids were able to help put the M&M’s in place too.
The kids were able to help put the M&M’s in place too.
![]() I was pleased with the outcome of this cake. This cake was my popular White Velvet cake recipe.
I was pleased with the outcome of this cake. This cake was my popular White Velvet cake recipe.
![]()
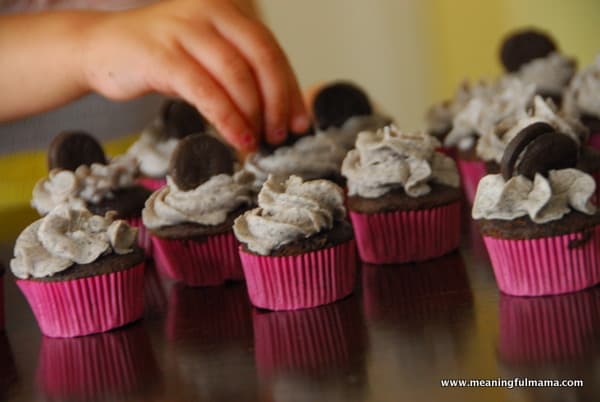
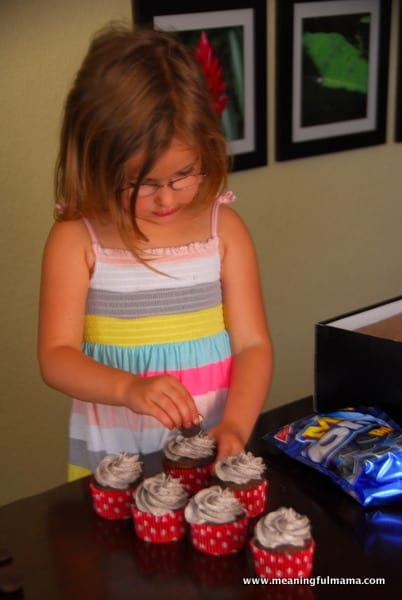
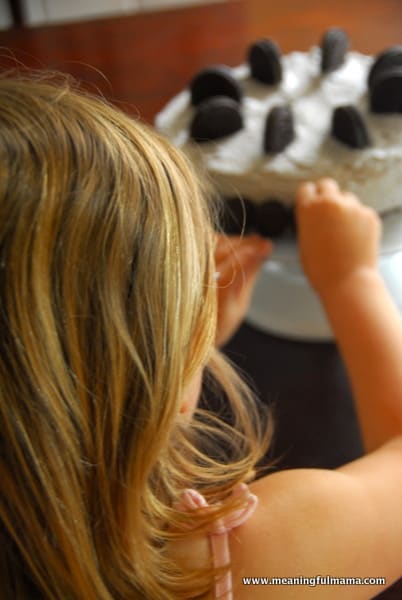
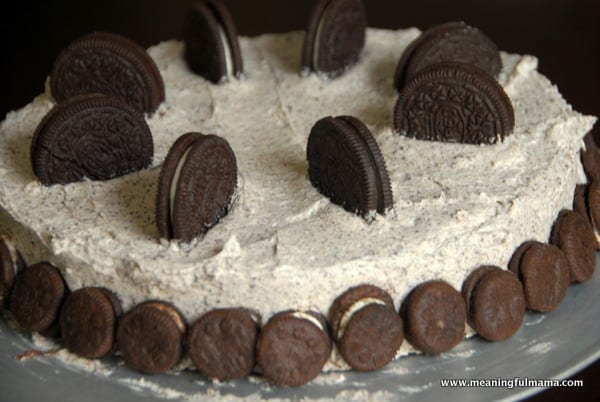 Kenzie was definitely my #1 decorator for the Oreo Cookie cake and all the cupcakes. We took the mini-Oreos as the main decorating feature for these cakes. I can recommend my Oreo Cream Cheese frosting recipe, which is amazing. I didn’t have enough cream cheese, so I just added Oreo cookie crumbs to my go-to buttercream frosting recipe. Here is the chocolate cake recipe I use for all my chocolate cakes. The Oreo cookie idea was also inspired by the fact that I was making a cake walk cake for a bunch of kids.


So cute!
Thanks so much!
I love this cake! Isn’t decorating with M&M’s fun. Thanks for stopping by my blog! Following you now. 🙂
Thanks – I’ve liked you on Facebook too. It will be fun to check out what each other are doing.