This is a sponsored post written by me on behalf of Groupon Gift Shop for IZEA. All opinions are 100% mine. #GiftGroupon
Things. We often go shopping for things during Christmas time. I am really wanting to embrace the idea of giving people time and experiences this Christmas. I know! It sounds hard to wrap in a pretty package and put under the tree, but this is where a little creativity comes into play. Today, I want to show you how to make DIY snow globes so you can gift an experience.
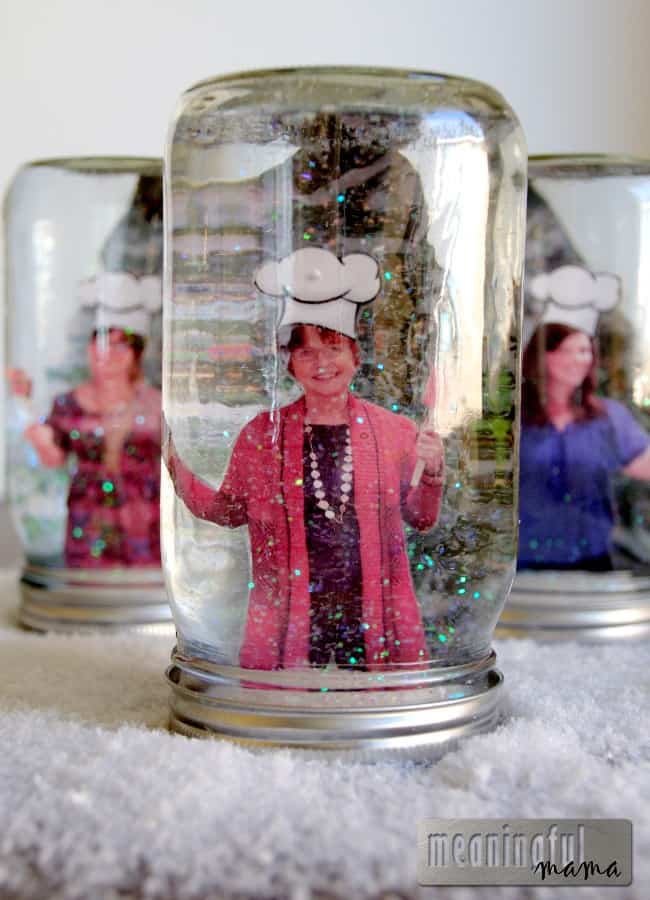
It’s fun to gift an experience. You create a life memory when you are thoughtful in not only what is given but also how you present it. I recently wrote a post for Kids Activities Blog about how to give the gift of time, and I want to show you another way to gift it today with a creative and personalized snow globe made from a mason jar.
One great place to shop for an experience is Groupon because of the great deals and the great variety of ideas found there. I had a hard time deciding on the experience to gift. I was able to choose from house cleaning, camel rides, ropes courses, car racing, workout classes, cooking lessons, spa experiences and so much more. There were gift ideas for all genders, interests and ages. I decided that I wanted to pick an experience that I could do with my mom and sisters, so I chose a chocolate truffle making class since food is passion.
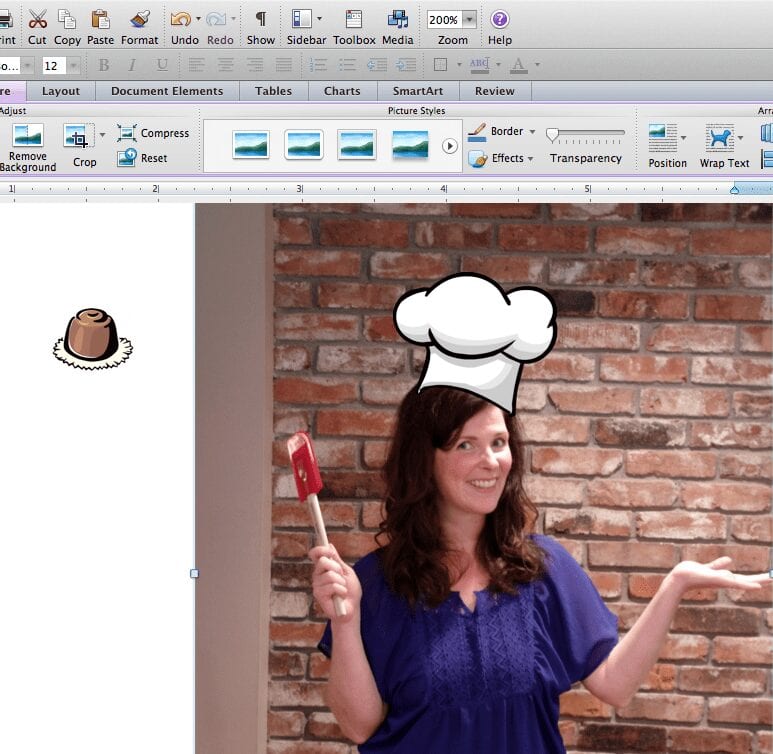
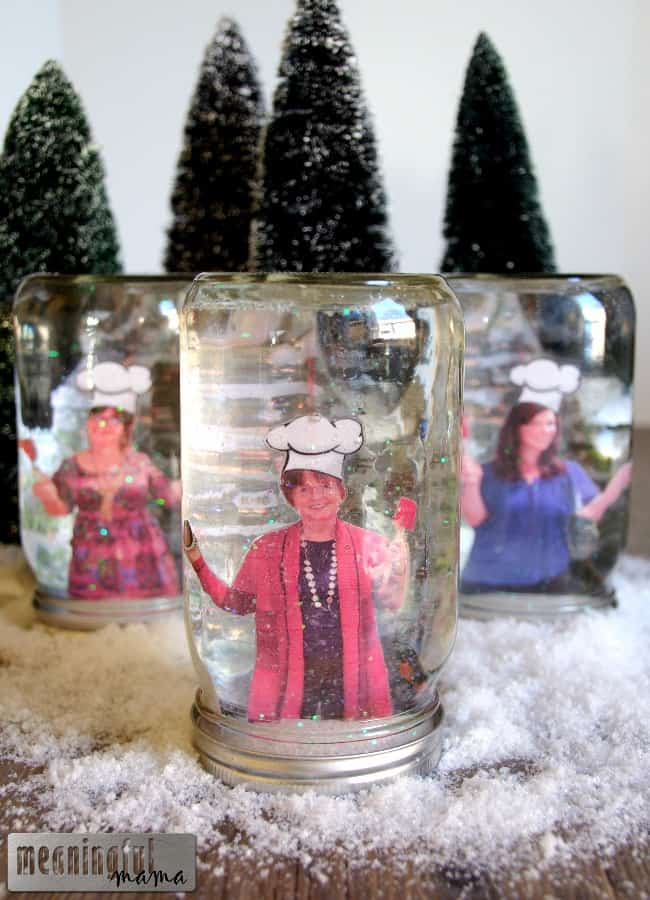
Once the decision was made, I wanted to come up with a super creative way of presenting the gift. I decided I would make my own DIY snow globe with pictures of my mom and sisters inside. I first had to get the pictures, so I made them pose holding a spatula, but they had no idea why. I then got to work adding a chef hat and a truffle to their hand. I found a free download of a chef hat and a truffle online and added them to the picture. You can layer pictures or clip art in Microsoft word if you chose clipart that layers well. If you right click on the photo and then choose format > layout > behind text, it is then easy to move the pictures around and layer. The other option is to have your components separate and then glue them all together before you laminate. Below you’ll see a picture of how I did it. The chef hat layered nicely because it was a clipart with no background, while the truffle had a white box around it. I, therefore, put the chef hat directly on my picture while I kept the truffle separate. When I printed, I cut around my main image and my truffle image. Then, glued the two together. Remember, you can get super creative here based on the experience you have chosen. You could grab a picture of someone else doing yoga and then attach a head of your friend or family memeber on top. You could have your person holding a bottle or a glass of wine for a wine tasting experience. If you aren’t with them to have them pose, just stick their head on another person’s body. It’s a lot of fun. Just make sure to re-size your image(s) correctly based on the size of your mason jar. Once you have your images created, you are ready to begin to build your snow globe.
Materials Needed to Create a DIY Snow Globe – Gift an Experience
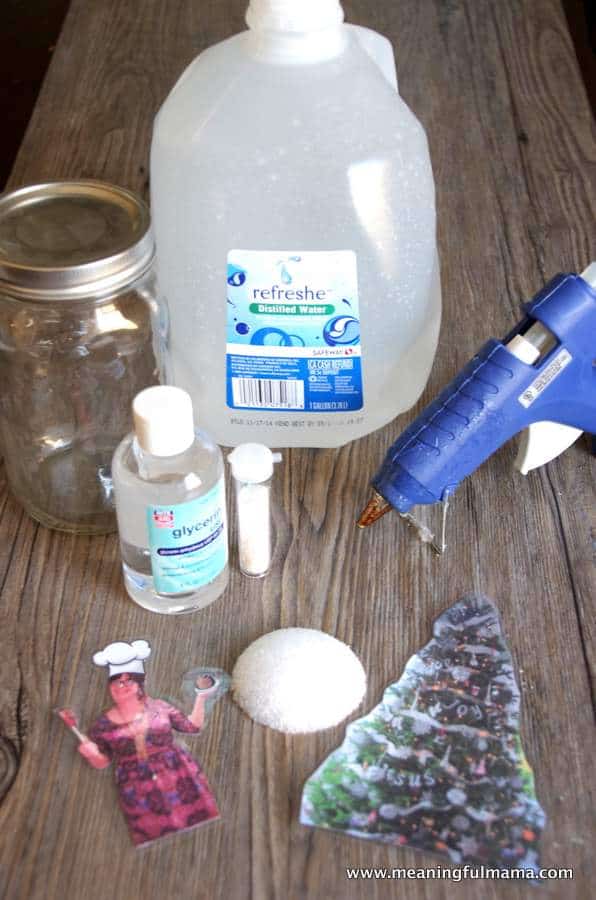
- Mason Jar
- Laminated Images (I did a picture of my mom, sisters and a Christmas tree for the background)
- Styrofoam ball, cut
- Distilled Water
- Glue – I used hot glue, but I think I would have been better off using a super glue or clear-drying opoxy.
- Glycerin – found in the first aid section of most pharmacies
- Glitter
- Scissors
- Laminator
How to Make DIY Snow Globes – Gift an Experience
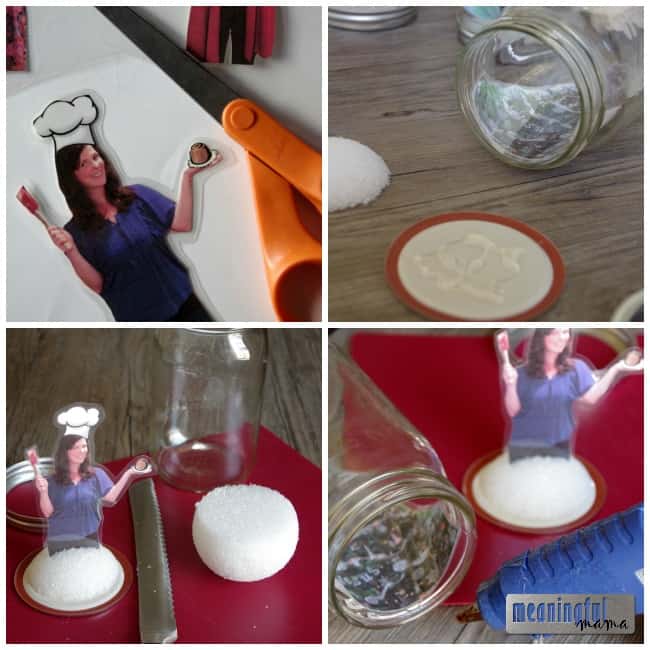
1. Create your image, print and laminate. I use my Fellowes laminator (affiliate), but you could always take this to a office or FedEx store to get it done. Cut around the laminated images leaving a slight laminated border to assure seal.
2. Cut off the top of your stryofoam ball and glue to the inside of the mason jar lid.
3. Cut a slit in the stryofoam ball, add a dot of glue and slide your laminated picture into the slit.
4. Glue your background to the inside rim of the jar. I used a laminated picture of a Christmas tree. You can use the picture of my Christmas tree if you like that background idea.
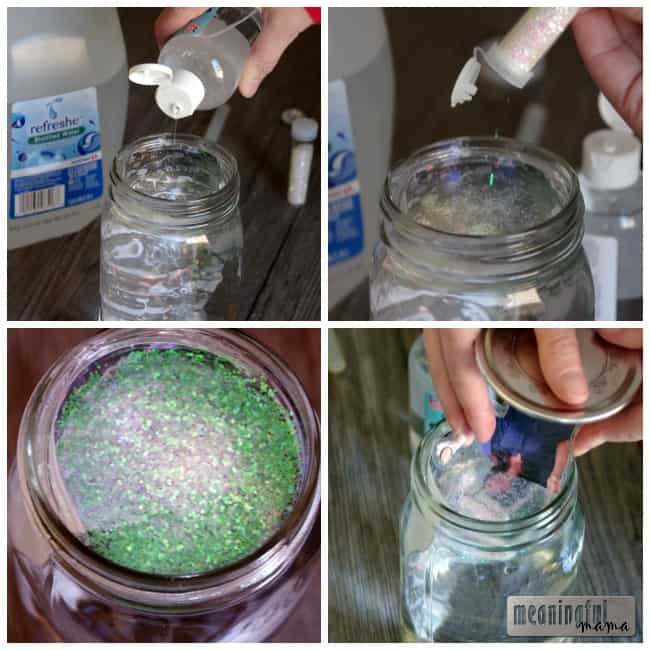
5. Fill up your jar, almost to the top, with distilled water.
6. Add a little glycerin in the water. I estimate that I added a teaspoon to my 7 inch tall jar. The glycerin helps the glitter to move more slowly through the water.
7. Add a layer glitter to the top.
8. Add the lid with your image. Screw on the outside of the jar lid. You can add some glue to the inside of your jar if you want to assure that little hands don’t open it.
I think you are going to love gifting something truly unique and creative. Head to Groupon and get started on your own snow globe gifting experience to give someone the gift of creating a memory. Groupon also has great deals on travel and gifts, so make sure to stop by to see what kind of discounts you can receive. I also wanted to let my family know what their gift entailed, so I added this image to the lid:
![]()


How necessary is it to use distilled water? Can I just use tap water? Also, I am finding vegetable glycerin. Do you think that will work?
I think distilled water is important because it removes the impurities that might contribute to the objects inside getting gross. I’m not 100% sure, but that’s my thought. I’m not sure about the glycerin. I found the difference, but I’m not sure if that will impact the craft. Sorry I’m not more help. If it works, could you comment again to let my readers know. Thanks!
What is the glycerin used for, and what if I used thinner glitter is there something I can do to get it to not stick to the picture?
Hello! Sorry I didn’t get back to you sooner. I was really trying to be on break with my family. They’re back in school now, so I’m getting back to work. The glycerin is a thickening element that helps the glitter float more slowly through the jar. I didn’t have an issue with the glitter sticking to the picture, so I’m not quite sure what to recommend there. Sorry! Did you end up doing the project? I’d love to hear about it.