If you are looking for a unique, modern, and easy way to carve pumpkins this year, I think you’ll love this two-toned polka dot pumpkin tutorial. The results are beautiful and fun.
If you are looking for a fun pumpkin carving idea for the kids, you might enjoy these Sesame Street pumpkins.

Two-Toned Polka Dot Pumpkins
I am super psyched about the results of my two-toned polka dot pumpkins. I had the vision for these pumpkins a few years ago and never did them. That was before my blogging career.
I’m not sure where the idea came from. I think it was an original idea, but I always wonder if I have seen it somewhere. We live in such a visual world. Was it in a magazine? Was it on Pinterest (except I think the idea came before my Pinterest era)? I can’t quite nail down where I may have seen it, so perhaps it is an idea that was just born in my own brain.
The original thought I was discussing with my husband was doing a two-toned pumpkin where I would take shapes from one color of pumpkin and stick them in the holes of another. I talked about using cookie cutters or a template of some sort. He is the one who suggested doing polka dots with an apple corer – smart guy. I love having him on my team. (affiliate link)
How to Make Two-Toned Polka Dot Pumpkins
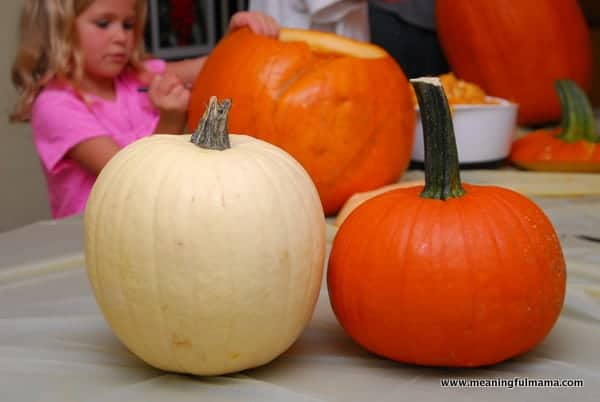
Pick out a white and orange pumpkin that are not too different in size.
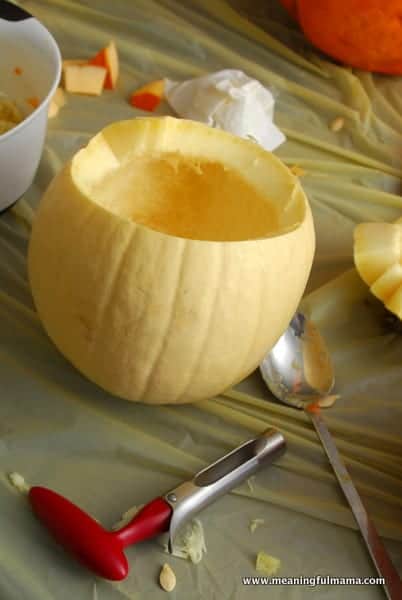
Hollow out both pumpkins.
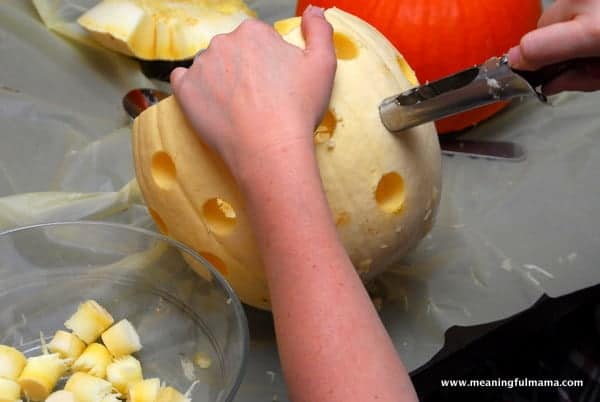
Use an apple corer to carefully twist into the pumpkin and then remove the pieces of the circle from the pumpkin. Set the cylinder pieces in a bowl to reserve for later.
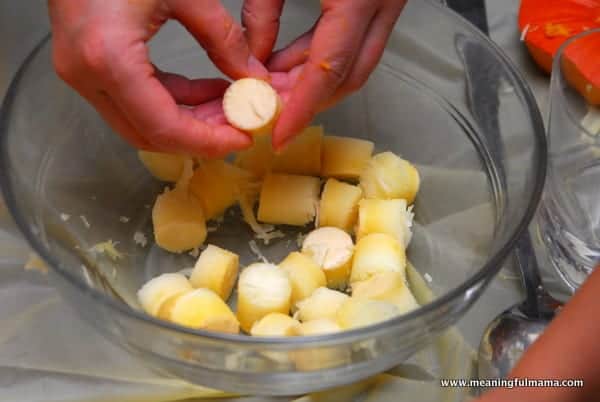

Remove the circles from the orange pumpkin with the same method. Take those polka dot, orange circles and plug them directly into the white pumpkin.
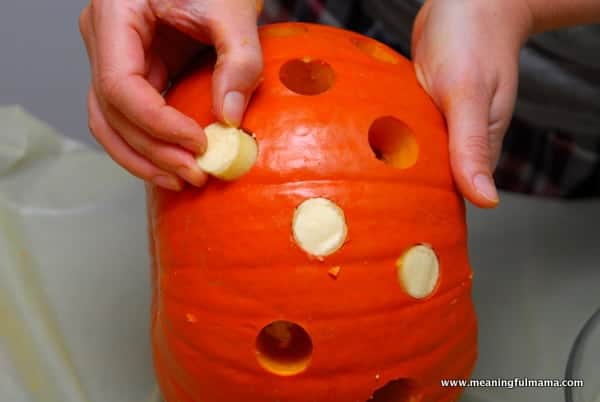
Then, fill the orange pumpkin holes with all of the white polka dot plugs.
Family Pumpkin Carving
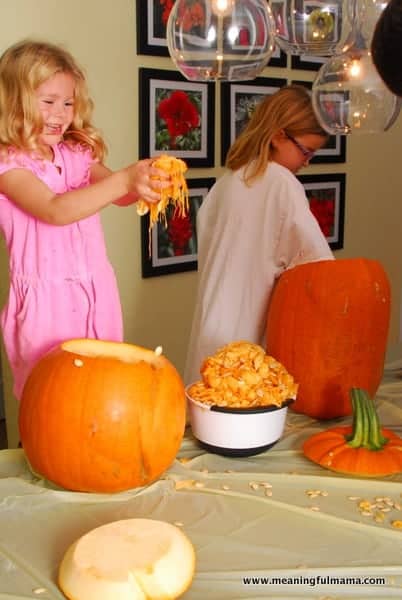
The kids were working on their pumpkins at the same time. Abby and Kenzie had no qualms about reaching in to grab out the pumpkin guts. Corban was not that interested. He has always been a little bit more hesitant about being too dirty.
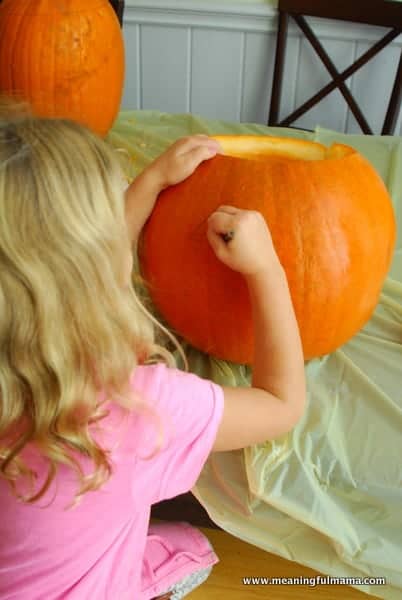
The kids drew on their own pumpkin faces. Actually, Corban didn’t draw his own. He decided he wanted Dad to make him a Superman pumpkin. We discovered that a black pencil is the best way to draw a design on a pumpkin.

Then, my husband carved out their designs.
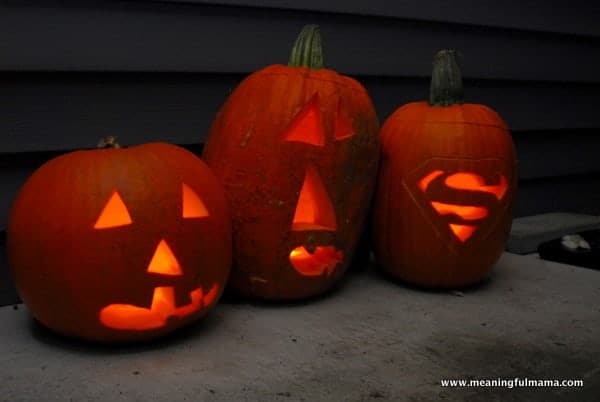
Here are the final results of the kids’ pumpkins from left to right – Abby, Kenzie & Corban.

Here are the results of my pumpkins. One final step I didn’t mention was sticking toothpicks on the inside at an angle to attach the plugs to the main pumpkin. They would sit there fine without the toothpicks, but I know that as pumpkins begin to wilt and shrivel, the plugs might start to fall out.
Enjoy your own pumpkin pursuits with your family.
Want More Harvest Decorating Ideas?
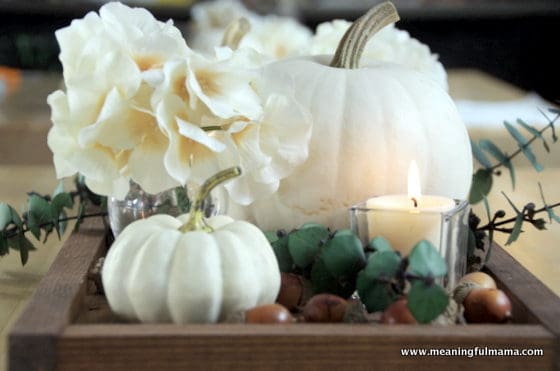
Contemporary Fall Centerpiece idea
Note: This post was originally written in 2012, but it has been updated with clearer instructions.


This is so stinkin’ clever, Jodi! I love it. I’ve done something similar with a drill bit, but as you can imagine, there’s no “core” to pull out after the drill has shredded it. Love the “swap” that you did here!
Thanks! I was pretty excited about the results. I love the beautiful pumpkin carving options that I see available now.