I can’t wait to share with you how to host an epic escape room party. If you are looking for ideas for decor, props, puzzles, and locks, I’ve got you covered.
A DIY escape room is such a fun party idea. This particular escape room was a roaring 20s theme, and it was for a fundraiser for my daughter’s mission trip to Africa.
Want more fun party ideas? Check out my recent pop-up indoor picnic.
How to Host an Epic Escape Room Party
Note: This post contains both Amazon and Mystery Locks affiliate links. Anything purchased through these links goes to support the free resources I provide here at Meaningful Mama. Thanks for your support.
This post is intended to show you how to take a purchased escape room kit that you print out in 2D and turn it into an amazing 3D experience with decorations, props, and lock boxes.
I have purchased a handful of escape room kits that I have adapted for youth group experiences. This fundraiser was different in that I transformed my garage into a 1920s bootlegger bar. I purchased this escape room at Mystery Locks, and I was impressed by the quality. A simple search for “roaring 20s” in their search bar will point you to the exact one I used.
That said, you can use what I did as a template and inspiration for making any of their other escape rooms come to life.
Mystery Locks said it designed this escape room for 4 people, but you can size up. I had groups of 10 going in at a time, and it did work well because people weren’t all trying to solve the same puzzle at the same time. Some were searching for clues, and other puzzles were being worked on simultaneously by a small group.
If you are simply working through the escape room puzzles one by one without the treasure hunt and lock box components, a smaller group is ideal.
How Difficult is this 1920’s Escape Room?
You might be wondering about the difficulty level of this roaring 20’s escape room. This escape room is intended for adults, but I had teens (8th graders and up) work on it successfully also. That said, these teens were problem solvers and gamers at heart.
Originally I worked on it with my husband and 16-year-old. We solved the problems in less than the allotted 60 minutes. I recommend going through the escape room in the more simplified version yourself so that you can sort through all the puzzles, understand them, and know how to best give clues to help others who might struggle.
With the room and 3D experience I created in my garage, it became even harder to solve the puzzles. I was in the room the whole time. Because it was a fundraiser, I provided hints available for purchase. All teams that went through the escape room needed hints to escape successfully.
In the escape room I created, much time was sucked up looking for clues and understanding the mechanics rather than just solving the puzzles. I created several red herrings based on the props I collected. Setting out games, cards, or books with numbers can distract people from the real puzzles as they try and discern what really matters.
In retrospect, it would have been a good idea to tell the teams that each puzzle they found only had a one or two-digit answer. I could have also revealed that puzzles could be solved simultaneously. This was not a sequential escape room where they had to open a box to reveal more clues to solve the next puzzle.
How to Keep it a Simple Escape Room
The beauty of these printable DIY escape rooms is that you can make hosting a party as simple or as involved as you want. On one end of the spectrum, you could print out the escape room and work through the problems with no other work involved.
Once you purchase the printable (only $16.99 as I write this), simply print it out, and get yourself a pair of scissors, a pencil, and a scrap piece of paper to work out the problems. If you solve them all, you can check online to see if you found the correct 12-digit code and “escape.”
How to Make it a Bit More Involved Escape Room
To take this 20’s escape room and make it a tad more involved, add a “treasure hunt” component. Print the purchased PDF out in color onto paper. Hide all of the components around the room in different 20’s props and simple decorations. Check out some simple roaring 20’s decorations here, here, and here. Perhaps you will be inspired by the party ideas found here for a black and gold celebration.
If taking this route, I would provide some sort of clue as to which parts of the printable go together. For example, puzzle 1 requires two different printables, and folks will struggle if you don’t tie those together. I will explain how I did this in my really involved escape room.
How to Make an Epic Escape Room
OK – Here’s what you really came for with this escape room – the epic version. We were doing a fundraiser, and I wanted to make it extremely high-quality so that not only was it worth the money I charged ($30 per person) but also that everyone could have an amazing experience.
Trying to wrap your brain around how to take a 2D printable and create a 3D experience filled with decorations, lock boxes, and props? I am about to show you.
How to Decorate for a 1920’s Bootlegger Bar and Roaring 20’s Escape Room
Dreaming big. It’s a problem. My creative side takes over with things like this, and I want to transport people to a different world. Go big or go home, right?
I did purchase things online. I will share with you all about the purchases. However, I was blessed to collect most of the things you see in the photos provided. I asked family, friends, and our local buy-nothing Facebook page for props for a bootlegger 20’s bar, and people came through. What a blessing to be able to collect such magnificent accessories for my escape room.
By the way, the 1920s theme can go in two directions – A more bootlegger bar, as seen here, or a more upscale roaring 20s theme with some of the decor I linked to in my “how to make it a bit more involved” section.
Below I will provide some photos of the decorations from the event. There will be affiliate links to the things I purchased. All other items/props will indicate how they were acquired.
Bootlegger Bar Decorations for Escape Room Area 1
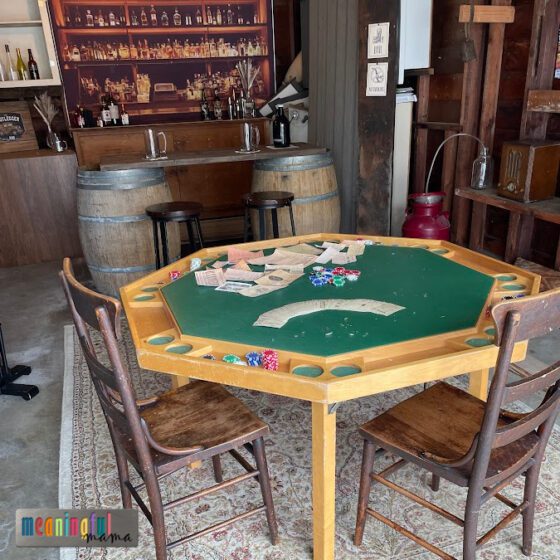
- Rug – borrowed
- Chairs – borrowed
- Poker Chips – owned
- Poker Table – borrowed
- Old Cards
- Wine Barrels with board to create bar – borrowed
- Antique Radio – Borrowed
- Antique Red Milk Jug – Borrowed and set with a glass bottle and clear tubing to make it look like a prohibition alcohol-making process
- Old Articles from the ’20s printed out (I’ll share about this later as I show puzzles) – Created
Bootlegger Bar Decorations for Escape Room Area 2
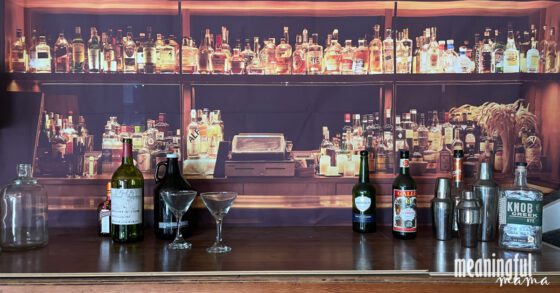
- Wine and Liquor Bottles – Borrowed or Gifted
- Alcohol Shaker – Borrowed
- Alcohol Glasses – Borrowed – I also purchased a couple from the Dollar Store.
- Alcohol Bar Backdrop
Bootlegger Bar Decorations for Escape Room Area 3
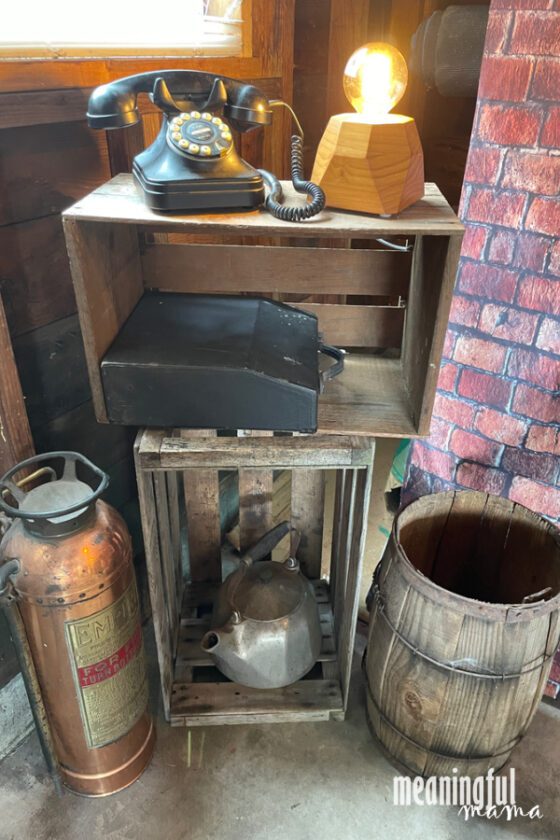
- Old Phone – Borrowed
- Old Light – Gifted – I also switched out the garage lights for antique-looking lights.
- Old Tea Pot – Borrowed
- Old Wooden Bins and Barrels – Borrowed
- Old Fire Extinguisher – Borrowed
- Old Type Writer Box – Borrowed
Bootlegger Bar Decorations for Escape Room Area 4
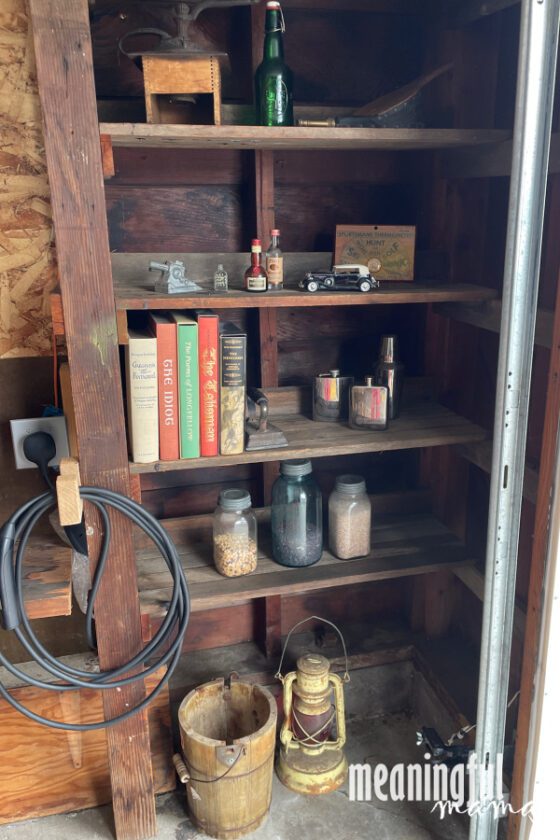
- Antique Toys, Bottles, Alcohol Containers and Jars – Borrowed
- Antique Lantern – Borrowed
- Old Bucket – Borrowed
- Old Books – Borrowed
- Old Iron – Borrowed
Bootlegger Bar Decorations for Escape Room Area 5
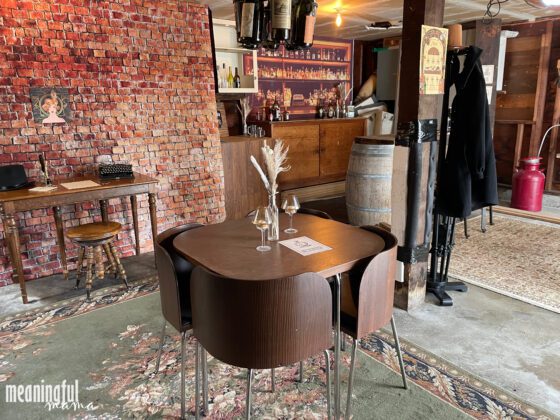
- Table & Chairs Owned
- Vase – Owned
- Dried Feathers and Grasses for Vases
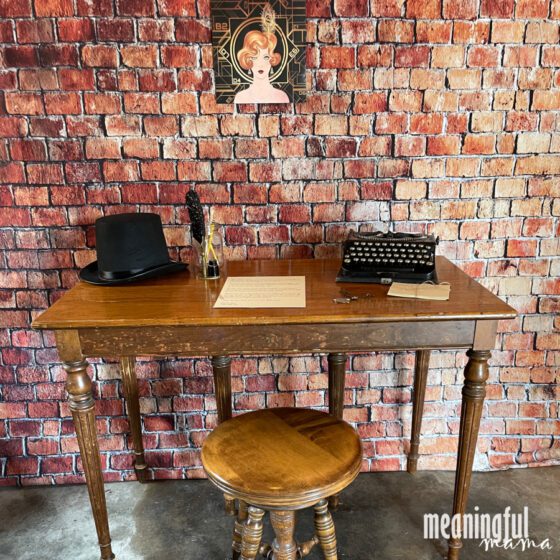
- Desk and Stool – Borrowed
- Wine Bottle Chandelier – Gifted
- Old Type Writer – Borrowed
- Top Hat – Owned
- Old Jacket and Top Hat on Coat Rack – Owned
- Old Rug – Borrowed
- Small Candle Holders – Owned
- Fountain Pen
- Brick Wall Backdrop
Bootlegger Bar Decorations for Escape Room Area 6
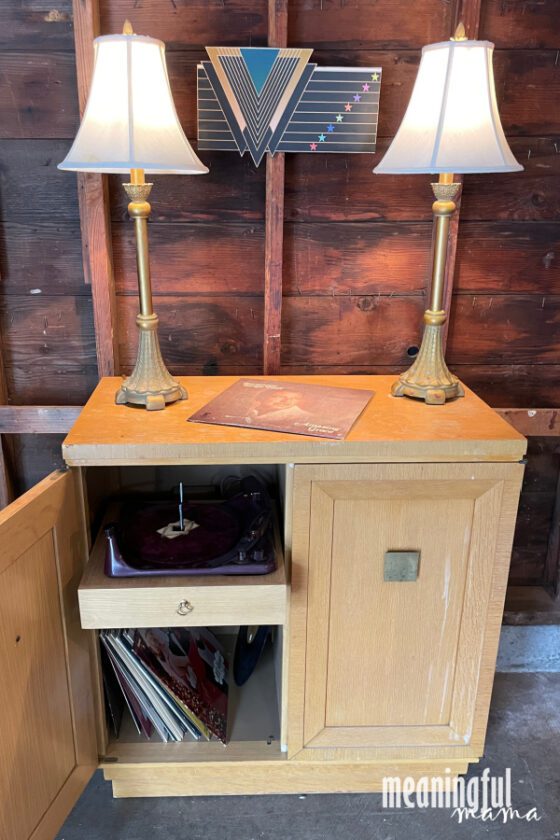
- Record Cabinet – Donated
- Records – Borrowed
- Lamps – Borrowed
Instructions for Bringing the Roaring 20’s Mystery Locks Escape Room Puzzles to Life
>>> Purchase your Roaring 20’s Printables Here <<<
Once you have purchased your printable escape room, it’s time to get started. Beyond the decorations I showed above, let me explain how to bring the puzzles to life by including tangible components like locked boxes, props, and adaptations to the puzzles that were created by Mystery Locks.
Set the Stage
First of all, I created the scenario as to why this group of people were locked in a bootlegger bar together with the prompt that they will need to escape within the hour. See the gangster note below, and download it for free here.
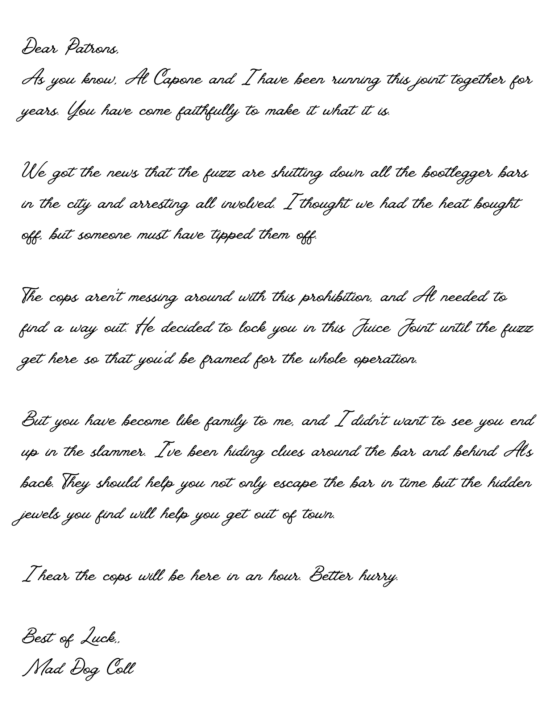
I set this letter on the table for the participants to find.
Along with this clue, I provided writing utensils and scratch pieces of paper for problem-solving.
How to Incorporate Locking Mechanisms into the Mystery Locks Escape Room
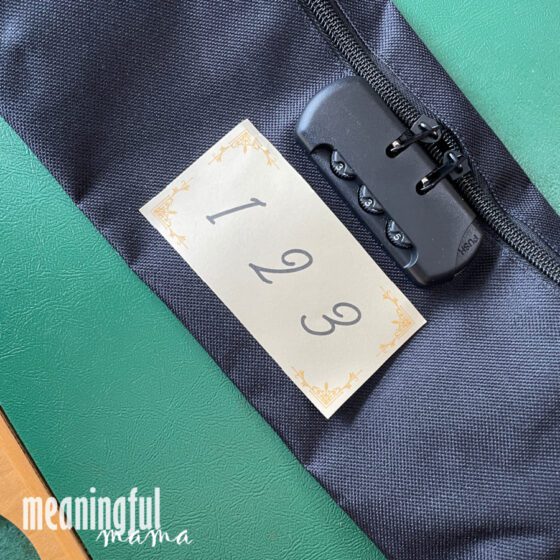
The Mystery Locks Escape room is different in that each puzzle only provides a 1 or 2-digit answer. There are 10 puzzles involved, but two of the puzzles had a two-digit answer, so the result is 12 digits needed to “escape.”
My solution for how to work in lock boxes was to provide 4 lock bags. Each bag had a three-digit code.
Each bag was labeled. Bag one had 1 2 3. The second bag had 4 5 6. Bag 3 said 7 8 9, while bag 4 said 10 11 12. What the players need to figure out is that the answer to puzzle one coordinates with the first digit on the bag labeled 1 2 3. The answer to the third puzzle would be the third digit on that same bag. Basically, every puzzle (1-10) has a coordinating digit on one of the lock bags.
Download the free 1-2-3, 4-5-6, 7-8-9, 10-11-12 bag labels here.
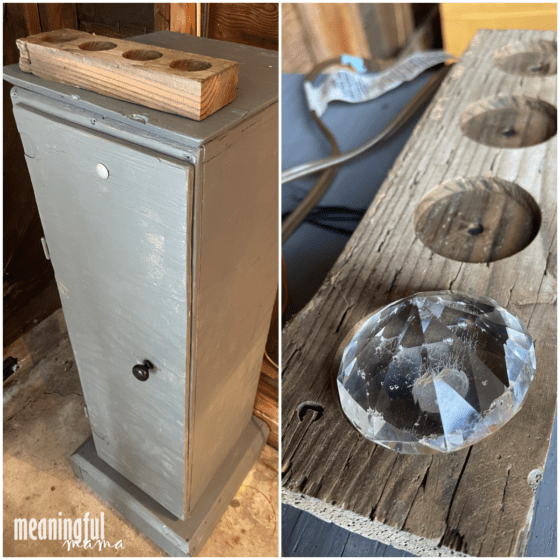
So, what was in those bags? Diamonds.
Let me clarify. Each bag contained a large acrylic diamond with a small magnet super glued to the base. Your next question probably is, “What do the magnets do?”
A friend of mine did an escape room for his wife’s birthday party recently, and he created the box pictured above on the left. He purchased this escape room magnet sensor lock mechanism. Essentially, the box with the door was locked with a magnet. Once the end of the sensors engage four different magnets, the lock is released, and the door can open. Along with the opening, you can do a voice recording that can say whatever you like. Inside the box, for this escape room, the garage door opener was hidden inside so that the participants could escape.
My husband built me a wooden block that had a place to set each diamond with a hole with each magnet sensor coming through. There was a hole in the top of the lockbox where the wires went down into the box and were attached to the locking mechanism for the box.
To sum up the process, the players had to solve the puzzles > find the one or two-digit answer for each puzzle > match the numerical answer with the digit placement on the bag that represented the puzzle number > release the diamond once the three-digit code was discovered > put the magnet on the diamond on the sensor on top of the lockbox > once all four diamonds were found and placed on the sensors, the locking mechanism would release and the door would open.
Solving the Escape Room Puzzles
When you purchase the escape room kit you will notice that for some puzzles there is just one printout associated with a puzzle. For example, puzzle 3 only has one single paper involved. However, some puzzles have more printouts. For example, puzzle 1 has two printable pieces of paper needed to solve that puzzle.
The big question is: As components to these puzzles are hidden throughout the room and then found and collected, how do participants know which clues go together? How do they know which clues go to clue puzzle number 1 and therefore are associated with the number 1 on the lock bags?
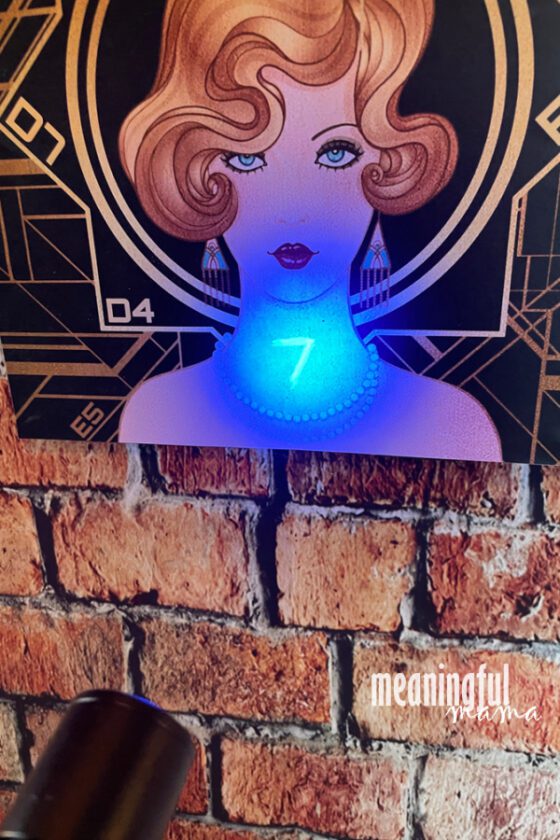
My solution was to use black light. I had two black lights hanging in the room. Players needed to discover the black light and realize it was needed to be able to pair clues together. Once participants found the black light, they had an easier time figuring out what in the room was a valuable clue vs. what was a red herring.
Then, using a black light invisible ink pen, I wrote numbers on each of the clues associated with a single puzzle, as pictured above.
Pictured above was one component of puzzle number 7. There were actually 8 clues in the room associated with puzzle number 7. Each of these clues had a number 7 written on them with a black light pen. Therefore, once you found all of the number 7s in black light, you knew that was what was needed to solve puzzle number 7. If you are following, the answer to the puzzle is the exact digit needed to enter into the lock bag that has a 7 on it. On that particular lock bag, it was the first digit.
Guests had to work the room, treasure hunt style, to gather up all the clues. Then, they needed to figure out which clues went together. Once clues were gathered, they had to solve the puzzles. The puzzles gave them a number to enter into the correct position on the lock bag.
Break Down of the 3D Component of Each Puzzle in this Roaring 20’s Escape Room
This is a lot of information. I hope I have made it all clear. As explained, this was a challenging escape room with all of the added components I included. In retrospect, maybe an hour wasn’t enough time to get it all done.
That said, we did have groups of ten working on gathering clues and solving clues simultaneously. I was there to give directions and hints. Perhaps I could have simplified it for participants by giving a bit more explanation behind the mechanics as noted above.
However, part of the problem-solving and discovery was part of the beauty. There were definitely people who thrived more under the circumstances based on exposure to past escape rooms as well as gamer or problem-solving personalities. It’s not for everyone, but everyone had a good time. Some people gravitated more to the problem-solving. Others were drawn to the treasure hunt. Some just wanted to socialize.
I now want to share how I presented each puzzle in this escape room kit. Follow the following puzzle instructions step-by-step to learn how to host an epic escape room party.
Puzzle 1
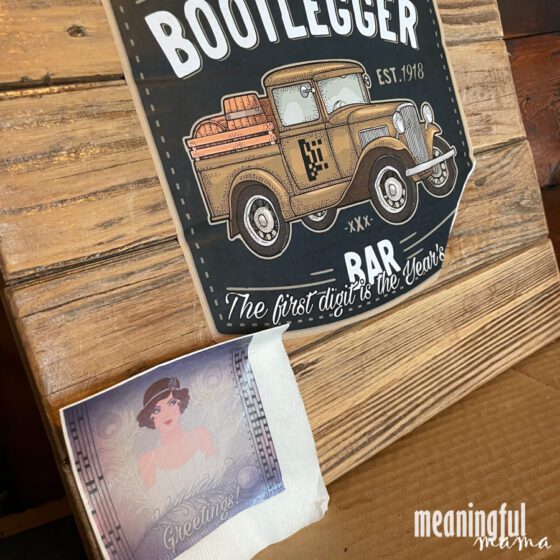
Puzzle one had two components, as seen above. The Bootlegger Bar poster I attached to a wooden sign using spray adhesive. Spray adhesive became a staple in my set-up.
The second part of this puzzle I decided would be cool to put on a cocktail napkin. Did you know you can iron images onto a napkin? I haven’t seen anyone do this, but I thought I’d give it a whirl. It worked!
I purchased silicone t-shirt transfer iron-on sheets. Then, I had to reverse the image on the computer, size it to fit the cocktail napkin and print out the mirror image onto the transfer sheets. Next, I ironed the image onto the napkin, following the package instructions. Below I will share a video showing the magic.
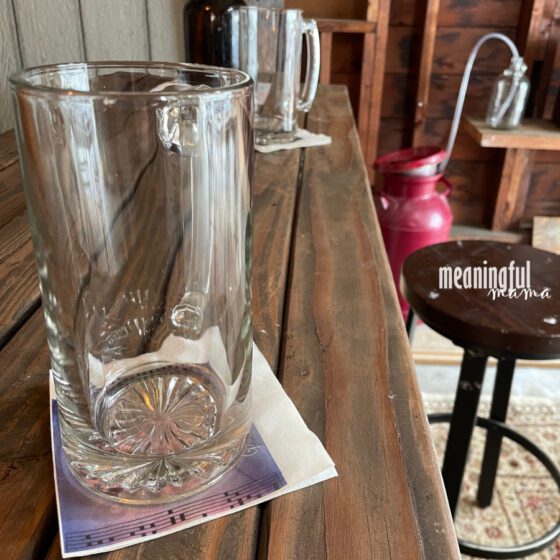
The cocktail napkin was then placed on the bar under a beer glass and near the bootlegger bar sign. A number one was written on both of the components using the black light pen.
Puzzle 2
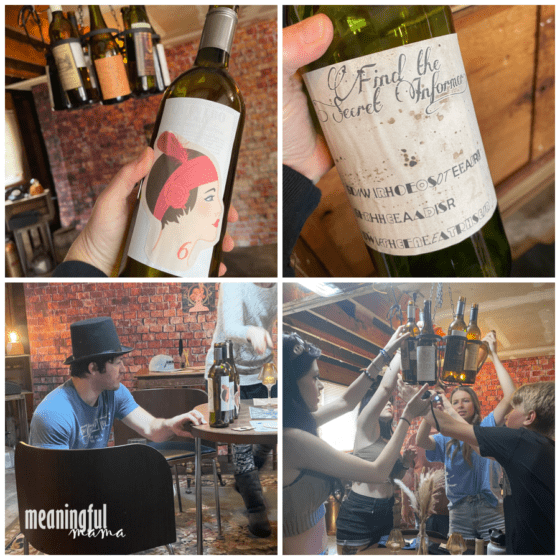
The second puzzle involved 6 images of a woman with a number with that woman, as pictured in the upper left corner. The other printable was the clue you see in the upper right corner.
The images of women I cut out individually and used spray adhesive to put on the back of 6 different wine bottles. Someone had donated the wine bottle chandelier that you see in the bottom right image. However, these wine bottles can also be set on a shelf.
The other printable, I cut out and attached to another larger wine bottle that was at the “bar.”
This was puzzle number 2 (associated with the lock bag number 2 digit), so using the black light pen I wrote the number 2 on all 6 of the women as well as the “Find the Secret Informer” clue.
Puzzle 3
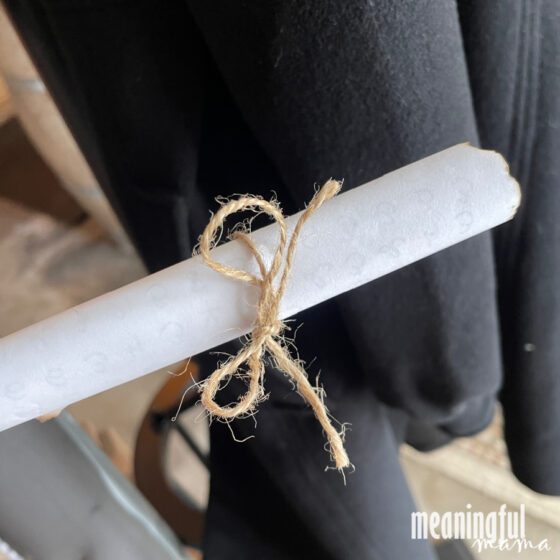
Puzzle 3 was a stand-alone puzzle. I printed it out, burned the edges to look old, rolled it up, and used twine to tie it up. This clue I hid this in an old-looking jacket. Of course, I wrote a number 3 on this clue in black light pen.
Puzzle 4
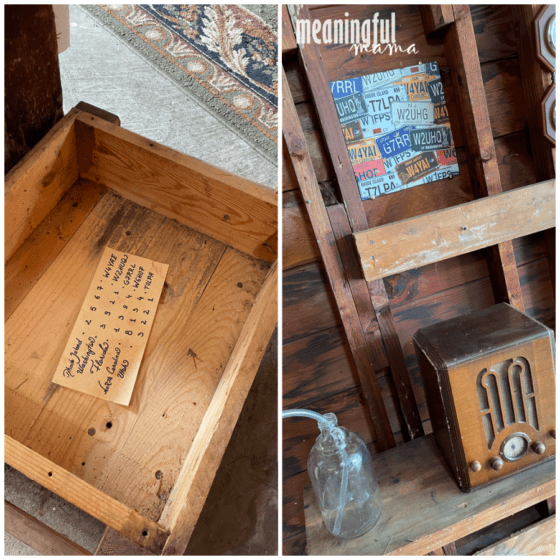
Puzzle 4 had two components. Writing a 4 in black light pen indicated to the players that they went together. I hid one clue in an old wooden box. The license plate clue was hung on the wall. I used the spray adhesive to attach this onto a foam board.
Puzzle 5
My husband found this old record player cabinet in a mostly empty building and asked the owner if we could borrow it. He said we could have it, so we used it for this fundraiser and then passed it on to a friend.
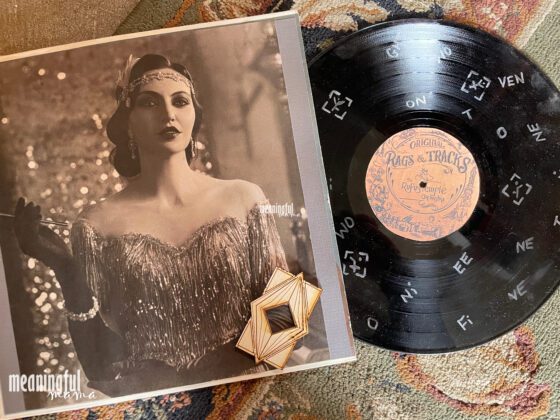
For Puzzle 5, I thought it would be fun to use a real record for the clue. I copied the printable provided and used a silver paint pen to mimic the image in the printable escape room kit. Then, I took the image of the 1920s flapper lady that contains a clue and attached it to the front of an album cover using the spray adhesive.
I googled an old record center image to put in the center of my record, just to make it feel more authentic.
The record I slid into the cover and put it among a bunch of other records in the cabinet. I cannot tell you how many teams went through these records but missed that one of the images was tied to the 1920s theme.
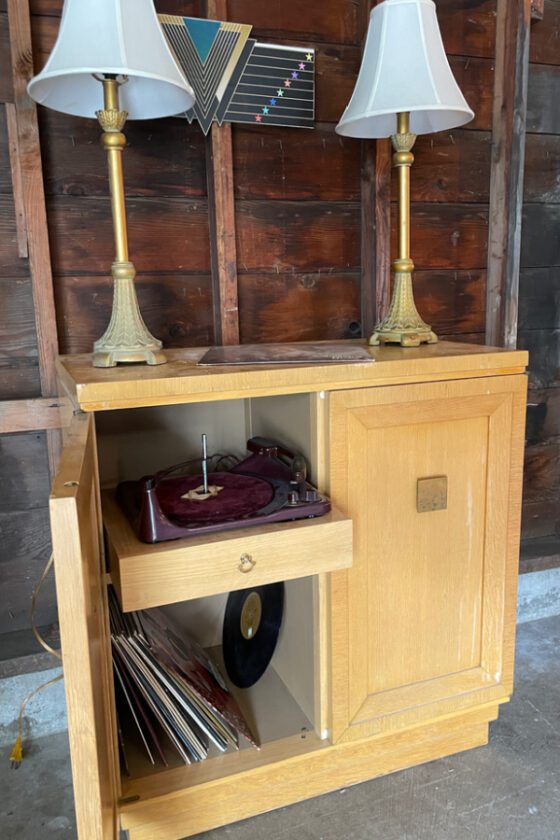
The final component of this clue was the diamond-shaped, wooden feature you see in the image above. The printable provides a paper one that can be cut out, which is perfectly acceptable. I happen to know someone with a woodcutter/engraver, and I had her make a couple of elements for this escape room just to take it up to the next level.
This wooden piece was needed to solve this puzzle, and I hid it on top of the velvet, record turn table. These components were all marked with a number 5 written with a black light pen.
Puzzle 6
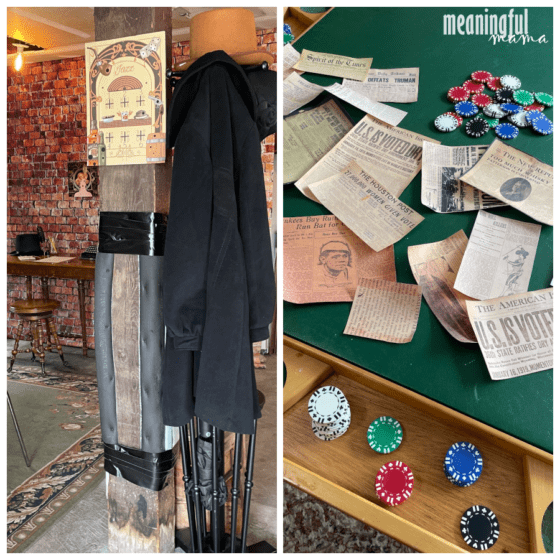
Puzzle 6 had two components. One was a poster, which I attached to a foam board using spray adhesive (pictured on the left in the picture above). The second part was a newspaper article. I searched the web for other period newspaper articles so that the needed article was hidden among several red herrings (pictured on the right).
So that players could figure out which newspaper article was relevant, I wrote a 6 on the poster and the article with the black light pen.
Puzzle 7
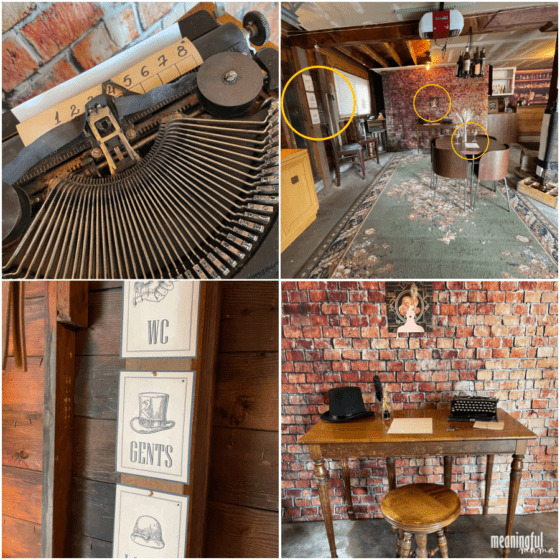
The next puzzle was puzzle number 7, and I marked a 7 in blacklight pen on all eight elements of this puzzle. This puzzle was a bit more scattered across the room. The upper right picture shows some of the placements. I had one poster mounted to foam board and hanging on the faux brick wall. I had three posters printed on heavy cardstock hanging on one wall and two on the opposite wall. The reserved sign I set on the table.
One of the clues (the number/letter grid) was rolled into the typewriter.
Puzzle 8
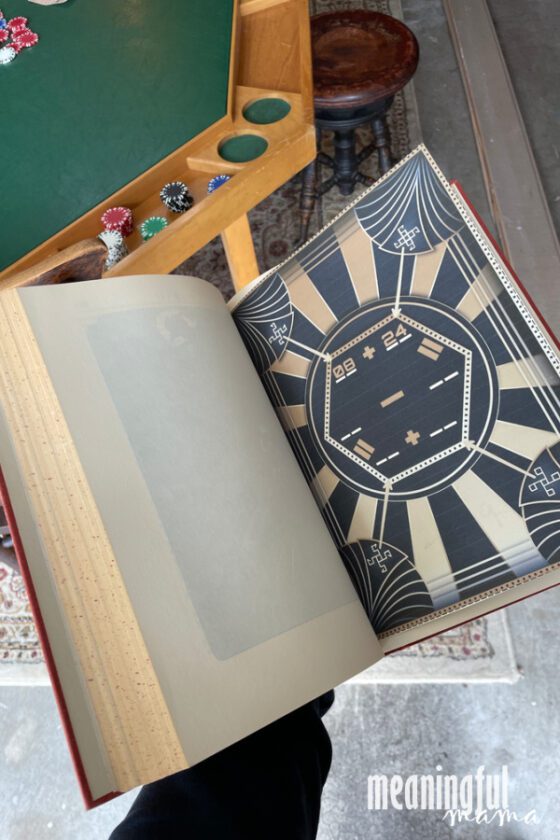
Next, you have another stand-alone puzzle. For this one, I simply printed the problem out onto cardstock and hid it in one of the books I had on the shelf after labeling it with an 8 & 9 with a blacklight pen.
Note: This is one of the puzzles with a two-digit answer, so the solution was the two numbers that were to be entered into the 8 & 9 places on the bag.
Puzzle 9
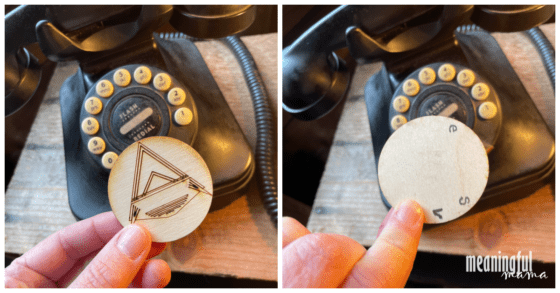
My puzzle 9 was different than the puzzle 9 in the escape room kit I purchased. I really wanted to incorporate this cool old phone, and I didn’t see a way with their puzzle.
What I did was make this wooden circle and write e, s, and v on the back of the wooden medallion. When players lined up the e, s, and v with the letters on the phone, the pointy symbol on the front pointed to the numerical answer.
The phone and this medallion, which was hidden under a bottle of wine in a wooden wine box, were both labeled with a 9 to indicate both items were needed to solve puzzle number 9.
Puzzle 10
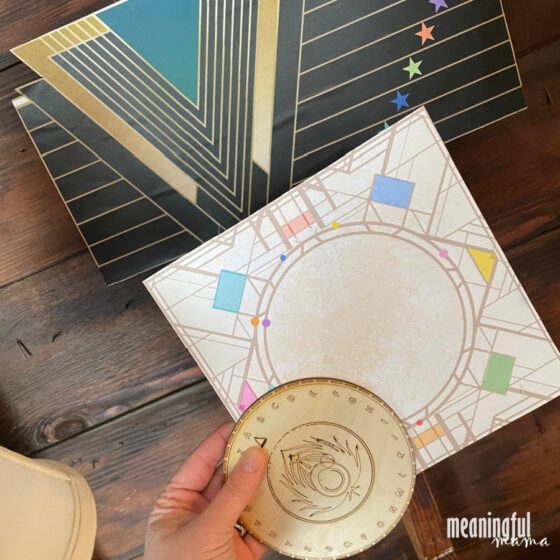
The final puzzle had 3 elements, which were all labeled in blacklight with the number 10. You can see the components in the picture above. The cipher they provided I had my friend make into wood, but their paper version would work just fine. This was hidden in the room. I printed out the color/circle clue onto cardstock and hid it in the room. The final element was printed out, mounted to foam board, and hung on the wall above the record player.
How to Host an Epic Escape Room Party
With all of the prop, puzzle, and decor ideas I hope I have made it clear how to host an epic escape room party. Of course, you can go more simple. However you choose to do it, I hope you embrace the escape room concept.
When we watched some of the teens go through with it, a couple of parents said, “You need to do this again. This is the kind of thing our kids should be doing.” They were having fun, working as a team, problem-solving, and engaging with one another. Not a cell phone in site.
What Kind of Locks Can I Use for an Escape Room?
Perhaps you are inspired but dreaming up some other options for your escape room party. You might be curious about what other kinds of locks you could use for your own adventures. I will share some locks I have experienced or used in the past. These are general ideas rather than specific to this Roaring 20s Escape Room.
Researching these different locks and ciphers is inspiring me to want to host another escape room party.
- Letter/Word Locks
- Directional Locks
- 3-Digit Locks
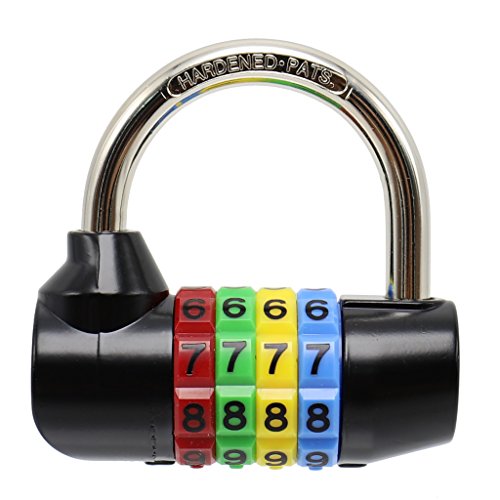
- 4-Digit Locks
- Lock Bags
- Combination Lock Boxes
- Key Lock Boxes
- Maze Lock Boxes
- Fake Cans to Hide Things Like this Coke Can or this Shaving Cream Can
- Vintage Combination Locks
- Jail Cell Lock Boxes
- Wooden Three-Wheel Secret Lock Puzzle
- Antique Lock Padlocks
- Wooden Cipher and Decoder Disk or this one
- Bottle Cap Locks
- Invisible Cabinet Lock
- Davinci Code Style Alphabet Puzzle Box
Mini Antique Brass Padlock and Key Escape Room Party Lock Private Chest Lock Collar Decorative Lock Treasure Chest Tissue Box Padlock with Key [2-Pack]WHRMQ The Mini Da Vinci Code Cryptex Lock,Revomaze,Toy Interesting Gifts for Her or Him to All Festivals Occasions Such as Birthday or The Other Annversary.
Bin Buddy Steel Storage Box For Padlock | 7
SciencePurchase Pirate’s Treasure Chest Wooden Nautical Jewelry Box with Functional Lock and 2 Keys, Wood with Iron Accents, Hinged Lid, 8 Inches Long
Bosvision Combination Padlock for Gym Locker and Escape Room, Code Padlock, 7.8mm Shackle
GIVERARE 4 Pack Combination Lock, 4-Digit Padlock Keyless, Resettable Luggage Locks for Backpack, Gym & School & Employee Locker, Weatherproof Travel Lock for Fence, Backyard Gate, Hasp, Case-Black
3 Wheel Combination Secret Lock Puzzle Box
Mobile Phone Jail Cell Phones Prison Lock Up Safe Smartphone Stand Holders Classroom Home Table Office Storage Gadget -Family Time, Party Fun Novelty Gift Idea
Honbay Mini Size Vintage Antique Style Carved Bird Flower Leaf Padlock Lock with Key for Jewelry Box Drawer
FDXGYH Vintage Mini Bear Padlock Lock Antique Style Small Key Lock Bronze Bear Head Padlocks with Key for Treasure Chest Notebook Wood Box
Shimeyao 4 Pcs Gym Locker Lock 5 Digit Combination Lock Your Own Word 5 Letter Lock for School Gym Sports Locker, Safety Padlock for Toolbox, Hasp Cabinet Storage, Black
Super Secret Spy and Detective Decoder Wheel
Runes Cipher for Escape Rooms – Decoder Disk – Escape Room Prop
GTHER Antique Vintage Combination Password Lock Padlock, Chinese Decorative Lock English Letter Combination Lock Escape Room Lock for Box Cabinet Furniture Trunk, 80x37mm
Key Lock Box Wall Mounted, Upgrade Clearly Visible Keys, Portable Lock Box for House Key, Key Safe Security Lock Box for Indoor, Outdoor, Garage, Garden, Store (1 Pack, Grey)
KYODOLED Medium Cash Box with Money Tray,Small Safe with Key,7.87
Key Lock Box for Outside Wall Mount, Waterproof Spare Key Storage Box, 10-digits Combination Lockbox Push Button Key Keeper Box for Home Indoor & Outdoor Realtors Landlord Property Management
7 UP Can Safe 7 UP Diversion Safe 7 UP Stash Safe Compatible/Replacement for (7 Up) Made by Keurig Dr Pepper Company 7up Can Safe with Hidden Compartment to Hide Money, Jewelry, or ???
Patelai 2 Pieces Money Holder Maze Puzzle Gift Box, Christmas Money Gift Holder Box Fun Maze Puzzle Brain Teasers for Kids and Adults (2.8 Inch)
BSIRI Canopic Chest- Challenging Brain Teaser Wooden Box Mind Puzzles and Use as Money Box, Stash Box, Jewelry Box, 3D Puzzle Lock Box, Gift Card, Money Puzzle Box for Cash Gift
Want More Fun Party Ideas?

![Mini Antique Brass Padlock and Key Escape Room Party Lock Private Chest Lock Collar Decorative Lock Treasure Chest Tissue Box Padlock with Key [2-Pack]](https://m.media-amazon.com/images/I/31WKtYNqwwL._SL500_.jpg)


