Planning a video game party? Wondering how to make a realistic Nintendo Switch cake? I got you. With my written instructions, photos, and video tutorial, I hope to make the task manageable for even novice cake decorators.
My cake-making 101 and cake-making 201 posts are great places to start if decorating cakes is a newer hobby. I even think more experienced bakers could pick up a few things in those posts. I am sure they could teach me a few things also.
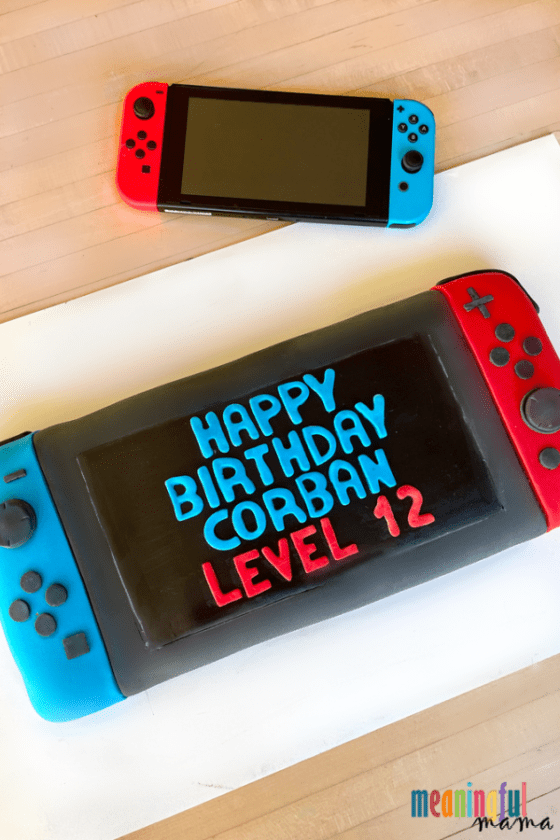
How to Make a Realistic Nintendo Switch Cake
Cake decorating is just a hobby for me. I love it. I personally know I love something when I forget to eat while I am doing it because I so rarely forget to eat.
The creative outlet is super fun. People ask if it is hard to watch my cakes get cut up and eaten. “Absolutely not,” is my answer. I am a purger by nature, so I love that I can just take a picture of remembrance and not feel bad that I don’t want it taking up space in my house.
It has been fun to make cakes for different occasions. You can see my collection here.
Under that link, you will also find some of my favorite recipes. For this Nintendo Switch cake, I used my simple Oreo Buttercream Recipe and the thin chocolate cake sponge cake recipe found here.
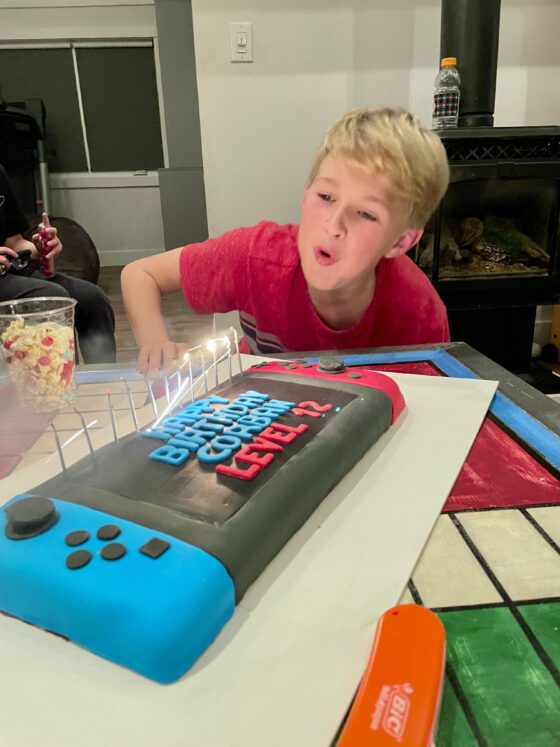
This cake was made for my son’s 12th video gaming party. He loves everything Oreo, which helped determine the cake flavors.
Materials Needed to Make this Realistic Nintendo Switch Cake
Note: The following list contains Amazon affiliate links. Everything you purchase through these links goes to support the free resources I provide at Meaningful Mama. Thank you for your support.
- Oreo Buttercream or a Regular Buttercream
- Thin layers of chocolate cake baked in a 12″ x 16″ jelly roll pan. Here’s the recipe I used.
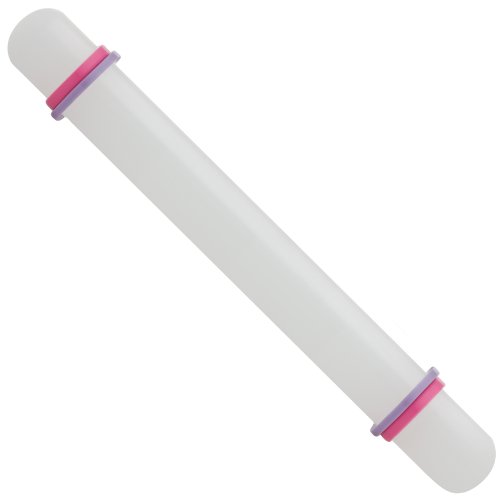
- Long Fondant Rolling Pin
- Small Fondant Rolling Pin
- Long Wooden Dowels, 1/4″ thick
- Sewing Pin
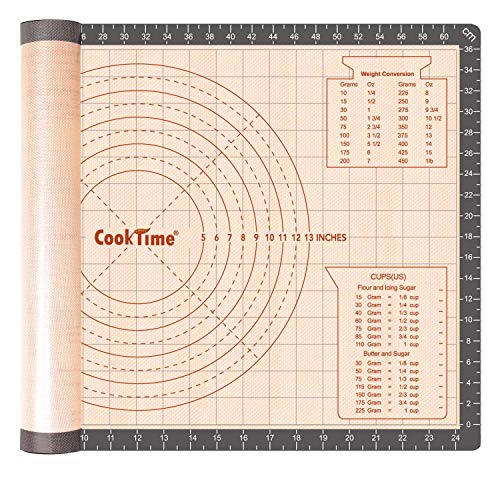
- Rolling Mat
- Blue Fondant – Satin Ice is my favorite brand. In my option, it tastes way better than Wilton.
- Red Fondant
- Black Fondant – You need just over a pound.
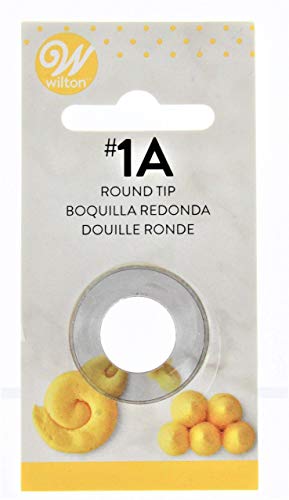
- 1A Piping Tip
- Small Letter Fondant Cutters
- Fondant Smoother
- Shortening
- Paper Towel
- Small Pastry Paint Brush
- Pizza Cutter
- Ruler
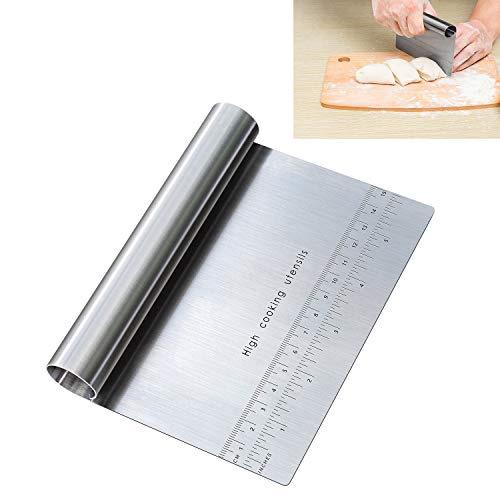
- Pastry Scraper
Ateco Fondant Rolling Pin with Adjustable Thickness Bands Baking Supply, 20HelferX 15 inch Long Stainless Steel Rolling Pin for Baking – Perfect for Fondant, Dumpling, Ravioli, and Pizza Dough
Long Wood Dowel Rods Unfinished Natural Wood Craft Dowel Sticks 50 Pack 1/4 Inch×12 Inch
iminoo 200 pcs Multicolor Sewing Pins Plastic Head Straight Pins Craft Positioning Pins Fixed Sewing Marker Needle for Crafting Dressmaker, Jewelry Decoration and Other Crafts Making (Colorful 200)
Silicone Pastry Baking Mat Non Stick-Large Rolling Dough with Measurements-Non Slip Pizza,Fondant,Pie,Cake Baking Mat – 26 x 16 Inch By Cook Time
Satin Ice Rolled Fondant – Red – Vanilla – 1 kg
Satin Ice Black Fondant, Vanilla, 2 pounds
Wilton Decorating Tip-1A Round Carded, Package May Vary
ShengHai 26-Piece Small Alphabet Cutters Set (A – Z), Stainless Steel Decorating Tools Letters Fondant Cutters
3Pcs Plastic Fondant Icing Smoother Shaper Polisher Cake Decoration Smoothing Tool for Fondant Cake Edge Corner Decoration Sugarcraft DIY Baking Tool, White
Crisco Baking Sticks All Vegetable Shortening, 20 Ounce (Pack of 3)
Bounty Select-A-Size Paper Towels, White, 8 Double Plus Rolls = 20 Regular Rolls
10 Pieces Cake Baking Brushes Food Paint Brush for Chocolate Sugar Cookie Decoration Brushes Set Cookie Decorating Supplies with Fondant and Gum Paste Tool (Purple)
Zulay Kitchen Large Pizza Cutter Wheel – Premium Stainless Steel Pizza Slicer – Easy To Clean & Cut Pizza Wheel – Super Sharp, Non-Slip Handle & Dishwasher Friendly – Teal
Business Source Nonskid Stainless Steel Ruler (32361)
Pro Dough Pastry Scraper/Cutter/Chopper Stainless Steel Mirror Polished with Measuring Scale Multipurpose- Cake, Pizza Cutter – Pastry Bread Separator Scale Knife (1)
Satin Ice Blue Fondant, Vanilla, 2 Pounds


Dimensions for a Nintendo Switch Cake
I wanted to make this Nintendo Switch cake to scale, so I had to pull out some old algebra skills to make it feel realistic. Wanting to spare you from algebra, I’ll provide my dimensions…If I can read my chicken scratches and remember what they all meant.
The cake was made in two 12″ x 16″ Jelly Roll pans.
Height: I made my cake three thin layers high. With frosting, fondant, and cake layers, the cake was about 2″-3″ tall.
Rectangular Surface: The dimensions of the cake, which made up the rectangular surface of the Switch cake, were 16″ x 7″.
Black Fondant for Center Part of Nintendo Switch Console: 11.5″ x 11″.
Red & Blue Controllers: The controllers will be 2.5″ in width. You will want to cut the fondant to 6″ x 11″.
Black Circles: On the controller, you find a few different-sized circles. You will need to make 4 larger circles using the larger size of your 1A piping tip (use it like a cookie cutter) and 9 smaller circles, using the smaller end of the 1A piping tip.
How to Make a Realistic Nintendo Switch Cake
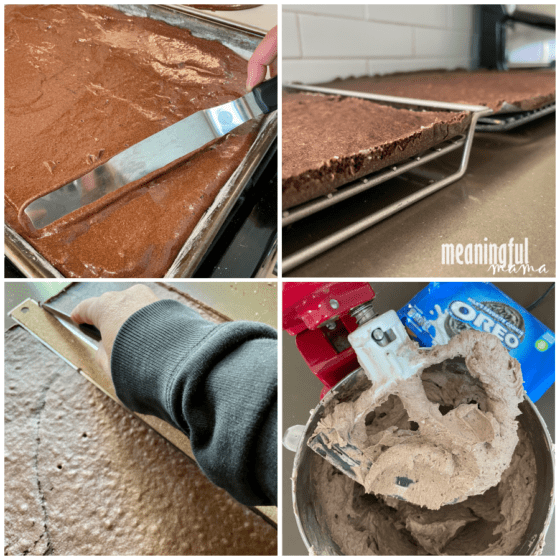
First, you will want to make your cake and cut it to size. The recipe I shared provides enough cake to fill two sheet pans. The layers do end up super thin. Make sure to bake these on a sheet pan lined on the edges with shortening and a piece of parchment paper on the bottom to prevent the cake from sticking.
Measure carefully and cut the cakes to a 16″ x 7″ size. Your “scraps” will be used as the center layer, so do not treat them as scraps. Just cut one of the “scraps” down to make sure you have two pieces that equal 7″ wide when they are put together.
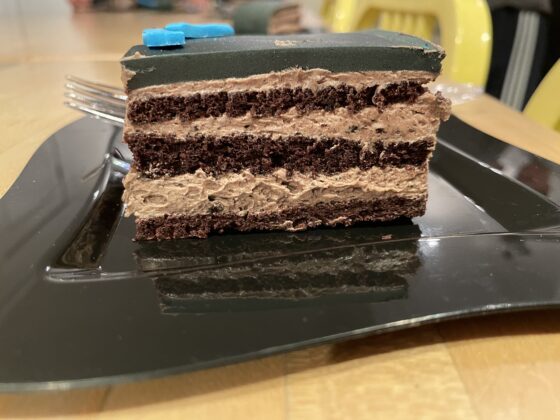
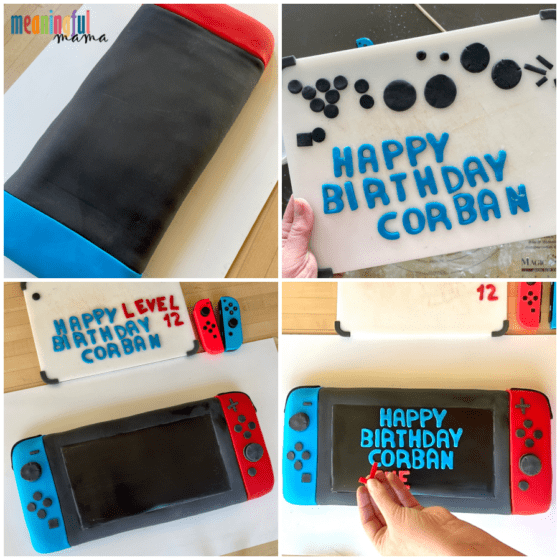
Layer – cake, frosting, cake, frosting, cake, frosting, fondant. I wish I had done my frosting layers a little thinner and more even than I made them, so I would do a thinner layer than you see in the following picture.
How to Decorate a Realistic Nintendo Switch Cake
Time to cover your cake in fondant. The video tutorial at the bottom will be super helpful, but I will also provide written instructions also.
Here are the steps:
- Knead black fondant, and roll it to 11.5″ x 11 inches. Any air holes can be poked with a sewing pin and the fondant smoothed using a circular motion of your finger. The 11 inches is an estimate. That’s the bit that hangs over the sides, so it will be trimmed back. The 11.5-inch width should be exact. Use a straight edge like a metal ruler and a pizza cutter to do your cutting.
- Measure 2.5 inches from the short edge of your cake and mark a straight line using a knife. Do this on both ends of the cake. This becomes your guideline of where to lay the fondant.
- Place your black fondant between the two lines, flattening with your hand or a fondant smoother. The fondant should go straight up to your guidelines.
- Roll out your red fondant to about 6″ x 11″. Using a straight edge and a pizza cutter, trim off about a quarter inch of your fondant on the long edge. This straight edge will butt up against the black fondant of your base.
- Lay the straight edge of your red fondant on one edge of your cake, butting it right up against the black fondant.
- Using your hand or a fondant smoother, work your red fondant into place, where the top and sides of the controller portion of your cake are fully wrapped. Cut off excess.
- Roll out blue fondant to about 6″ x 11″. Using a straight edge and a pizza cutter, trim off about a quarter inch of your fondant on the long edge. This straight edge will butt up against the black fondant of your base.
- Lay the straight edge of your blue fondant on the other edge of your cake, butting it right up against the black fondant.
- Using your hand or a fondant smoother, work your blue fondant into place, where the top and sides of the controller portion of your cake are fully wrapped. Cut off excess.
- Roll out a small amount of black fondant to 1/8″ thickness and another small amount to 1/16″ thickness.
- The 1/8″ black fondant will be used for your larger black circles that make up the joystick portion of the switch controllers. Cut out 4 circles using the larger end of your 1A piping tip. Flatten one of these slightly so it is a little larger than the other. On the smaller one, make four small grooves to match the small grooves of a switch controller. You can make these slight indents with a toothpick.
- Roll out 4 small balls that will go between your two large circles – one slightly larger (for the base) and one with the grooves (for the joystick).
- The 1/16″ black fondant will be used for all of your other components. You will need 9 small circles, One small square about the same size as a small circle, a minus sign, a plus sign, and two long rectangles that will wrap around the edge of the cake controllers as the top buttons (estimated 1/4″ in width and 3″ in length). The small circles are cut out using the small end of your 1A piping tip. The plus and minus signs are cut using the pizza roller.
- Fondant pieces are attached by using a small amount of water with a pastry paintbrush. Be careful to not get too much water. It only needs an itty bitty drop. Too much water will result in bleeding fondant. You don’t want that.
- Let the large circles dry in a dry, dry cool place for a little bit so they aren’t floppy in nature. For the joystick, you will use all four of the larger black circles. You flattened one slightly larger. Place the circle in place on the controller portion of the cake. Then, add the small ball you made to the center. Centered on top of that add the large circle with the four grooves.
- Attach all of your other fondant pieces in place using the controller as a guide. If you don’t have a controller available to copy, here is an image to help.
- Next, you will want to make your screen actually look like a screen. The screen will be 2 cm from all black fondant edges. Measure this out with your ruler and poke guidelines with a sewing pin or toothpick. Using a straight edge like a metal ruler and your pastry scraper or a knife, draw lines around the screen edge. Don’t cut into the fondant too much. You should be able to just press it slightly to get an indentation.
- A cake tip I have used along the way is if you want your cake to be a bit shinier rather than matte, you can rub it with shortening. This is how I made the screen shiny, appearing like an actual screen. Carefully work your shortening to the edges of the screen using a paper towel.
- Roll out a long roll of blue fondant and a longish roll of red fondant to 1/8″ thick.
- Cut out “HAPPY BIRTHDAY (name)” in blue and “LEVEL (age)” in red.
- Mark the center of your screen so you can know how to center the letters.
- Using a small dab of water applied with a pastry paintbrush, attach your letters, working from the center outward so that everything looks centered in the end.
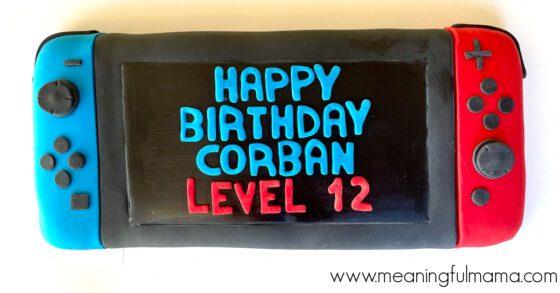
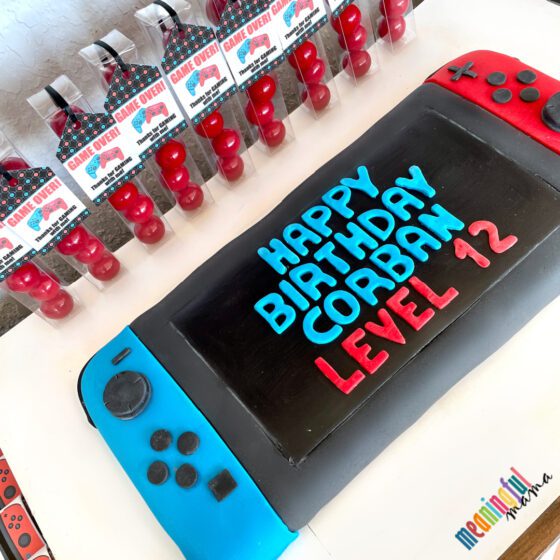
There you have it – a Nintendo Switch cake. If you are hosting your own Switch party or video gaming party, I hope this cake tutorial helps you create your own gaming cake for your gamer.
Whatever your skill level, I believe you can do this. Go for it! Let me know how it turns out. Share your pictures and tag me on Instagram or Facebook.
Video Tutorial for Making a Realistic Nintendo Switch Cake


Thank you for this, very helpful! One question: About how many servings did you get out of this? Thank you!
Oh man. I should have paid more attention. I know 15 people were at the party and got fed, and I know there were leftovers. Online it says a 12×16 cake feeds 40, and this was a 7×16. I’m estimating that you could feed 25-30 people with it. I hope that helps. I remember our slices being generous.