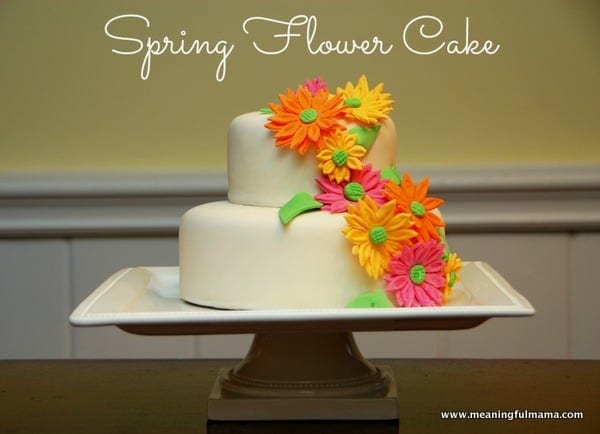
 We just celebrated Kenzie’s 4th birthday. I will be leading up, this week, to her spring birthday party. I want to show you “how to” do things so that if you want to replicate them, you can. I want to teach you how to make this spring flower birthday cake. I know a fondant cake might be intimidating to some, but I will try and break it down for you as simple as possible. I believe the most challenging part of a cake like the one pictured above is covering the cake in fondant. I have a couple posts that will be helpful if this is your goal. I wrote a post called Cake Making 101 and Cake Making 201. I break down the basics, and I believe you can achieve success with the right lessons and some practice. This cake used my favorite white velvet cake recipe. You can read in the comments that people have loved it. For me, it’s a no fail recipe. I pair it with my favorite buttercream for the perfect combo. I like to use Duff fondant, which I buy at Michael’s with a 40% off coupon. Once you have the basics down by following the directions in Cake Making 101 and 201, this cake is super easy to decorate. Kenzie and Abby were banging out these flowers on their own once I taught them. They were machines and had a lot of fun doing it.
Here are some links to some products I use:
[field name=iicing] [field name=irollingpin] [field name=idaisycutters] [field name=ifondanttools]
Here’s the story: Corban broke out in hives. I’m still not sure why, but it may have been a new laundry detergent I tried. He has sensitive skin. The doctor said to give him Benadryl at night to help stop the itching (he was getting scratch marks everywhere on his little body). I had never given it to him before, and I’ve heard it can either make a kid really sleep or get really hyped up. I decided to try it nap rather than experiment when I wanted to be sleeping. The results? It wired him. So, I had a screaming kid who needed my attention with a cake that I needed to get ready for the party. While he did sleep a tiny bit at the beginning of the nap, I had taught the girls how to do the flowers. When I needed to attend to him, they just kept going. I was kind of amazed. I guess my point is, if a 4 and 5 year old can do it, I believe you can too…with proper instructions, so here we go.

First of all, your kids will have so much fun and learn so much if you let them help in the process of making the cake. There might be spills (see bottom left pic), and that’s OK. It’s a learning process. I covered the cake in white fondant (see my Cake Making 201 post for the “how to”).
The girls had two different jobs in helping with the flowers.
Kenzie’s Job:
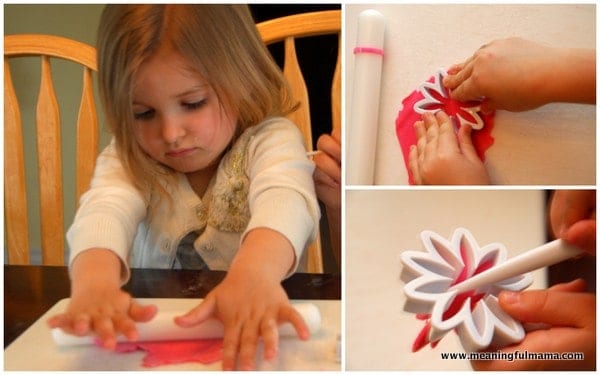
I have two sizes of daisy cookie cutters. I also have this little roller that is perfect for me or the kids to use. In the upper right hand corner you can see it has the pink band around it. You put that on either side of the roller, and it helps with consistency of the depth of your roll. There are bands that create two different widths. I also used Duff’s gum paste. It’s the most consistent I have had work for me. I colored the gum paste with Wilton color gel. Kenzie rolled out the fondant, used the cookie cutter to press out the flower shape, and she used a gentle poker to poke the flower out. Each flower on the cake is made up of two flowers the same size but staggered.
Abby’s Job:
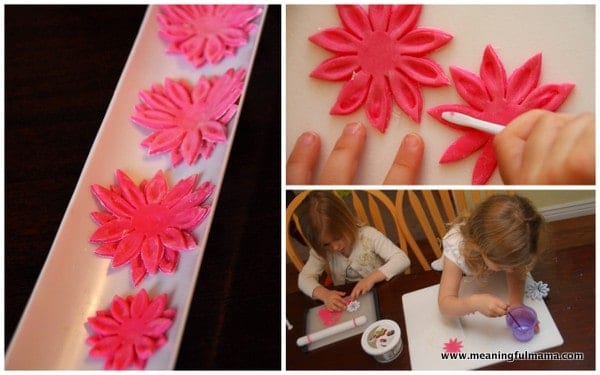 Abby would take the two flowers, use a little tool to flatten out the pedals in the center, paint the center of one with water to help them stick together and lay them on top of each other, staggered. She’d then set them in this rounded tube to dry with a bit of a curve rather than flat. You can also put the smaller ones in egg cartons and dry the bigger ones around toilet paper tubes.
I didn’t take a picture of us making the centers, but those are just little green balls with a criss cross pattern made from the back of knife.
Gum paste dries pretty firm within a couple days. How easy does that look?
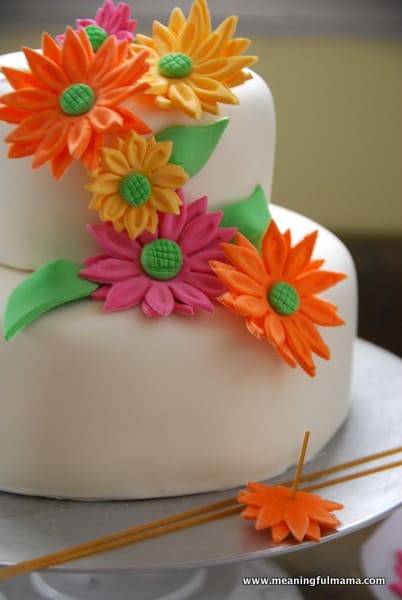 How do you attach the flowers to the cake once they are dry? With thinner flowers, you can just attach with a dab of water. There was some weight to these, so I wanted to ensure they’d stay. Some people like to use tooth picks, but what if one gets left in the cake. I like to use hard spaghetti noodles, ensuring the cake is edible and no one is going to choke. Of course, you can inform your guests to remove the spaghetti noodles before digging into their slice. I use both spaghetti noodles and a dab of water on the back of the flower. Too much water and the color will run.
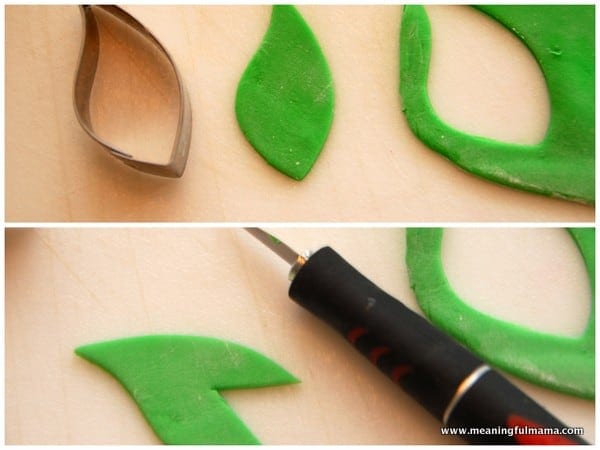 The leaves are made from cutting out leaves with a leaf cookie cutter. You could hand cut them out with an exacto knife too since there aren’t many. You will want to cut a V in the bottom of the leaf as shown.
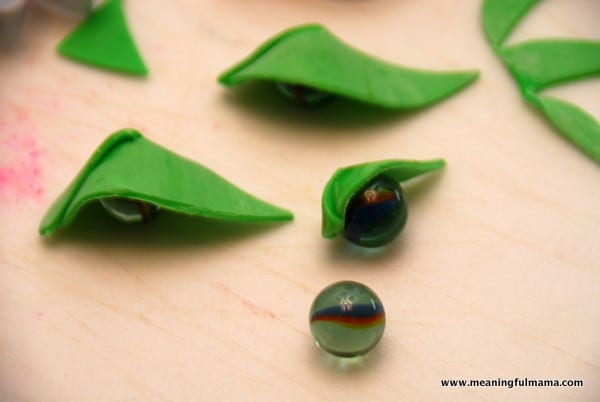 I used a little water on one side of the V. Then, I brought the one side without the water over to lay on top of the side with the water. I laid them on marbles to dry with the 3D feel.
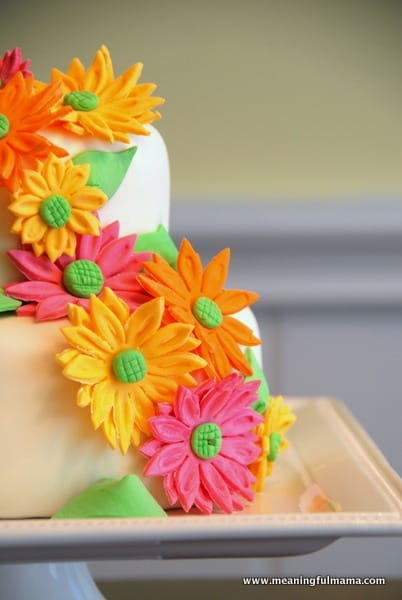
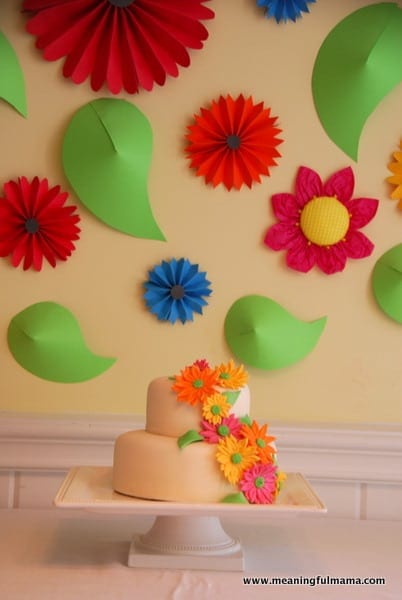 And there you have a spring party cake with a hint toward the big reveal of the entire party.


Turned out super cute! Happy Birthday!
Thank you so much, Ashley!
You make that look so easy!
It’s seriously not too hard…like I said, the hardest part is covering the cake. That takes some practice. The flowers are a piece of cake…lol – seriously, no pun intended.
Love it and can’t wait to see your party!
Thanks so much! It was a fun one!
Wow, so impressive and I love that you had the kids help! Thanks for sharing at monday funday. Take care, Laura
Thank you so much, Laura. It’s fun when the kids actually do become a help. 🙂
Beautiful flowers Jodi!
Mackenzie 🙂
What great little helpers you have. they did an exceptionally good job on the flowers too. Such a pretty cake as well!
I do have good helpers. They love to be in the kitchen with me. Thanks so much for your kind words!
Hi Jodi, This cake is super cute, colorful and bright! My daughter asked for a vanilla flower cake for her birthday and i came across your website and this cake while i was searching over the net for one which suits her requirements :). I fell in love with this design instantly and replicated it for my little one who turned 4 this week. Thanks for the amazing idea and tutorial. it came out really pretty and yummm!
What a fun report. I am so glad it worked out well. It’s so fun to hear of people inspired by my ideas and designs. Thank you so much for taking the time to let me know. It is super encouraging for me to hear!