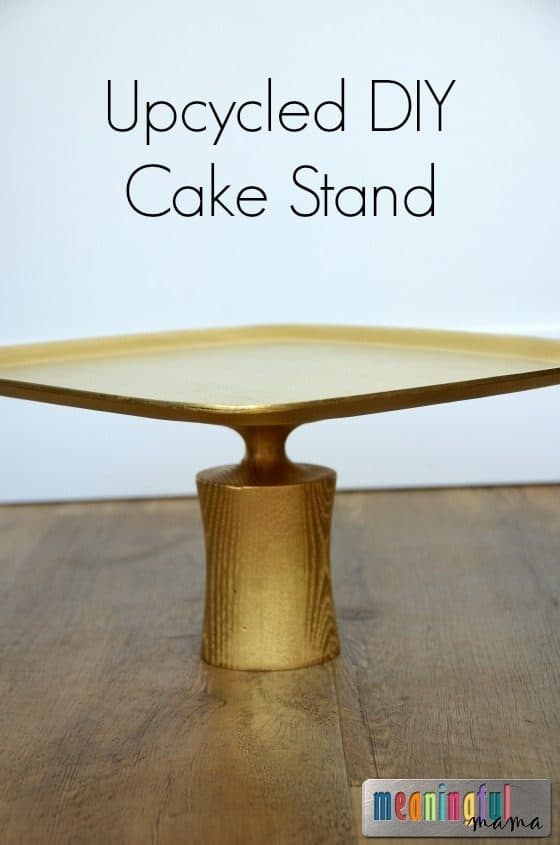
This Upcycled DIY Cake Stand has been on my mental to do list for a long time. I wanted to pursue making a cake stand, so I went to Goodwill a couple years back. I looked around for something I thought would work as both a platter big enough for a cake and a stand. The two pieces I purchased have been sitting out in the garage for quite some time.
* Affiliate links provided for your convenience. Anything you purchase through these links helps to support Meaningful Mama and the free resources I provide. Thank you for choosing to support us.
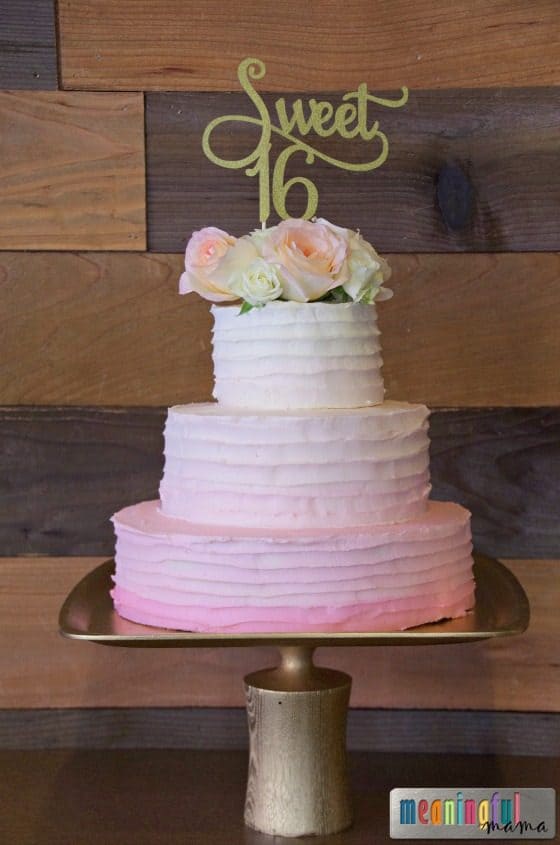
What inspired me to pull these pieces out of the garage and finally do something with them? Making my niece’s sweet sixteen pink ombre birthday cake. I went to stack the cake the morning of the party. My white cake stand is what I had pictured using, but I quickly realized it was an 10″ round cake stand while my bottom tier for this particular cake was 11″. Oops.
Luckily, it was my husband who remembered the intention sitting in my garage. He went out, grabbed them and got to work.
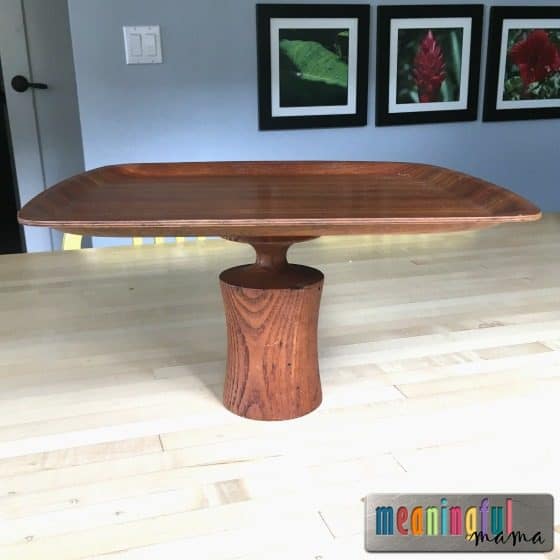
I had originally considered leaving these retro 70’s style, but with the need of a golden base for the party theme, a little spray paint did the trick.
Materials Needed to Make Upcycled DIY Cake Stand
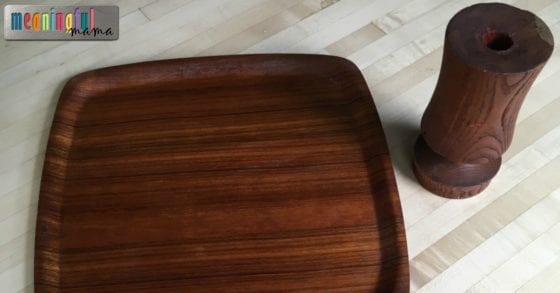
- A Platter and a Stand – There are so many options here. You might have something on hand, or you might want to go shopping at garage sales or secondhand stores. You can use large plates, platters, or even square or circle cutting boards. For a stand you can look for candle holders, upside-down goblets or wine glasses, clay pots, or table legs. You can let your imagination run wild.
- Five Minute Epoxy
 – This is a strong and quick solution for your pieces. Of course, if you are working with glass or ceramic, you will want to look for a glass glue.
 - Sand Paper
- Gold Spray Paint
- Spray Paint Sealer
 – This is a strong and quick solution for your pieces. Of course, if you are working with glass or ceramic, you will want to look for a
  .
.


How to Make an Upcycled DIY Cake Stand
- Sand the pieces you want to use.
- Using 5 minute epoxy (or another glue that corresponds to your materials chosen), glue the pieces together, measuring to find the center of your plate or platter.
- Once dry, spray paint the entire cake stand.
- Finish with a spray paint sealer.
Easy enough? Right. It was so quick and easy that my husband was able to do it the same day as our party. Just look at the results with the cake:
While most of my posts focus on all things family – parenting, marriage, character development and other kid activities, I also love to show you the fun DIY projects that occupy my time on occasion. Enjoy!


These cake stand ideas are really nice. I love that shade and its simple design.
Thanks so much. They are fun to make!