These caramel apple monsters are a fun way to make plain old caramel apples come alive. This is an easy fall and Halloween activity that kids will love creating with you.
Want another engaging Halloween food activity for kids? You should check out these Mac and cheese monsters.
Caramel Apple Monsters
My daughter requested that we make caramel apples this season. I was just going to make them without doing a post about it. However, once I came up with the idea for Caramel Apple Monsters I figured it became blog-worthy.
I also want to bring you a caramel apple recipe that does not use cream. I was walking through Walmart’s Halloween section after I had picked up my apples and saw these scary candy eyeballs made by Wilton. An idea was born. I bought some black writing gel and knew I had candy corn at home to complete the vision in my mind.
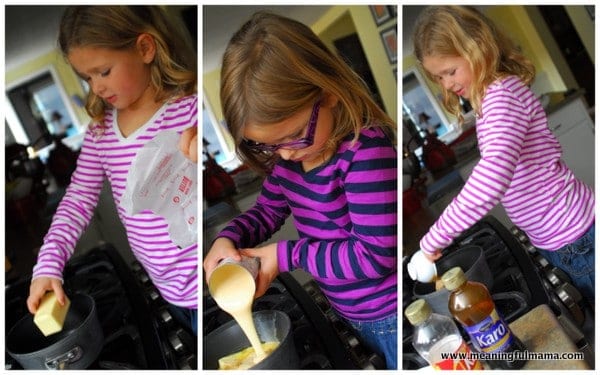
The first thing we had to do was make up some caramel. I forgot to buy cream, so I had to search for a new recipe. This one at Food.com used sweetened condensed milk. I adapted it slightly, so I am going to give you my own version of this recipe.
It was really delicious, easy to work with, and easy to make…didn’t seem as sensitive as some caramels.
Caramel Recipe for Caramel Apples
Ingredients
- 1 cup butter
- 1 can 14 oz sweetened condensed milk
- 2 cups packed brown sugar
- 1/2 cup light corn syrup
- 1/2 cup dark corn syrup
- 2 tsp vanilla
- 1 tsp salt
Instructions
- In a heavy saucepan, combine the butter, brown sugar, corn syrups, sweetened condensed milk, and salt; bring to a boil over medium-high heat.
- Cook and stir until the candy thermometer reads 248 degrees. It can take 30-40 minutes
- Remove from heat and stir in vanilla.
- You can dip your apples right away, but I have found the caramel then drips down the sides of the apple a bit more. I let mine cool to 150. I’d probably suggest letting it cool to 175-200 because mine was a tad thick.
How to Make Caramel Apple Monsters
Note: The following contains Amazon affiliate links for your convenience. Everything you purchase in these links goes to support the free resources I offer at Meaningful Mama. Thank you for your support.
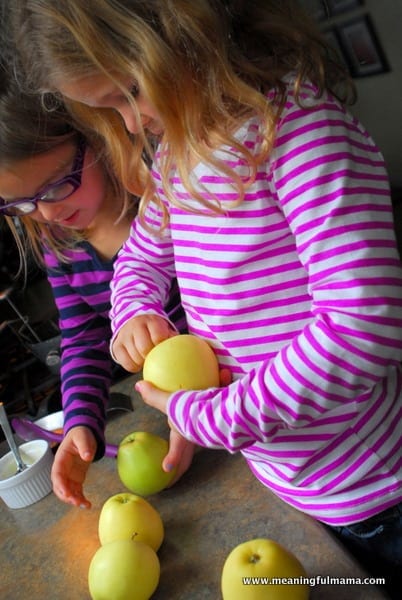
While it was cooking, I had the girls twist off the apple stems.
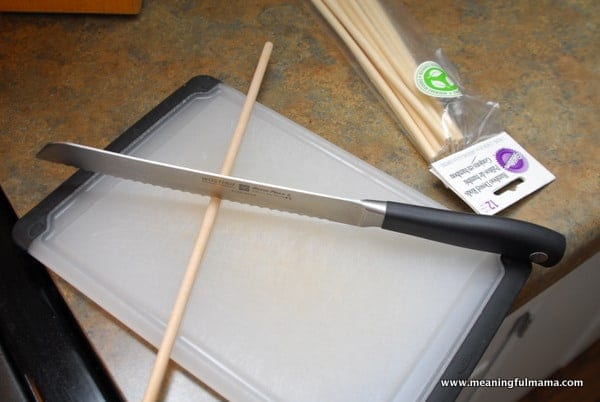
I took cake dowels and cut them in half because I had those on hand. However, buying wooden caramel apple dowels with the pointed end is a much easier solution.
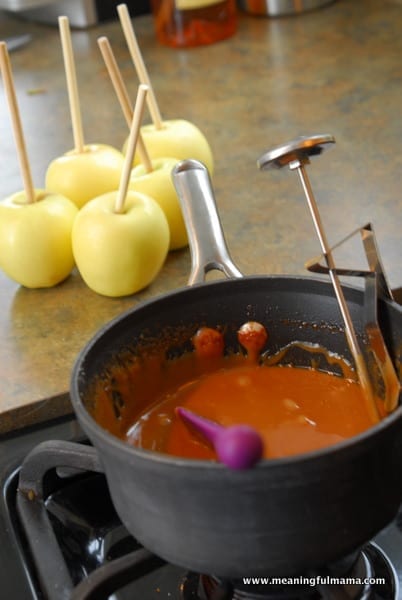
We stuck the wooden dowels down the center of the apples, and the caramel was done.
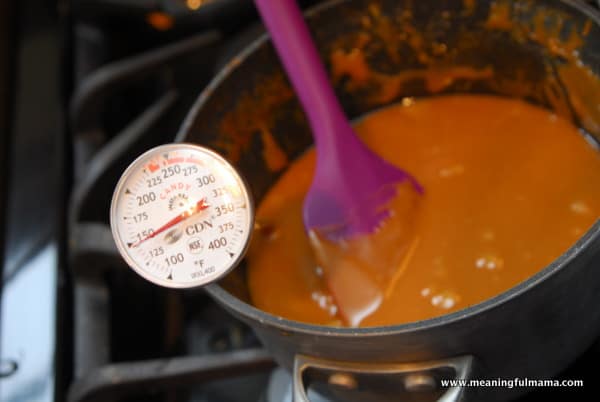
You can dip your apples right away, but I have found the caramel then drips down the sides of the apple a bit more. I let mine cool to 150. I’d probably suggest letting it cool to 175-200 because mine was a tad thick. I do kind of like it that way though.
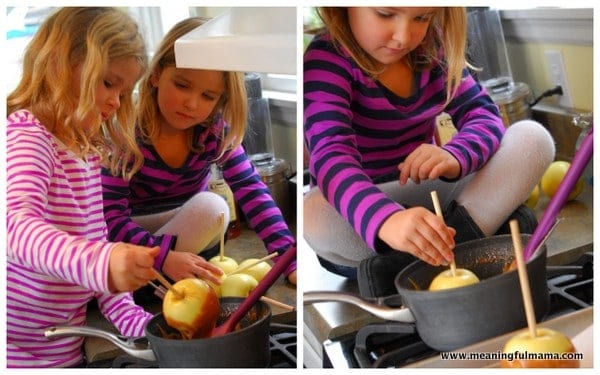
The girls were then able to dip the apples. They did the initial dipping, and I rolled it a bit around the edges so it went a bit more to the top.

Gorgeous.
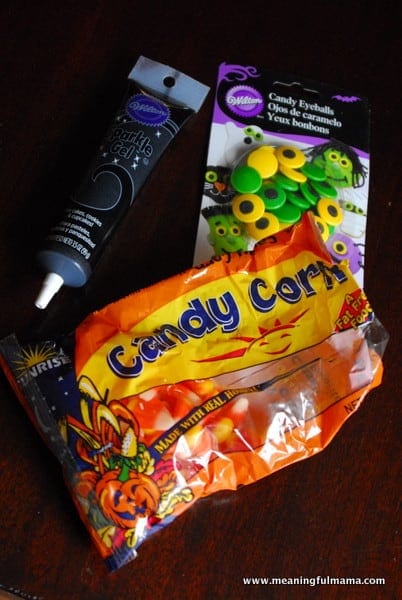
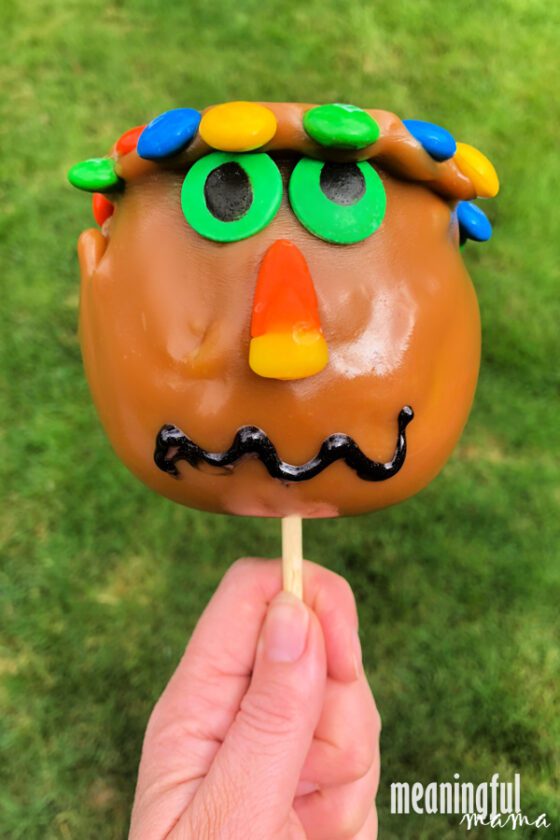
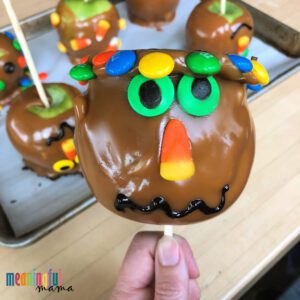
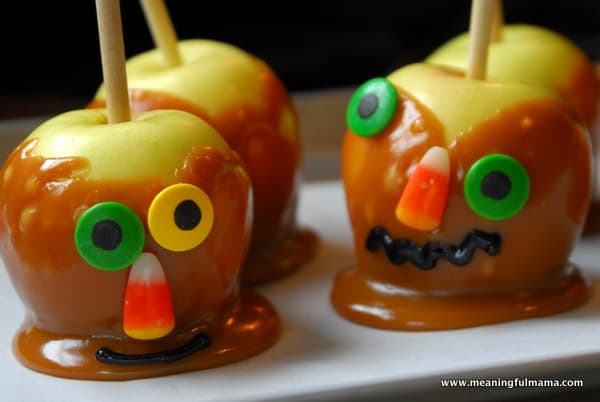
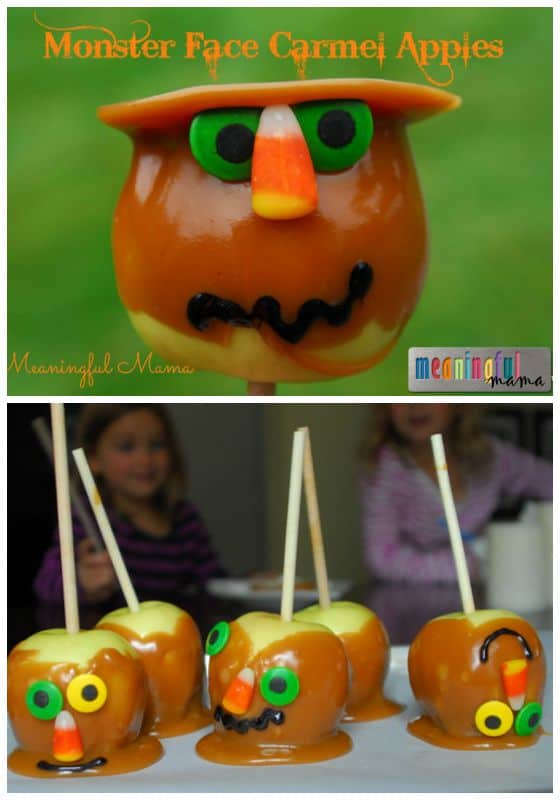
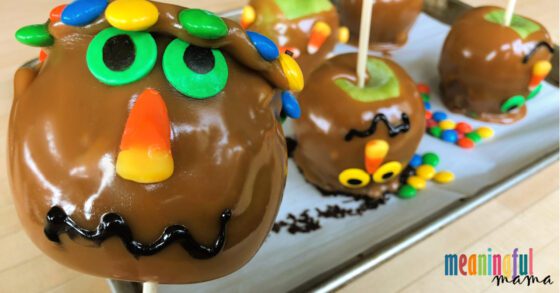
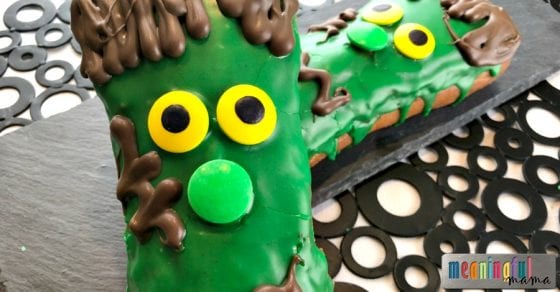
These are the decorating items I needed to make the monster faces possible: candy corn, Wilton candy eyes, and gel writer. At a later date, we also decorated with sprinkles and M&M’s.
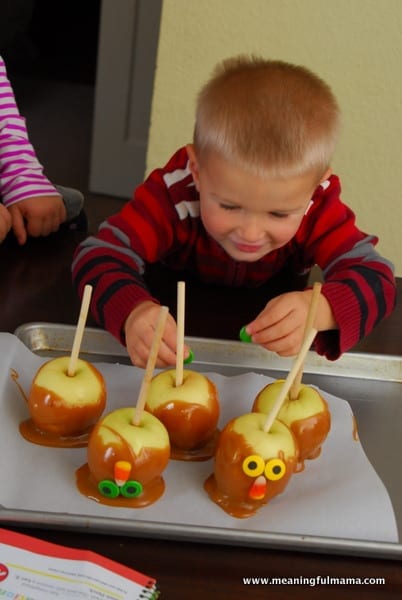
I let the apples cool slightly. Each of my kids was able to make their own face, adding the eyes and nose. I actually did the mouths. They directed me in the kind of mouth they wanted.
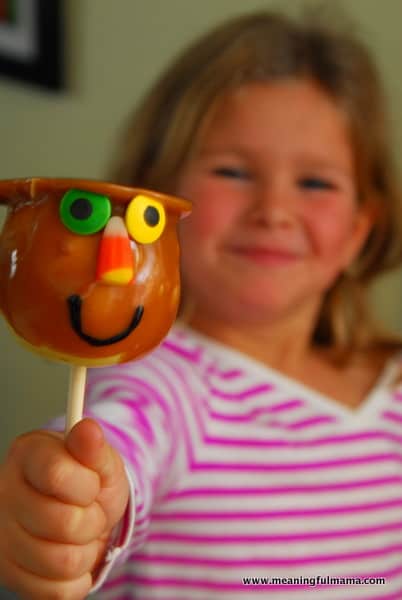
Here are a couple of the faces made by Kenzie and Corban. I told the kids they could make their faces right side up so they could see the monster while it was sitting on the plate or make them upside down so the monster is right side up while they are eating it.

Abby did hers upside down, which I highly recommend.

The caramel apple monsters turned out super cute.
Abby was excited to share hers with you and then eat it as a snack the next day. Because the caramel is made with sweetened condensed milk, I stored it in the refrigerator, which worked well. We had them the next day, but I’m sure they could stay in the refrigerator for a few days.
One thing to keep in mind is that after a while, the candy begins to droop. This was after about 4 hours. I think that is why making them upside down is so great. The eyes drooped into the top caramel and looked like a Frankenstein-type character.
We all loved making (and eating) these.
Note: This post was originally created in 2013. It was updated in 2023 with more pictures and instructions. We have made these together a few times, so I wanted to add some new pictures.
Want More Fun Halloween Food Ideas?


Amazing. The things you do with your kids. You are a patient and good mother. So inspiring.