It’s autumn, and I’m excited to bring you this easy leaf craft that teaches symmetry to celebrate the season. This is a great fall craft idea for elementary-aged kids.
Are you looking for other leaf crafts? Check out these salt dough leaf bowls.
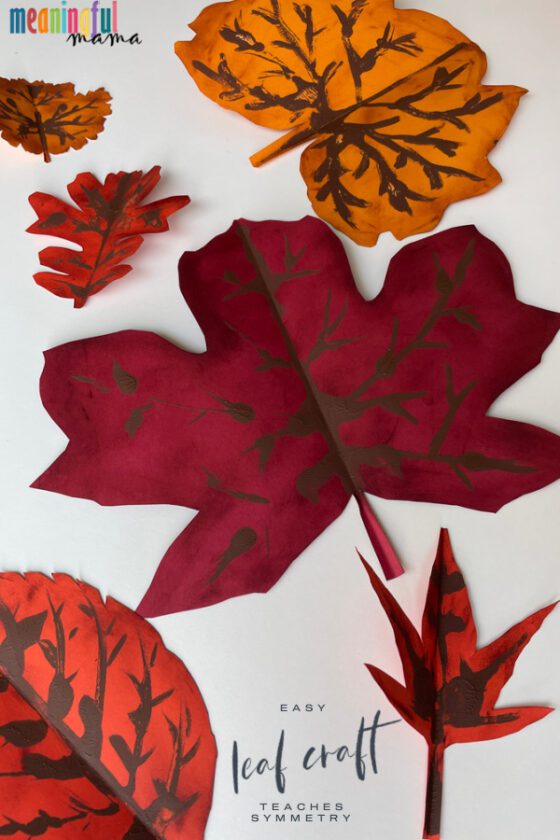
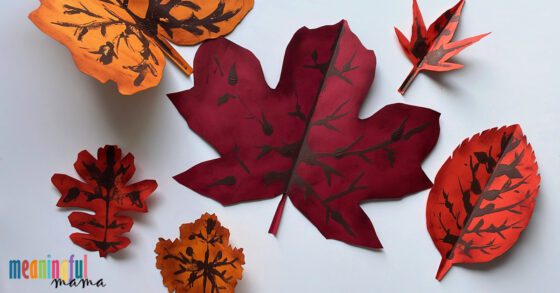
Easy Leaf Craft that Teaches Symmetry
Autumn is the perfect season to embrace the beauty of God’s artistry. The vibrant hues of falling leaves and the crisp, cool air inspire us to get creative and bring a touch of the outdoors inside our homes.
Exploring the outdoors with your kids is a fun way to be active and enjoy God’s beautiful creation. This leaf craft not only gets you outside but also brings you right back inside to not only work on creativity but also learn about symmetry.
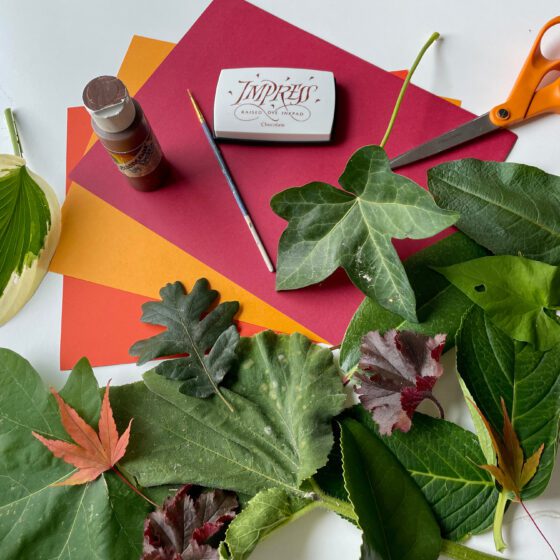
Materials Needed for this Leaf Symmetry Craft
This post contains Amazon affiliate links. Anything you purchase through these links goes to help support the free resources I provide at Meaningful Mama. Thanks for your support.
- Autumn Colored Stock Paper
- Scissors
- Small Paint Brush
- Brown Craft Paint
- Brown Stamp Pad
- Sponge Brush (not pictured)
- Pencil (not pictured)
How to do This Easy Leaf Craft that Teaches Symmetry (video tutorial to follow)
- The first thing I encourage you to do is to get outside and gather leaves with your kids. Take the time to slow down and let them really explore nature. Look at bugs. Play with sticks. Talk about colors. Consider the intricacies of creation. As you explore, pick up different leaves you find.
- When you get back home or to your classroom, talk about the different kinds of leaves. Try and identify the ones you brought home. This list with leaf drawings should help.
- Next, discuss symmetry with your kids. The definition of symmetry is “the quality of being made up of exactly similar parts facing each other or around an axis.” Here’s a good site with examples of symmetry to show kids.
- Have kids look at their leaves and try and decide if their leaf has any kind of symmetry. Like so many things in nature, there will not be exact symmetry. While there will be leaves that look like they have a lot of symmetry, encourage children to look closely at the veins to notice the differences. There won’t be perfect symmetry, but there are still many similarities in the two halves that make them feel symmetrical. For this craft, we will be making the painted veins more symmetrical than occurs in nature.
- Using scissors, have children cut their leaves in half, following their stem line up as a guide.
- Next, fold the autumn-colored paper in half. Consider burgundy, orange, mustard yellow, or army green as potential leaf colors.
- Kids will place the cut side of their leaves along the folded edge of the paper. Time to trace their half-leaves using a pencil. Encourage kids to make up a stem at the bottom.
- Get out those scissors again. Time to cut out the traced leaf. Make sure kids do not cut along the folded side of the paper.
- Once cut, kids can open up their leaves to reveal a perfectly symmetrical leaf. Have them look at the symmetry again and discuss how, at this point, the leaf is perfectly symmetrical.
- Time to make it not symmetrical by adding in some shading with your stamp pad and sponge brush. This shading gives the leaf texture and depth. It makes the leaf look more realistic, but you can skip this step too. The process is to simply dab the sponge brush on the stamp pad, and then have the kids dab the leaf with the brush, focusing on the edges. I’ve used the technique before on our thankfulness leaf wreath.
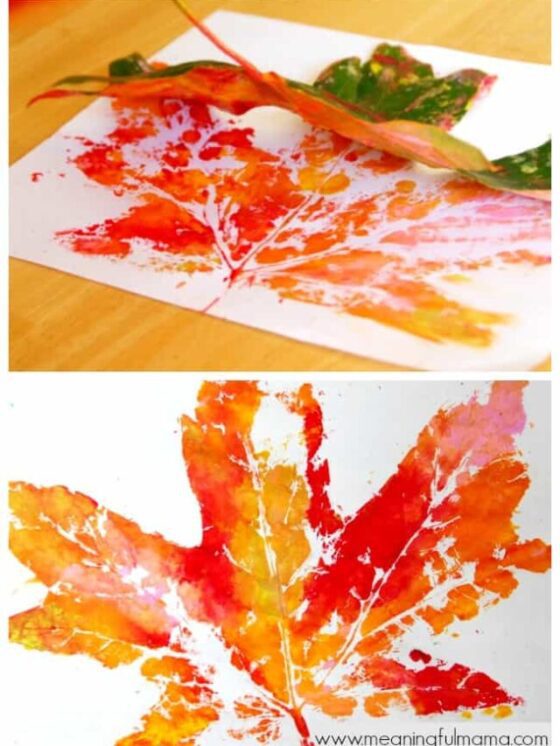
- The next thing to do is to have kids paint veins on ONE side of their leaf using brown paint and a small paintbrush. They can really examine their leaves. Providing a magnifying glass for deeper exploration would be fun. You might want to experiment first so you can best direct this process, but you wouldn’t want the kids to get too detailed or too thick of paint because when the leaf is folded, it will look like a big blob. If kids don’t use enough paint, the image won’t transfer. The goal is to work fairly quickly too so that paint doesn’t dry before they fold the leaves in half. It might be helpful for children to draw the veins with a pencil before they paint so they don’t have to think about their design too much and can work quickly.
- The final step is to fold the leaf in half and rub a finger over the paper to squish the two sides together. When they open it back up, they will see a mostly symmetrical design. If some of the paint wasn’t thick enough or dried too quickly, they can go over those with the paint and squish together again.
You can display your beautiful symmetry leaves in the windows, on the walls, or they can even be put in a frame for a more special keepsake.
I hope you have fun celebrating God’s creativity while taking a part in your own.
Leaf Craft Video Tutorial
Want More Fall Leaf Crafts?