If you are wondering how to make a baby Yoda cake, you have come to the right place. I’m going to give you all the resources you need to make your Grogu cake come to life. Mandalorian Friends, welcome to Meaningful Mama.
Cakes are a fun hobby of mine. While I’d love for you to check out all my cakes, you might want to read my Cake Making 101 and Cake Making 201 tutorials so you can get a good grasp of the basics. Here is my list of “must haves” for cake decorating also. All of those posts are the foundation for cake making.
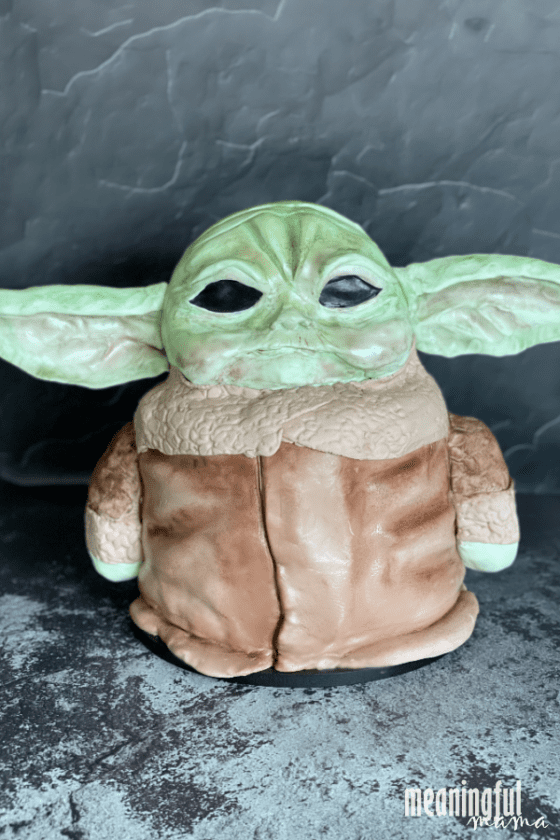
How to Make a Baby Yoda Cake
A nurse friend of mine asked me to make a unicorn cake for a 6 year old who was just finishing her cancer treatment. Of course! Of course I’m willing to do that. Any child that battles cancer deserves at the very least a great cake.
Unicorn cakes are on trend, and I even made one with my niece. Check it out on Instagram and follow along if you aren’t yet. I’d love to have you as a friend there. I was ready to make this sweet girl a sweet unicorn cake.
Then, I received a text from my friend. Never mind about unicorn cake, she wants a Baby Yoda cake. Oh. Wow. This was going to challenge my cake making skills. I actually became nervous about the project.
I knew I’d want to use Rice Krispies for the head, although I’d never done this technique before. Modeling chocolate was also a product I’d never used. I thought it was the right solution for the head and face. So, I took a big breath and prepared.
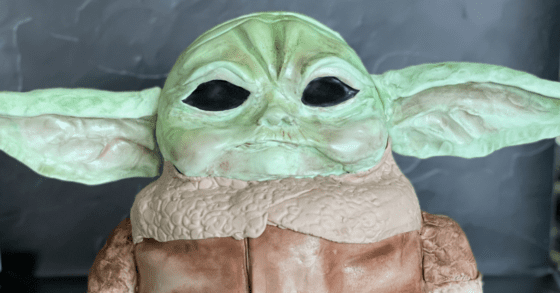
Materials Needed to Make a Baby Yoda Cake
- Cake – I made a 5 layer, 8″ diameter cake in chocolate using my favorite chocolate cake recipe. I tripled the recipe.
- 8″ Cake Circles
- Buttercream Frosting – I used my favorite buttercream frosting recipe, but this Trophy buttercream frosting recipe is a great option if you don’t want to work about refrigeration.
- Rice Krispies Treats for Head – I don’t remember how much I made, but the tutorial I followed is embedded below.
- Modeling Chocolate – 1 pound
- Fondant – white – 5 lbs- Note: I much prefer the fondant I linked to rather than Wilton, which I think tastes metallic. The Satin Ice tastes more like soft Lucky Charms marshmallows.
- Black Fondant
- Food coloring – brown and ivory
- Candy Colors
- Edible Luster Dust Powder – Pink, Brown & Gold
- Brown Edible Marker
- Baking Brushes
- Modeling Chocolate and Fondant Molding Tools
- Fondant Rolling Pin
- Powdered Sugar
- Pizza Cutter
- Stick Pin
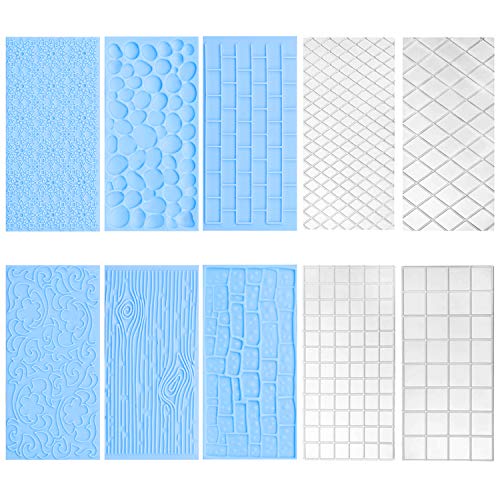
- Stone Texture Impression Mold
- Wooden Dowels
- Base for Cake – I found a round, wooden, black, 9-10″ circle in the dollar section at Target. We added a dowel to the center to add stability to the cake.
Here are the Items You Will Need
Satin Ice ChocoPan Bright White Modeling Chocolate, 1 PoundSatin Ice White Fondant, Vanilla, 5 Pounds
21 Pieces Cookie Decorating Tools Set, Include Cake Decoration Brushes, Sugar Stir Needle Cookie Scriber Needles and Fondant Cake Decorating Sculpting Modeling Tools for Cookie Cake Fondant Decoration
Fondant Rolling Pin with Rings, 20-Inch, Non-stick, long, plastic for cake decorating, pizza and cookie rolling. By CiE
OXO SteeL Pizza Wheel and Cutter
10Pcs/Set Fondant Impression Mat, Tree Bark Brick Stone Wall Flower Cobblestone Diamond Quilted Grid Texture Design Embossed Lace Embossing Mold Decorating Tools for Wedding Cake Border Decoration
Dowel Rods Wood Sticks Wooden Dowel Rods – 1 x 36 Inch Unfinished Hardwood Sticks – for Crafts and DIYers – 2 Pieces by Woodpeckers
Satin Ice Black Fondant, Vanilla, 4.4 Ounces
Luster Dust Set 8 Colors (3 grams each container) for Cake, Fondant, Gum Paste
10 Pieces Cake Baking Brushes Food Paint Brush for Chocolate Sugar Cookie Decoration Brushes Set Cookie Decorating Supplies with Fondant and Gum Paste Tool (Purple)
Wilton 8-Inch Cake Circle, 12-Pack
Wilton Candy Colors .25oz 4/PkgPink, Green, Violet & Black
Americolor Soft Gel Paste Food Coloring, Chocolate Brown Net WT. .75oz
Wilton Icing Colors, 1-Ounce, Ivory
Directions for Making a Grogu Cake
To understand the dimensions, my Baby Yoda cake was made from 5 x 8″ in diameter cake layers that were about 1.25″ tall each. There was buttercream between each one. Then, the head made of Rice Krispies. The whole Baby Yoda Cake consisted of 2/3 body and 1/3 head.
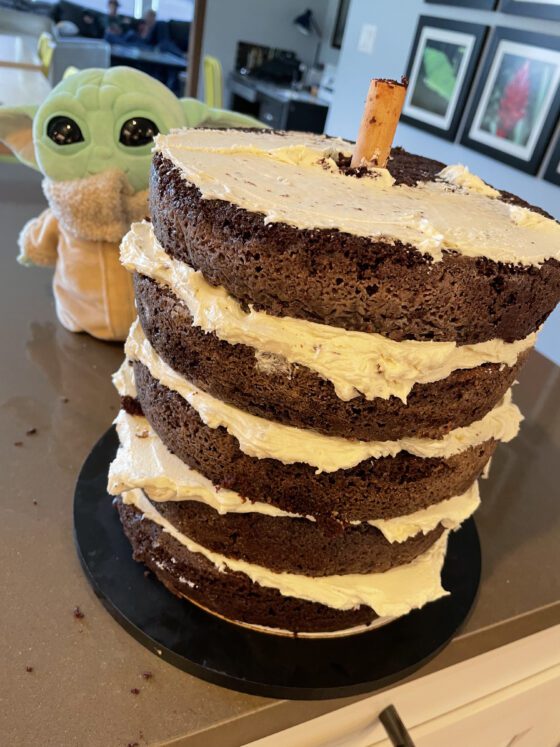
When analyzing how to make a Baby Yoda cake, I realized creating stability was important since the cake was stacked taller.
In the dollar section at Target, I found a black round wooden circle. I think it was intended to be made into a sign, but it seemed like the perfect cake base. I believe it was 10″ in diameter – maybe more. My husband cut a shallow hole the size of a wooden dowel in the base plate. He then used wood glue to secure the dowel to the black, round cake base.
The next step was to stack my cakes. Cutting a hole into the center of the cakes made it so I could easily slip the cakes onto the cake plate. I had to cut it because I always freeze my cakes.
It’s simple. Cake. Buttercream. Cake. Buttercream…and on and on until it is stacked.
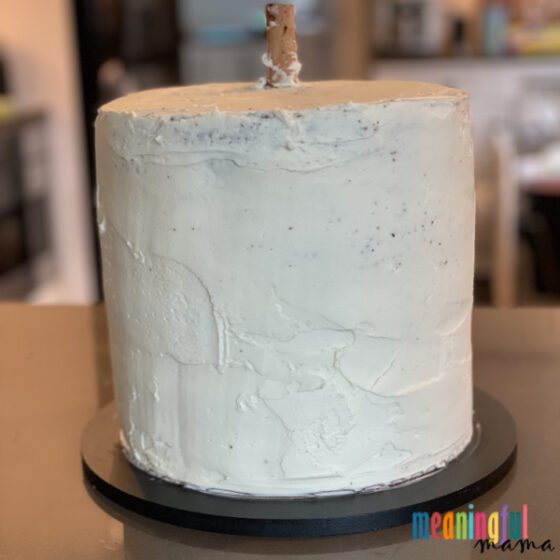
The next step is the crumb coat. This is the opportunity to seal in all those loose crumbs. After doing a crumb coat, I always stick the cake into the refrigerator to help secure the crumbs. Next, do one more thin layer before adding the fondant.
Covering a Baby Yoda Cake in Fondant
It’s time to color your fondant. I used a mixture of brown and ivory to get the color I wanted for the body. Work quickly because over kneading can cause fondant to dry out.
Once color is completely combined, roll out the fondant to 1/4″ thick. Please visit my cake making 201 post to learn all of my top tricks for working with fondant.
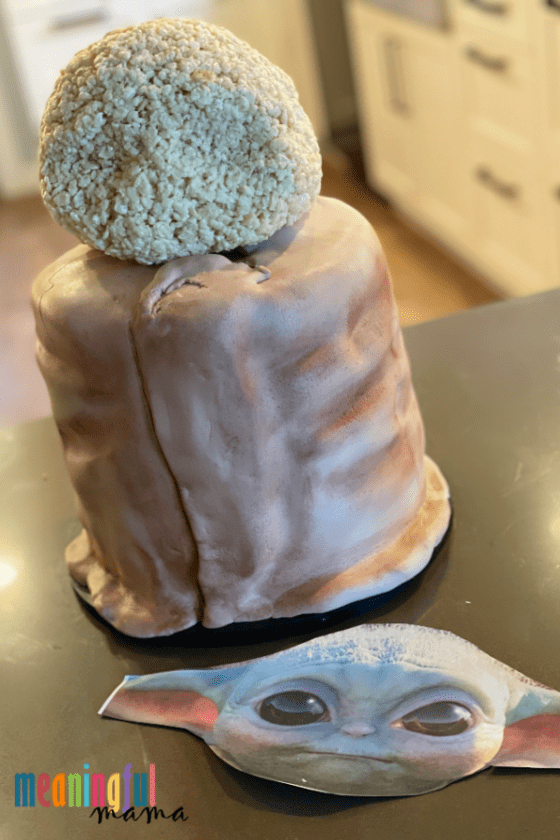
Unlike traditional fondant cakes where they get covered from the top, I wrapped this cake around the sides of the cake so I could have it look like a jacket. Normally, I am trying to get a very clean and straight look like this. It was refreshing to be OK with a less-than perfect look.
I further shaped the clothing to create curves, divots and folds.
To create dimension, I used edible brown and gold luster dust to shade and highlight. An edible marker was used to create some of the darker and more strong lines.
How to Make a Baby Yoda Head out of Rice Krispies
These next steps were new to me. I have not used Rice Krispies treats, nor have I used modeling chocolate. Because of this, I want to share two videos that were helpful on this stage of the process.
The first video is all about using Rice Krispies in cake design. I used his recipe for the Baby Yoda cake head.
The next video I used was the amazing Natalie Sideserf, one of Duff’s team members. She has a great tutorial for a fabulous Baby Yoda cake. While the size of mine was different, and how I did the base was different, I used a lot of her video tutorial as a guide for covering the head in modeling chocolate, sculpting and designing the ears.
I highly recommend watching these two tutorials to help you in the process. I wanted to add my own instructions on the web since my Grogu cake was a totally different scale and a bit more simplified – mainly because of the difference in how we did the eyes. Her’s are amazing but takes it to a whole new level of design.
I also wanted to prove that a more amateur baker could create a great Baby Yoda cake.
Using this photo (I believe), I printed out Baby Yoda’s head to size. I used this as a template for the shape of the head as well as the eye and mouth template. Natalie Sideserf shows how to do this in her video. I shaped the head, making an indentation for the eye placement and a bit more build up of the forehead and cheek placements, but you can build it up with modeling chocolate also.
Using Modeling Chocolate for a Baby Yoda Cake Head
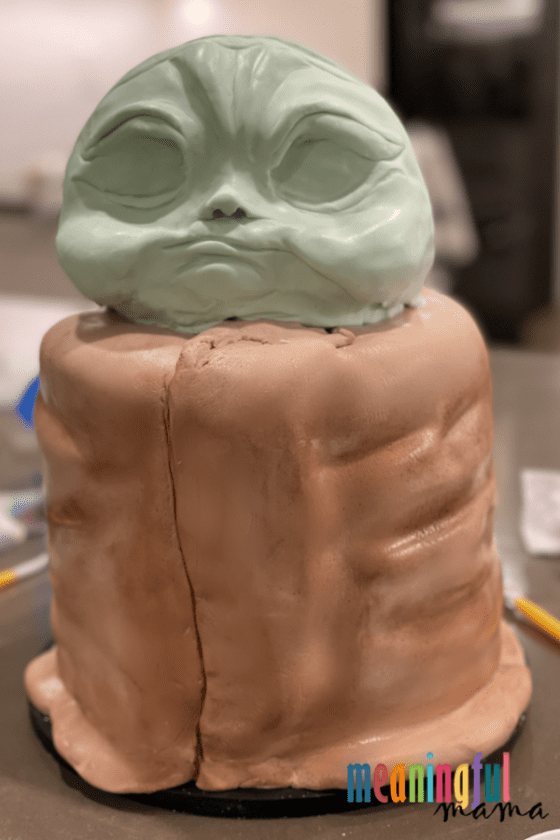
As mentioned, this was my first time using modeling chocolate, and I fell in love with it. It’s really simple to use – easier than fondant, in my opinion, so don’t be intimidated.
Next, color the one pound of modeling chocolate using green candy color, which is different than traditional food coloring. It is important to use coloring that works with chocolate. Start with a bit of color and then add more. You can always add more color, but you can’t take it out.
Once combined, roll out the modeling chocolate to cover the head. It is now time to start sculpting and shaping. When doing this, it is good to have on rubber gloves for a more smooth experience.
Modeling chocolate is amazing in that it just smooths out when you rub it with your fingers. It blends into itself easily. Take the time to build out the forehead, brows, nose, mouth, chin and cheeks. Your modeling tools will help in this process.
The above picture shows the sculpting in process. I continued to smooth until satisfied, but continue reading for some advice about that because I learned a lesson when I started fussing too much.
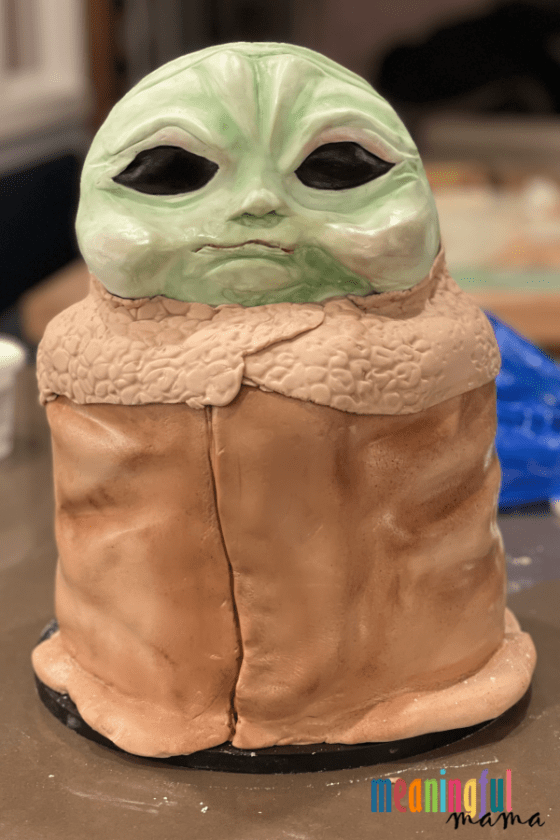
Time to tackle the eyes. Mine were made with black fondant. I rolled out fondant to 1/8″ thick and cut them to size using my template. Stick them in place. Fold the modeling chocolate over the black fondant so the eyes look inset.
Black fondant tip: Don’t try and make black fondant from white fondant using black food coloring. It will never get there. The result will be purple. Before there were so many options for purchasing black fondant, I used to make black fondant by adding food coloring to chocolate fondant. Now, you can find a bunch of amounts and brands of black fondant for sale.
The next thing to make is the fleecy-looking fold over piece of Grogu’s jacket. Color a piece of fondant a lighter brown. Then roll out a long strip. I’ll save you some math. The circumference of an 8″ circle is 25.12″, so roll it out about 26 inches or more to get an overlapping piece.
To create texture, get a stone-like texture mat and roll or press that onto the fondant, overlapping so it doesn’t look as much like stone. This same technique will be used for the cuffs of his sleeves.
Next, I started to add color and texture to the face using pink, brown and green luster dust. Shadows are deep. Highlights are the parts that protrude.
I promised to share my over-fussing experience. The luster dust was added, and then I wanted to continue to smooth and shape the modeling chocolate. I recommend not doing that. It became blotchy in areas. Complete your modeling chocolate smoothing and shaping and then add the luster dust as the final step. Don’t mess with it anymore!
How to Make a Baby Yoda Cake…Continued
We are getting there. Time for the arms and ears.
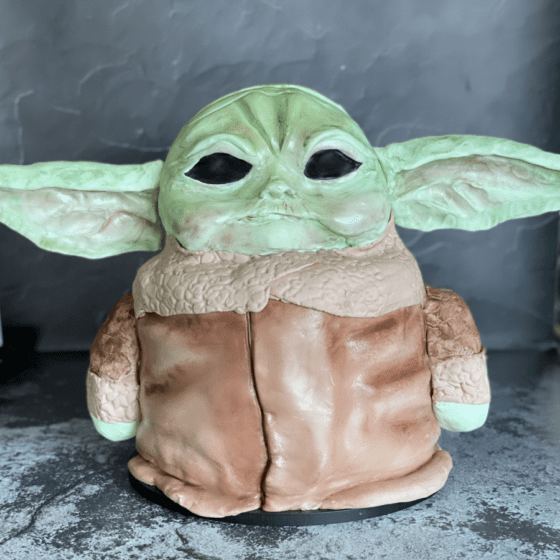
The arms were made from Rice Krispies and covered with fondant and modeling chocolate. Once made, they were attached to the sides using shortened dowels.
For the ears, I used long dowels. The top flap of the ear disguises the dowel. Shape them to look like an ear. Watch Natalie’s tutorial to see the magic in action. Use luster dust to add to the dimension and texture.
I then stuck the completed ears into an empty cereal box and let them set a bit. They may have been OK without that, but I was more comfortable getting some chill on them. I taped up the box before I put it in the refrigerator. After a couple hours (probably don’t need to go that long), I kept them in the box for a bit to more slowly cool.
Note: When working with modeling chocolate or fondant that goes into the refrigerator, I always follow a certain protocol. The first step is to box it completely and stick it in the refrigerator. When it’s getting closer to serving the cake, I pull the box out of the refrigerator. It’s tempting open the box and peek in, but I wouldn’t recommend it.
The purpose of leaving it in the box for a bit is to let it acclimate to room temperature. Taking it unboxed from the refrigerator to the room will result in condensation. Opening the box too early will have the same results. The goal is to bring it to room temperature gradually to avoid sweating.
Fondant cakes can be kept at room temperature unless they have a buttercream that has an ingredient like whipping cream. I love my whipping cream buttercream, but in retrospect, I wish I had used one without cream to avoid the refrigeration process. If you avoid refrigeration, fondant cakes can be stored in a cool, dry place for 3-4 days.
Here’s more about storing items made from modeling chocolate from someone more experienced than me.
Once the ears are out of the refrigerator, stick the dowels into the head. My dowel went about 1/4 of the way through the head. I would transport the cake without the ears in the head. Attach them right before presenting.
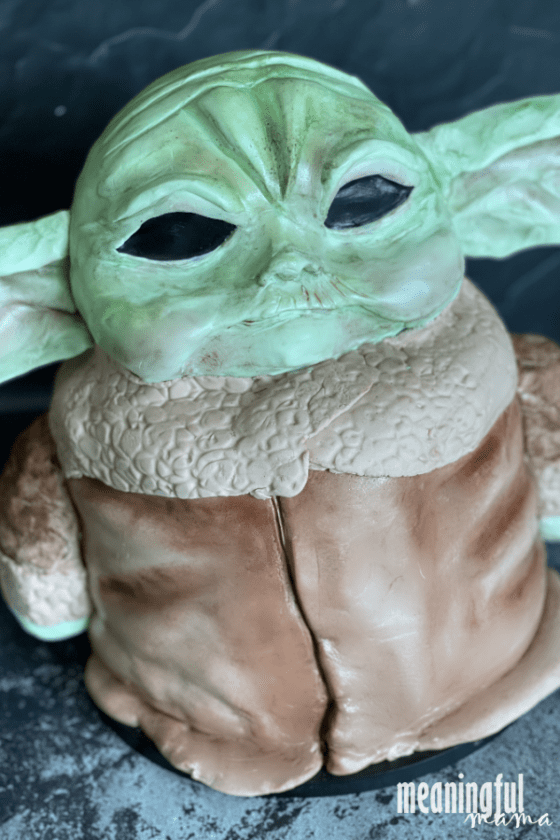
Did I hit it all? I think I hit it all. If you follow the instructions on how to make a Baby Yoda cake, I think your will please your biggest Mandalorian fans. Have fun with it!
Want More Fun Cake Ideas?
