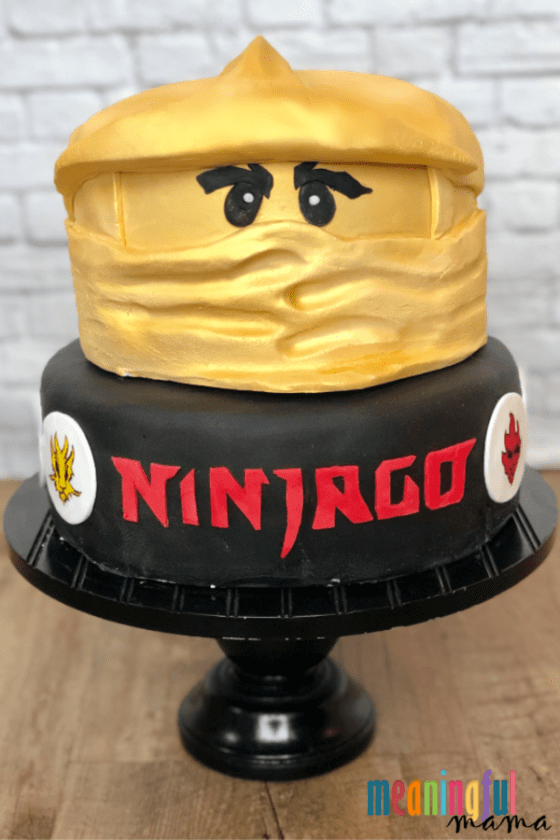
I am hoping this cake decorating tutorial that teaches how to make LEGO Ninjago Cake is really helpful as you seek to create the ultimate cake for your child’s Ninjago birthday party.
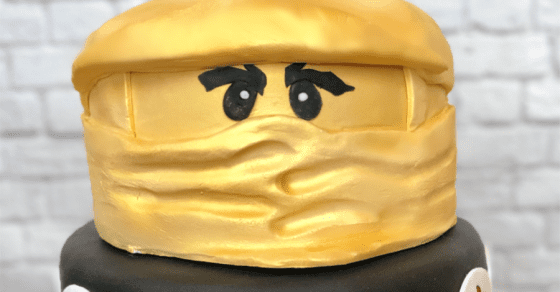
My son described exactly what he wanted for his cake. The top would feature Lloyd, the Golden Ninja. The bottom tier would have all of the symbols of the different Ninjago characters.
Cake decorating has been such a fun hobby for me. If you just enjoy looking at cake design, I invite you to check out my cake tab for more inspiration and tutorials.
How to Make a LEGO Ninjago Cake
I want to lay out for you my step-by-step process for making this LEGO Ninjago Cake. I made up the process as I went along. Hopefully, this tutorial helps so that you don’t have to re-invent the wheel.
My Cake Making 101 should help you bake and frost the cake. Cake Making 201 contains my lessons on working with fondant.
For this cake, I used some of my favorite recipes. The white velvet cake recipe I have is super easy to make and always gets rave reviews. My buttercream frosting recipe pairs perfectly with any cake recipe!
Materials Needed to Make LEGO Ninjago Cake
- 3 layer 8 inch cake
- 2 layer 10 inch cake
- Fondant I’m adding an affiliate link to my favorite. Some fondant, in my opinion, tastes metallic. This one is easy to work with and has Lucky Charm marshmallow-like flavor. I had a five pound container of white, and I used a bit over half of it. I used a two pound container of black fondant.
- 2 Cans of Gold Edible Spray Paint
- Edible Paint Markers
- Fondant Tools
- Exacto Knife
- Red Food Coloring
NOTE ABOUT BLACK FONDANT: You will want to buy black fondant. Making it from white is virtually impossible. You would need to add loads and loads of black food coloring, and it never truly gets black. It takes on a purple/blue tint. Before black fondant was available, I would buy chocolate fondant and work my way up from there. I’m so glad that buying black fondant is now an option.
How to Make a LEGO Ninjago Cake – Step by Step Written and Visual Instructions
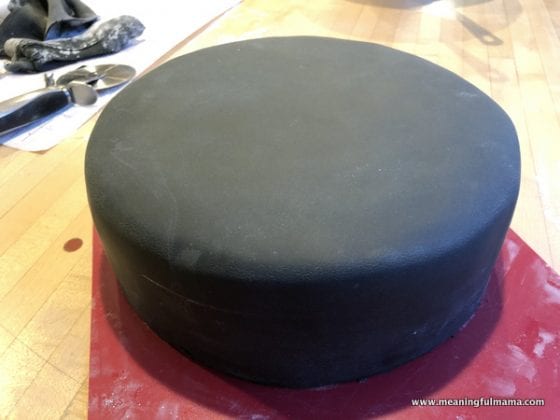
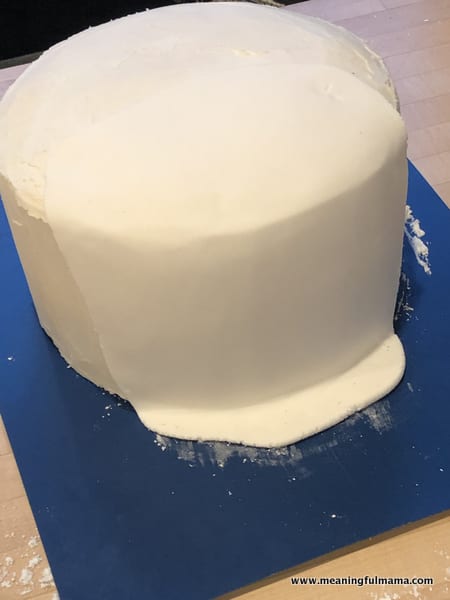
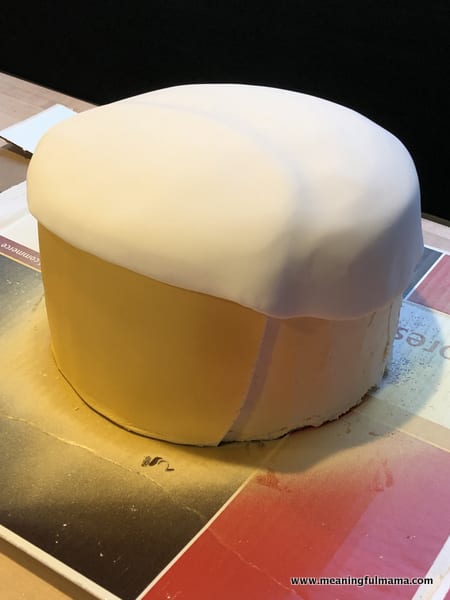
The first step is to cover the bottom tier in black fondant. 2 lbs was a perfect amount for this tier.
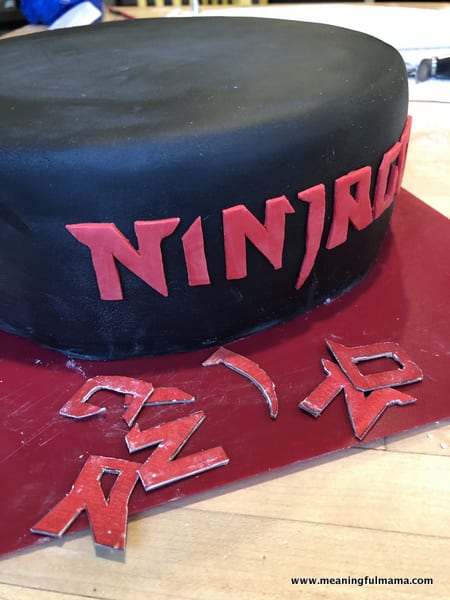
The next thing to do is print out the Ninjago word in the proper font. We happened to have a LEGO box that had the size that fit well on the cake (about 2″). Cut those out with an Exacto knife.
Make a small amount of red colored food coloring. Roll it out. Lay your letters on top of the red fondant and use your Exacto knife to cut around those.
Apply a small amount of water to the back of your letters (one at a time). Attach them to the cake, making sure you use a ruler to make it level.
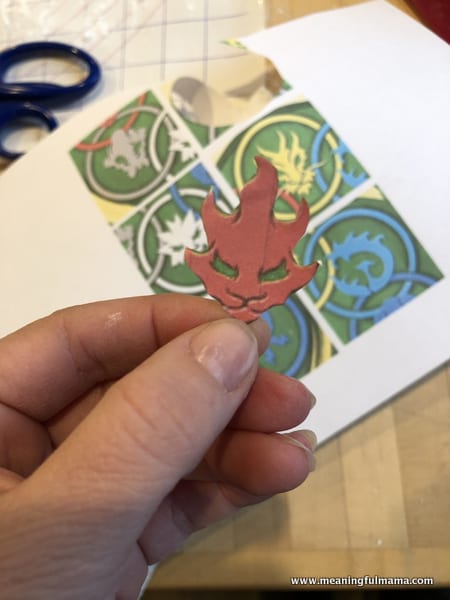
Next you will want to find all of the Ninjago symbols online and print them out to about 1.5″ tall. Using your Exacto knife, cut out around the edge of the image.
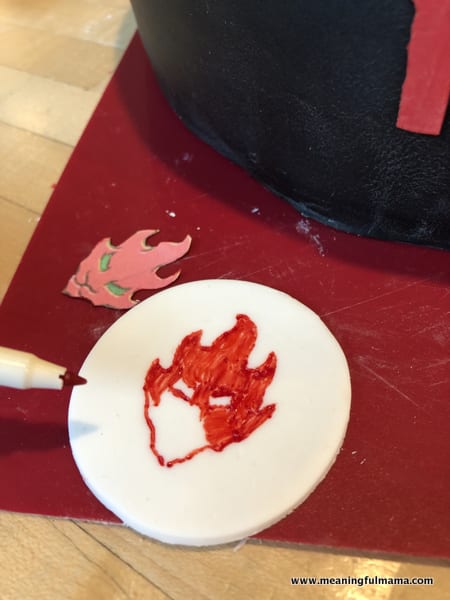
Cut out 2.5″ white fondant circles. Using edible markers, trace your images onto the white circle and color them in. There will be some artistic components here, as you will need to copy the inside of the image.
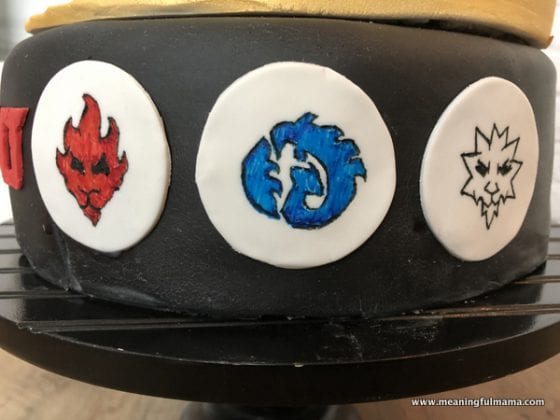
Attach these circles around the bottom tier of your cake with a little bit of water.
Good news! The bottom is done.
Golden Ninja Top Tier Decorating Instructions
Roll out some white fondant, big enough to drape down the front and swoop about 1/3 back on the top of the tier.
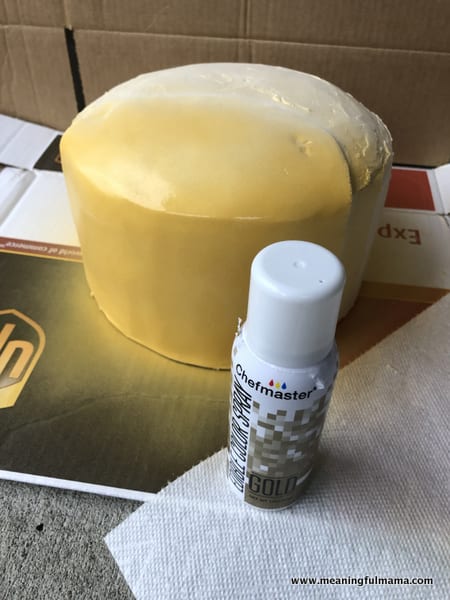
Using edible gold spray paint and the instructions on the top of the container, spray paint this first piece of fondant gold.
Roll out a piece of fondant large enough to cover the top half of your cake. The back will swoop lower than the front. You will want to visaully provide enough room on the front to fit the eyes.
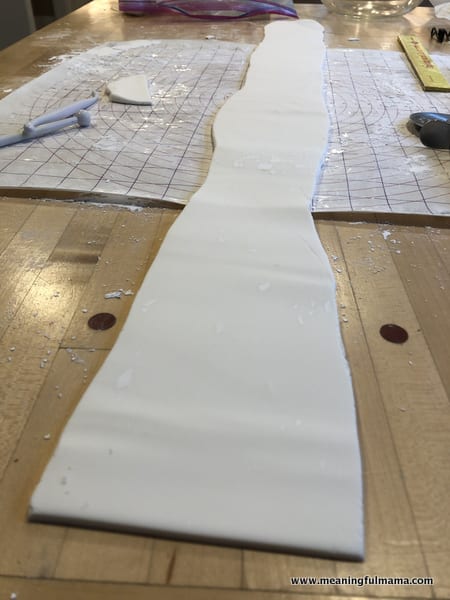
Roll out a long piece of white fondant. This needs to go all around your cake, so if your cake is 8 inches the circumference is over 25. I would roll out a 26-27″ piece.
You want to make it tall enough also. Don’t worry about it being exact because you can have it drape off the bottom and then trim it with a pizza cutter.
I intentionally had it curve up slightly in the center so as to accommodate the curve up of the nose area.
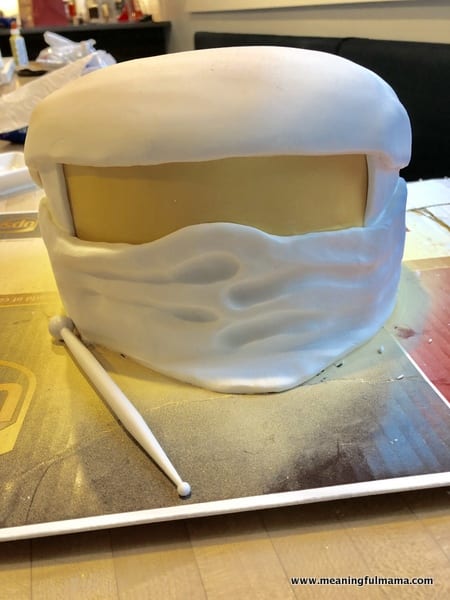
Wrap the fondant around the base of this tier. Trim the bottom edge accordingly. I had the front swoop out a bit. The top edge you will want to work and smooth with your finger and/or a fondant tool.
Using the ball tool, work the “folds” into the front of the face mask.
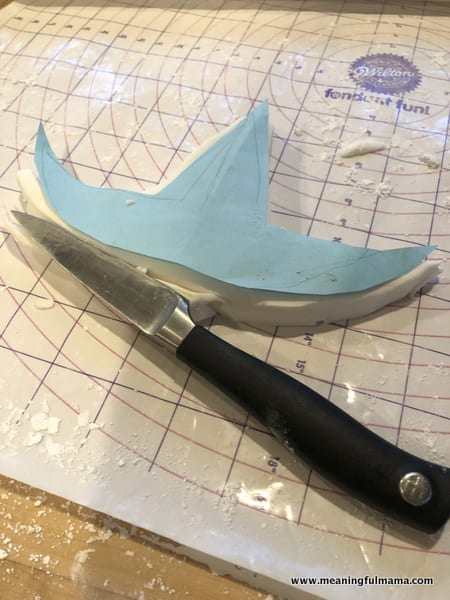
The next step is to cut out a thick piece of fondant in the shape shown above. I eyeballed this. I took a piece of paper and drew out this main shape to fit the front and top of my mask.
Next, I folded it in half and cut it out so that I could get the piece symmetrical.
Attach this with a little bit of water and shape with our fingers.
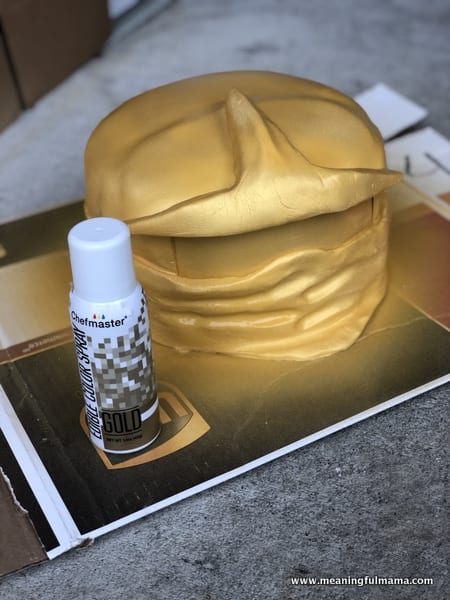
Spray paint the entire top tier gold. You night need multiple lite layers. I set up a little spraying station outside.
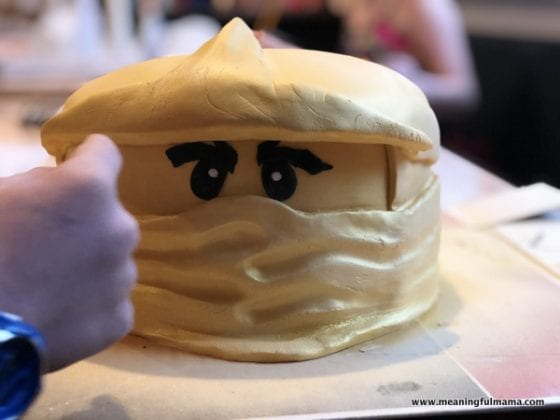
The eyes and the eye brows come next. I used oval cookie cutters for the black eyes and the top (smaller side) of a small piping tip to cut out the white center. The eye brows I just hand drew, cut out and traced onto fondant.
Stick the eyes and eye brows onto the cake with a tiny bit of water.
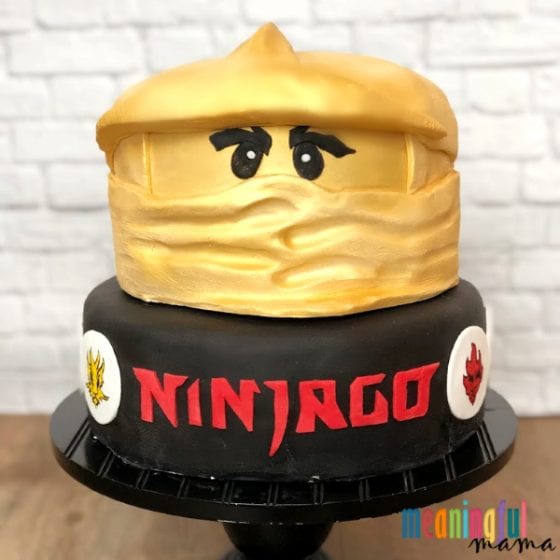
Time to stack your cake and be done. Look here for my tips to stacking a cake. You will definitely want to add the supports suggested because you don’t want too much weight on top of your bottom tier.
How to Make a LEGO Ninjago Cake
And there you have your instructions on how to make a LEGO Ninjago cake. I completely recognize that it is probably a very small percentage of the population that might actually use this tutorial.
That said, maybe you are like me and everyone else watching all those cake decorating shows out there. You love the process and are intrigued by the outcome. While you might not build this exact cake, these step-by-step instructions might just inspire your own cake designs.
Want More Cake Decorating Inspiration?


Well explained and nice Cake. I will use it as tutorial .
I’d love to see your results. Make sure to tag me on social media or send me a picture if you think of it. Thanks so much.
[…] 4. LEGO Ninjago Cake […]