I set out to find or create the best homemade puffy paint recipe and had great results after developing my own.
As I looked at homemade puffy paint recipes, I saw a variety of outcomes but didn’t loved the finished product.
After trying a number of DIY puffy paint recipes on the web, I was unsatisfied with the results. Therefore, I set out to create what I believe to be the best.
I will teach you how to make DIY puffy paint recipe that really works.

The Best Homemade Puffy Paint Recipe that Really Works – Materials Needed
- 3/4 cup shaving cream

- 1/4 cup white glue – We used Elmer’s School Glue (If the consistency isn’t what you’d like you can add up to 1/8 cup more glue…see notes below)
- 1/4 cup flour
- Food Coloring

 – We used Elmer’s School Glue (If the consistency isn’t what you’d like you can add up to 1/8 cup more glue…see notes below)

Step-by-Step Instructions on How to Make the Best DIY Puffy Paints
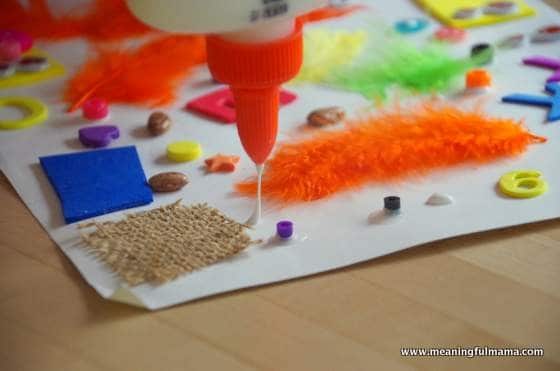
- Mix all ingredients together until completely combined.
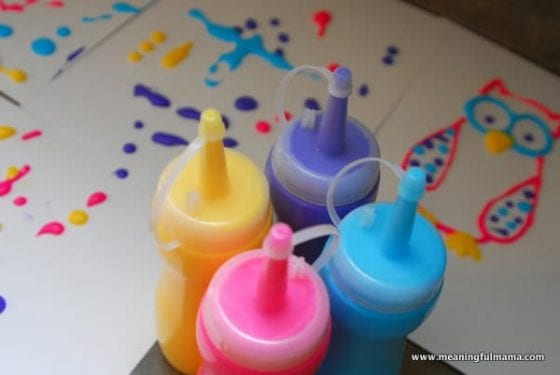
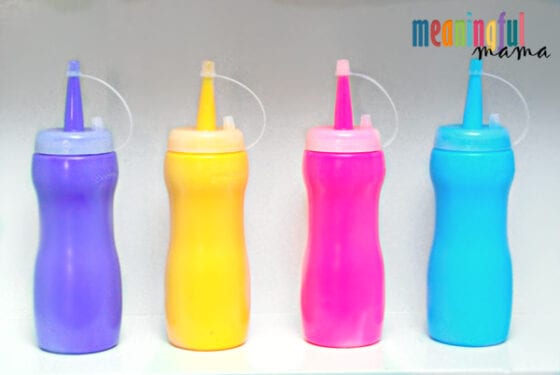
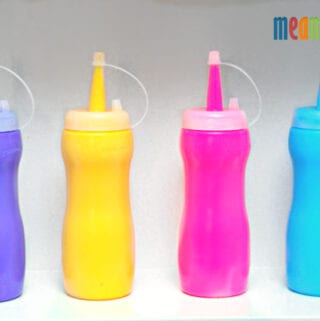
- Putting your puffy paints in a squeeze bottle works very well to help keep the puffy look. You can also use paint brushes for just a thicker consistency and texture.
This recipe dries in the air. You will want to use Plastic Squeeze Bottles![]() for this activity.
for this activity.
You will find the puffy paint ingredients easy to find and affordable to buy.
Note: See video tutorial at the bottom of this post if you are a visual learner.
Best Homemade Puffy Paint Recipe that Really Works – Reader Tips
Reader Tip: One woman (see comments below) said the order in which you add things is extremely important. Please mix in order listed. She suggested adding the shaving cream and glue and then adding flour a bit at a time until you get the consistency desired.
Reader Tip: A suggestion on getting the stuff into the containers: Spoon it in a Quart size zip lock and close. Then cut a small hole on the corner of the zip lock then squeeze the stuff into the containers. You can also use the zip locks as your tool to squeeze paint if you do not have a squeeze bottle. Just cut the hole in the corner very small.
Reader Tip: While I have made this multiple times just using 1/4 cup of glue, one reader noted that by adding a bit more (maybe 1/8 cup) she was able to get the consistency she desired.
Best DIY Puffy Paint Recipe – The Process of Trying and Creating Recipes
Let me show you the process of how I ended up making my own recipe, which became my personal favorite. I’ll show you the results of each test recipe, and you can decide which result you like the best in terms of puff and texture.
Let me clarify that this IS NOT the recipe that you put in the microwave. If you want to see that recipe, I encourage you to click back to see our microwave puffy paint project.

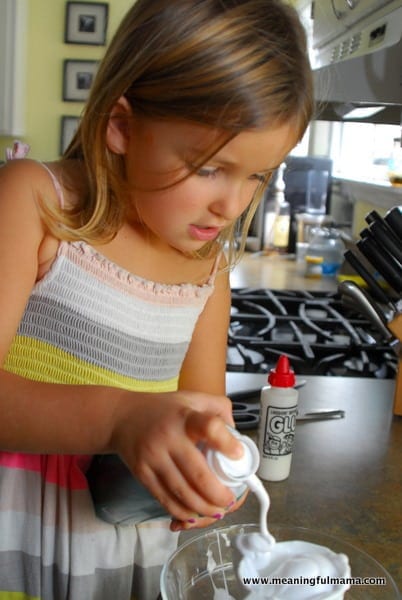
I am lucky to have little helpers in the kitchen to aid me in mixing up my concoctions.
Kids love to mix and pour. I always encourage you to get your kids involved in every step of the process.
I know too well that this can feel more chaotic. However, now having kids that can bake on their own is super encouraging.
Warning: If you raise kids to make things like inexpensive homemade DIY puffy paints, marbled paper made with shaving cream and Borax-free gak, you might end up with highly creative kids that have big ideas all…the…time. Expect some beautiful chaos in your home.

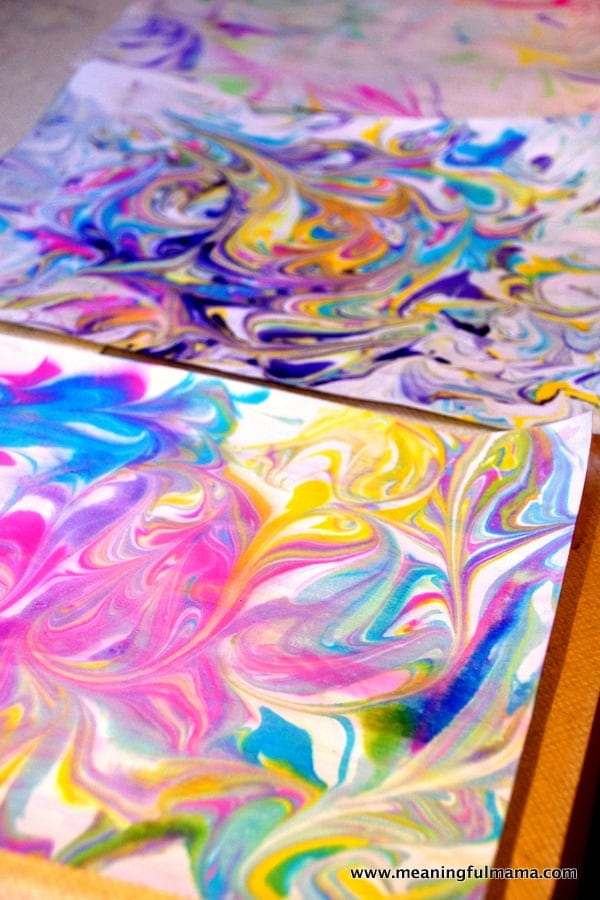
Above you notice I tried four different recipes. Which one is your favorite?
You can see all of the recipes above, but I’ve provided the written recipe for the pink color, since it was my preference. The texture was nice and it puffed up just perfect for me.
Does this Homemade Puffy Paint Recipe Really Work?

* Update: I had a few comments that this recipe was too thick for people. I wanted to try it again to see what was going wrong. I tried it again, and it worked for me.
Here are the exact details:
I used Barbasol Thick and Rich shaving cream, all purpose flour and Elmer’s school glue.
The picture above is of when I tried it again. I did the test, so it wasn’t originally kids trying to squeeze the bottle.
One reader has noted that she was more satisfied with the consistency by adding more glue…she estimated that she added 1/8 of a cup.
When my kids tried it a bit later, it was a little difficult for them to squeeze, something I didn’t experience the first time. I’m wondering if weather plays a part in how this responds.
I rectified this by adding water, 1 Tbsp total for me, and that made it very easy for my child to manipulate. However, the watered down one didn’t dry as firm if this is a keepsake.
I hope this is helpful! As suggested above, by one of my readers, it’s probably good to add a bit of flour at a time until you have reached the desired consistency.


I have shown you a close up of all the results so you can decide the consistency that works best for your project. Again, my favorite mixture was the pink mixture that I highlighted in my recipe for the best puffy paint.

We have a sweet friend we take care of once a week. She was able to join us for this project.
I love having projects for the kids to do when they have friends over. Sometimes the kids are very self-entertaining, which is the fabulous part of having friends over to play.
However, sometimes they seem to need a bit more direction, why it’s always good to have a few ideas up your sleeve.

I laid out my Dollar Store table cloth and the kids set to work.

The kids and I all did our own designs. Their results consisted of a lot of polka dots.
It was interesting and controlled they were and purposeful. They were very abstract with their designs, but they were not just squeezing it out with all their might like I sometimes see them do with toothpaste.

When Abby came home from school, she created her own design.
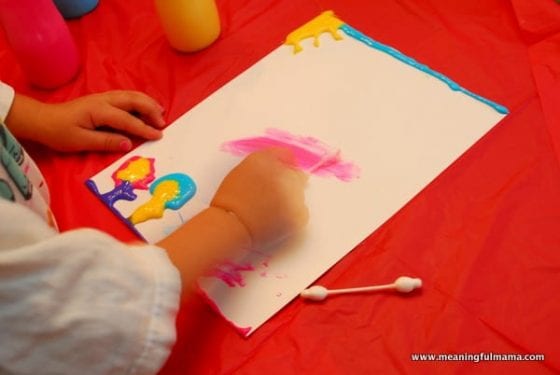
She had a different approach to the whole thing. She kept some of her painting puffy and wanted to take Q-Tips to some of the paint to bring on a different look.

Here are Abby’s results. It’s pretty clear that there were some puffy paint recipes that worked better than others. They were playing with the four different recipes here.

I had to get in on the fun and create my own artwork. This owl would do the trick, and it also really clearly shows why I liked the result of the pink DIY puffy paint the best.
The blue and yellow have air bubbles. The purple is my second favorite.
The Best Homemade Puffy Paint Recipe
Ingredients
THE BEST HOMEMADE PUFFY PAINT RECIPE – MATERIALS NEEDED
- 3/4 cup shaving cream
- 1/4 cup white glue
- 1/4 cup flour
- Food Coloring
Instructions
STEP-BY-STEP INSTRUCTIONS ON HOW TO MAKE THE BEST HOMEMADE PUFFY PAINTS
- Mix all ingredients together until completely combined.
- Putting your puffy paints in a squeeze bottle works very well to help keep the puffy look. You can also use paint brushes for just a thicker consistency and texture.
Looking for More Creative Fun with Kids? Try these Fun Ideas:
Check out my Kid Craft Section For all My Kid DIY Fun
DIY Marbled Paper from Shaving Cream


Great job! We’ve used puffy paint before, but never have the same consistency twice! Thanks for sharing!
Thanks for commenting. I just followed you on Twitter too. Glad to become blogging friends. Hope you enjoy the recipe.
What is the shelf life of puff paint when stored in air tilt squeezable container?
Oh no – I don’t have an answer to your question. It’s been so long since we have done this. I believe I remember that I had them in the containers for quite a long time – up to a month, but I’m not sure. I’m so sorry I’m not more help.
If you put some on a peice of wax paper will it peel off and bend plz try this
What a great idea. Thanks for this tip!
Hey! I run a before and after school program, and was wanting to make some of the puffy paint for an upcoming project. Is it something I can store to use throughout a week, or will I need to make fresh batches each day?
I still have mine in my squeeze bottles and was just wondering about them yesterday. I just went and tried them for you, and it looks like they still work!! Yay! Have fun with this.
Hi,
I tried the recipe but it was sooo thick?! I was wondering whether it needed to be a different kind of flour? I just used all-purpose flour?
I’m dying to be able to make this for my almost 6 year old, 4 year old and my kindergarten class, once I return from matleave in April!
Please help! lol ….and thanks for sharing! 🙂 Your pictures were beautiful too!
Weird. I just used all purpose flour, and you can see the result. I guess I would experiment with different amounts of flour. I’d start small and just keep adding until you have the consistency you like. I wonder why we got such different results. That is so weird to me. Let me know if you get it to work.
It may possibly be a humidity difference in your areas. Just a thought. Can’t hardly wait to try your fav recipe. Ty for sharing !!
You know – It totally could be. I live in the pacific NW. I wonder if you’re right. I’ll be curious to here your experience. Thanks!
The order that you mix things in makes a HUGE difference in how thick and workable this ends up being. DON’T add the flour to the glue before mixing the shaving cream and glue. This results in an unusable and thick mxture. DO mix the glue and shaving cream first then sprinkle in the flour a tablespoon at a time until you get the consistency you wany.
Thank you so much for this input. I have tried my recipe a handful of times, and it worked every time, so I had NO idea why some were reporting it didn’t work. I wonder if that’s the problem. I really appreciate you sharing your experience. Hopefully more will have success with your advice. I’ll add that to the post as well.
Hi i qiuld hust ask because i’m going to make one but its just white and i will apply the puffy panir in like a velvet like fabric wiuld ir still work good and dies it dry even it is embosed???
I am not sure I would try it on a velvet-like fabric. I would look for a puffy paint at the craft store that is made specifically for fabric. If you wanted to try it, I would definitely try it on a little scrap of fabric first to see if it worked the way you’d want. Good luck!
Just a question, do you know if the food coloring color will lighten up in the mixture, and if so, could I use red? Thanks!
I did experience it lightened up a bit, but I was still able to get vibrant colors. Red does tend to be challenging, but I would just try it. 🙂 Hope it works!
I HAVE NEVER USED PUFFY PAINT BEFORE BUT WANT TO TRY IT NOW. A (PROBABLY) SILLY QUESTION – DOES IT DRY HARD??? THANKS SO MUCH FOR THE RECIPE
It’s not a silly question. It does dry hard. I hope you have fun with it!
soooooooooooooooooooooooooooooooooooooooooooooooooooooo
fuuuuuuuuuuuuuuuuuuuuuuuuuuuuuuuuunnnnnnnnnnnnnnnnnnnnnyyyyyyyyyyyyyyyyyyyyyy
Yay – So glad it was a success!
Does the puffy design flatten after a few days? One recipe I read with similar ingredients says it did…still pretty, but flat.
I’m trying to think back so I can answer your question accurately. I had saved them for a bit, but I’m trying to remember which colors dried a bit more flat. You know, I think they might dry more flat. I know they are definitely like the puffy paints you’d buy in the store that stay super bubbly. Sorry my memory isn’t serving me well. I’d like to be able to answer more accurately.
You know – I just found the original owl drawing, and it is still puffy. I was pretty excited about that. The pink and blue recipe stayed puffy, but the rest grew flat. I hope that’s helpful to know!
How did you get it into the containers from the bowl?
I’m trying to rack my brain to remember. I think I just spooned it in over the sink. The opening is fairly wide, so I don’t remember it being too difficult. Good luck. Let me know what you think.
A suggestion on getting the stuff into the containers: Spoon it in a Quart size zip lock and close. Then cut a small hole on the corner of the zip lock then squeeze the stuff into the containers. You can also use the zip locks as your tool to squeeze paint if you do not have a squeeze bottle. Just cut the hole in the corner very small. Hope this helps! 🙂
Super great tip! I’m going to add this to my post. Thanks! I love your input.
Why do you only use corn starch in the blue and flour only in the pink? And Did you buy special dyes for it?
I was trying out different recipes to find the best. After experimenting I discovered that the recipe for the pink was the best one and the only one I would use in the future. I didn’t buy any kind of special dye. I used regular food coloring. You could use gel coloring too (Wilton or Americolor). I hope that is helpful.
I had to visit because the Frugalcrafter (youtube) said that you had the best recipe for puffy paints, and she was correct!!! She usually is though 🙂
I’m off to see your puffy glue
Great job!
Super fun. That’s my first YouTube referral that I know about. It’s great to hear that she pointed you my direction, and I’m glad you found me. Thanks so much for stopping by.
I’m here also because of the Frugalcrafter. I can’t wait to try your recipe. I have grandchildren who would love to get artsy with it.
Thank you so much. I’d love to hear how it goes! Have fun. Thanks for being such an involved grandma.
Hi..I’ve always tried the microwave recipes but they turn out to be dull..so first, thanks a ton for these vibrant looking colors..just wanted to know how much time does this recipe takes to dry?
Glad you found these recipes, and I hope you like them. I really, really need to pay better attention when I do these projects so I can have the answers. We have actually done it a few times, but I just set it in the laundry room to dry overnight, and in the morning they are dry. I’m not quite sure. I’m sorry I’m not more helpful. I’ll pay better attention next time I use them.
I also found your blog from Lindsey “The Frugal Crafter” I have been addicted to her youtube channel for quite some time now as I am an artist, but also a recipe connoisseur and all around nut when it comes to DIY projects. You can see some of my artwork by clicking on my link if you would like but I’m not here to spam up your site…I am here to soak up the awesome ideas and recipes you offer to us. Thanks again! If you haven’t checked out Lindsey’s Youtube channel, she’s awesome as well: https://www.youtube.com/watch?v=JVVvhfhKE48 and a link to her blog: http://networkedblogs.com/WJsLJ Happy Motehr’s Day and God bless!
Thanks so much. I am really glad you are here!!
HI Jodi!!
We did a fun video on How to Make Homemade Puffy Paint and dedicated it to your page for giving us ideas for the fun recipes. I hope you will check it out and let me know what you think. Thank you for you awesome blog! http://youtu.be/vHA0h_dTGH8
Thanks so much. I appreciate you dedicating it to me. Good luck in all your pursuits. It’s fun to watch your video and great to know about you!
How long does it take to harden ?
That’s a good question. I stuck it in the laundry room and let it dry overnight. Puffy paints and glitter paints I find take longer to dry, so I just always think overnight is a safe bet. If you do it and have a more exact experience, I’d love a report back. Have fun with it!
Hi i just saw this awesome recipe and I wonder which glue did you exactly used and do I get the same results if I try it with glitter?
Hi! Thanks for asking. I just used Elmer’s glue. I have absolutely no idea about the glitter, but if you do it, I would LOVE to hear your results! Keep me updated!
My 6 yo just finished an art camp- one of their projects was drawing on cardboard with puffy paint, then once it dried, wrapping the board with aluminum foil, rubbing it down to conform to the paint lines and then using black shoe polish to “antique” the foil. Now her peice looks like an old tin tile. Very very cool, we are going to try to make more at home.
https://www.flickr.com/photos/carlyscholz/14347780370/
Oh wow! That is super cool. I want to keep this in my collection of ideas to do with my kids. Thanks for telling me about that!
Do you have any ideas for a puffy paint to use on clothes? It would be cool to be able to do that but not have the texture wast away right away. I had though of adding some glow in the dark pant that is laying around from an old prject. I’m sure if I used normal paint or paint for silkscreening insead of food coloring it would still stay on the t-shirt after the wash but as a sain not the texture…any ideas?
I don’t know. I would be hesitant to suggest anything without trying it first. I do know that I wouldn’t use my recipe, as it has a lot of things that would dissolve away. I would just buy a product that was intended for fabric, like this one: http://www.amazon.com/Tulip-20595-Dimensional-Fabric-6-Pack/dp/B000ILZAWY/ref=sr_1_1?ie=UTF8&qid=1405175881&sr=8-1&keywords=puffy+paint+clothes. Other than that, I’d be ready for a lot of experimentation. If you did want to experiment, I would try a glue made for fabric to mix in like this one: http://www.amazon.com/Elmers-Craft-Fabric-Paper-4-Ounce/dp/B00178QQXY/ref=sr_1_fkmr2_3?ie=UTF8&qid=1405175973&sr=8-3-fkmr2&keywords=glue+that+doesn%27t+dissolve Good luck!
Looking to find the bottles you used
I found mine at Target, but I’ve seen them in the cake decorating station at the my craft store. Here’s a link on Amazong too: Bakers & ChefsTM Translucent White Plastic Squeeze Bottles – 16 oz. – 6 pk.
Hi Jodi! This is a great post! I shared it on Facebook the other day and it was a hit! https://www.facebook.com/CraftsbyAmanda/photos/a.353593675216.349539.323548680216/10154387947905217/?type=1
I was wondering where all the love came from. Thanks for letting me know and thanks so much for sharing!!
I love your blog such nice ideas. I just want to know how long can you keep the puffy psint in the bittel so that it stays puffy to paint because you might not use it all and paint a few days later. Will the effect stay the same or you need to make a fresh batch every time?
Thanx
I made it in December, and I know I used it a couple months after the first use. I still have the containers partly filled, actually. I just pulled them out to check. It is definitely dead now. I am sure a few days would be just fine. I would store in a cool, dark place. I hope that helps. Have fun!
OK – Just tried another time with all of the colors. The pink (best one when we used it initially and a while after) didn’t work at all (this is now 7 months later). The blue actually still works fairly well. It hasn’t tried yet, but it comes out in nice texture. The yellow still works decently too. Interesting!!