I’m going to show you how to make easy chocolate leaves with a video tutorial. As autumn baking is underway, we all want to find ways to make our creations beautiful. You don’t need to inform your amazed guests about how simple it is to make DIY chocolate leaves. Just let them stay in awe.
How to Make Easy Chocolate Leaves with a Video Tutorial
Materials Needed
- chocolate candy melts

- leaves, cleaned and dried – not dried in the sense of dead and brittle – just no longer wet. I used dahlia leaves.
- edible shimmer luster dust – I used gold, orange, yellow and brown.
- clean brush
- parchment paper or silicone baking mat
- jelly roll pan or baking sheet

 ,
,  and
and  .
.
 or
or 
 or
or 

How Do you Make Decorative Chocolate Leaves?
Brace yourselves for the ease of this. There is a video tutorial at the end of this post for all of you visual learners.
Go on a walk. You can have some alone time or take your kids with you so they can join in on the fun. This is a project they can help with if you love having your kids in the kitchen like I do…most of the time.
What Kind of Leaves to Choose for Edible Chocolate Leaves
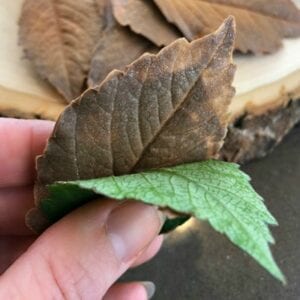
Pick off some tree leaves that look interesting for the dessert design you have in mind. You are probably looking for tips to find the perfect leaves. I chose dahlia leaves because I love the serrated look of the edges.
You want leaves that have a lot of vein variation on the back. Look for leaves that are not too thin or brittle. Durability is important. The leaf will need to hold shape under the chocolate. Glossy leaves with great veins are great!
I had considered getting faux leaves at the craft store, but as I explored and looked, the unnatural veining on the back was not appealing for the end look I was hoping to achieve.

Once you have chosen your leaves, go wash them in soapy water. Dry them completely, but do not let them dry out or become brittle. It is important that no water remains on the leaves as water and chocolate are bitter enemies.
Put a piece of parchment paper on a baking sheet. This is only for easy transfer and clean up. Once dry, place leaves upside down on parchment paper.
How to Melt Candy Melts
Time to melt your chocolate candy melts. Follow the bag instructions. Basically, you put them in the microwave for one minute at 50% power. Stir. Continue this process in 30 second increments until totally melted. I always stop when I see only a few chunks remaining. I then stir to incorporate those. You do not want to over-heat chocolate.
I love working with candy melts because it is so easy. I have been working with them since I was a child. My friends used to receive chocolate lollipops for all occasions.
If you want more ideas check out how I use the melts to make butterflies, owl pretzels, Easter bunny faces, Christmas reindeer and Halloween Frankensteins.
For the amount of leaves you see on my parchment sheet I heated up half a bag of candy melts and didn’t need that much at all. You can always melt no as needed.
Time to paint a generous amount of chocolate on each leaf with a clean brush. Paint to the edge and cover the leaf completely. You don’t want the chocolate crazy thick, but you don’t want it too thin either because it will break.
Refrigerate
Once all the leaves are all painted, put the chocolates leaves in the refrigerator for a short time. It doesn’t take long at all to get them to set.
Once chilled carefully pull the leaf away from the chocolate for your wow moment.

The next step is to apply some edible shimmer luster dust. I used orange, yellow, brown and gold to complete the look.

Eat these as is or garnish your favorite fall desserts with your gorgeous, edible, chocolate leaves.
Be prepared for you guests to ooo and ahh over your creation.

These chocolate leaves adorned a Pumpkin Spice Rolled Yule Log Cake (recipe coming soon). My husband and I work with the youth at the church. We host our small groups at our house. The kids walked in to this dessert, and it disappeared quickly. What was fun was to watch was them all freaking out over the chocolate leaves. They couldn’t believe they were edible and just kept saying things like, “No way!” “You made this?!” “You can eat these?”
[field name=iframe]
How to Make Edible Chocolate Leaves with a Video Tutorial
Ingredients
Materials Needed to Make Edible Chocolate Leaves
- chocolate candy melts
- leaves cleaned and dried - not dried in the sense of dead and brittle - just no longer wet. I used dahlia leaves.
- edible shimmer luster dust - I used gold orange, yellow and brown.
- clean brush
- parchment paper or silicone baking mat
- jelly roll pan or baking sheet
Instructions
How do you make decorative chocolate leaves?
- Brace yourselves for the ease of this. There is a video tutorial at the end of this post for all of you visual learners.
- Go on a walk. You can have some alone time or take your kids with you so they can join in on the fun.
- Pick off some tree leaves that look interesting for the dessert design you have in mind. You are probably looking for tips to find the perfect leaves. I chose dahlia leaves because I loved the serrated look of the edges. You want leaves that have a lot of vein variation on the back. Look for leaves that are not too thin or brittle. Durability is important. The leaf will need to hold shape under the chocolate. Glossy leaves with great veins are great!
- Once you have chosen your leaves, go wash them in soapy water. Dry them completely, but do not let them dry out or become brittle. It is important that no water remains on that as water and chocolate are bitter enemies.
- Put a piece of parchment paper on a baking sheet. This is only for easy transfer and clean up. Once dry, place leaves upside down on parchment paper.
- Time to melt your chocolate candy melts. Follow the bag instructions. Basically, you put them in the microwave for one minute at 50% power. Stir. Continue this process in 30 second increments until totally melted. I always stop when I see only a few chunks remaining. I then stir to incorporate those. You do not want to over-heat chocolate.
- For the amount of leaves you see on my parchment sheet I heated up half a bag of candy melts and didn't need that much at all.
- Time to paint a generous amount of chocolate on each leaf with a clean brush. Paint to the edge and cover the leaf completely. You don't want the chocolate crazy thick, but you don't want it too thin either because it will break.
- Once all the leaves are all painted, put the chocolates leaves in the refrigerator for a short time. It doesn't take long at all to get them to set.
- Once chilled carefully pull the leaf away from the chocolate for your wow moment.
- The next step is to apply some edible shimmer luster dust. I used orange, yellow, brown and gold to complete the look.

Want More Chocolate Candy Melt Ideas?

Rice Krispy Treats Presents with a Surprise