This chocolate mousse succulent tutorial will help you make a stunning dessert that your guests will have a hard time believing is actually edible.
Not only is this dessert beautiful, but it is also incredibly delicious. Using chocolate molds makes it a fairly easy dessert to reproduce. I’m going to show you how.
Chocolate Mousse Succulent Dessert Tutorial
This dessert was made for my sister-in-law’s baby shower. We will all be welcoming in a new life in February. You may have seen her gender reveal, which was fabulous.
To celebrate, we had a succulent baby shower. I love themed baby showers. Her mountain baby shower ushered in baby number one. Now? Succulents.
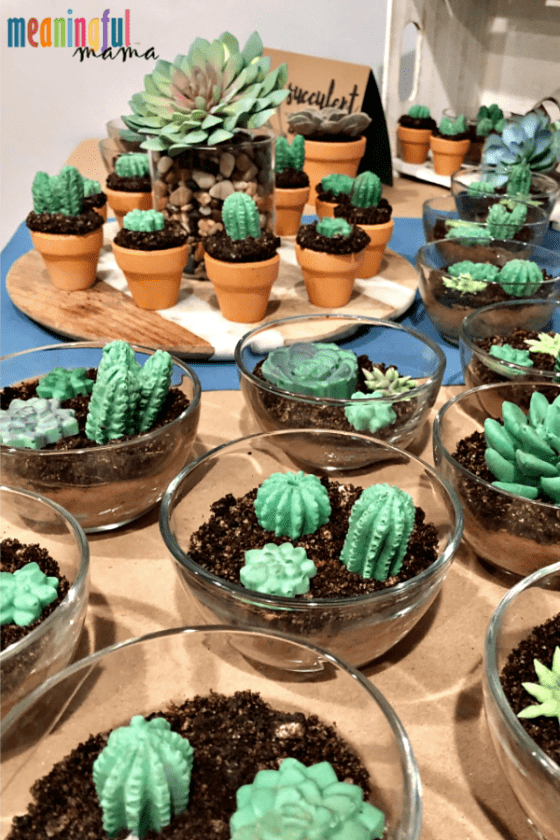
For the dessert table, I decided to make these chocolate mousse succulent desserts. I also made succulent cupcakes.
Guests walked past the dessert table, not even realizing there was food there. That was crazy fun to watch.
Materials Needed to Make Chocolate Mousse Succulent Desserts
- Glass Dessert Bowls – I looked everywhere for serving bowls that would work the way I wanted. I finally found some at Walmart for $1.27 a pop.
- Dark Chocolate Mousse – This link is to Bobby Flay’s dark chocolate mousse. Thanks, Bobby. It was fabulous! I doubled the recipe and was able to get 24 chocolate mousse succulent desserts.
- Oreo Cookies – I needed one package for both the cupcakes and the chocolate mousse.
- Succulent Silicone Mold
- 3D Succulent Mold – I didn’t use these, but I found them afterward and thought they’d be great.
- Large 3D Succulent Mold
- Cactus 3D Mold – Set of 3
- Green Candy Melts
- White Candy Melts
- Green Petal Powder (Edible) – Amazon link provided, but I found mine at Hobby Lobby.
- Blue Petal Powder (Edible) – Amazon link provided, but I found mine at Hobby Lobby.
- Purple Petal Powder (Edible) – Amazon link provided, but I found mine at Hobby Lobby.
- Clean Paint Brush for Food
- Royal Frosting – This is optional. I wanted to make the spiky succulents using this tutorial. I have linked to my favorite royal frosting recipe.
- Green Food Coloring – You only need this if you are making royal frosting succulents.
- Pastry Bags– Only needed if you do royal frosting succulents.
- Tip One with Coupling – Only needed if you do royal frosting succulents.
Chocolate Mousse Succulent Dessert Tutorial – Step by Step

Make up your dark chocolate mousse. I was so grateful for my little helpers.
Head on over to my Instagram account to learn more about the benefits and mishaps of having kids in the kitchen. Are you following on Instagram yet? I’d love to connect with you there!
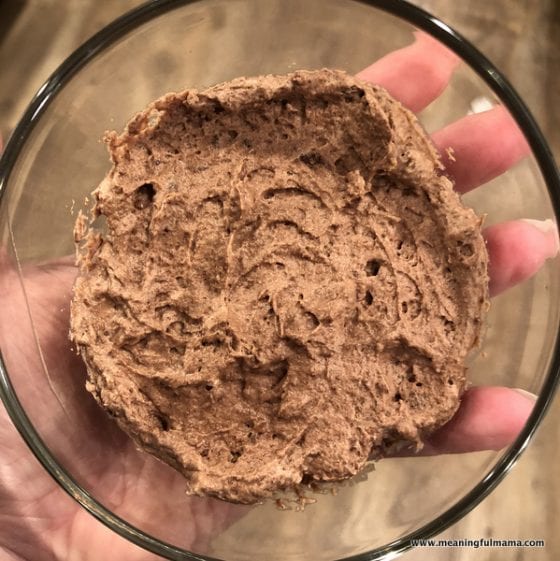
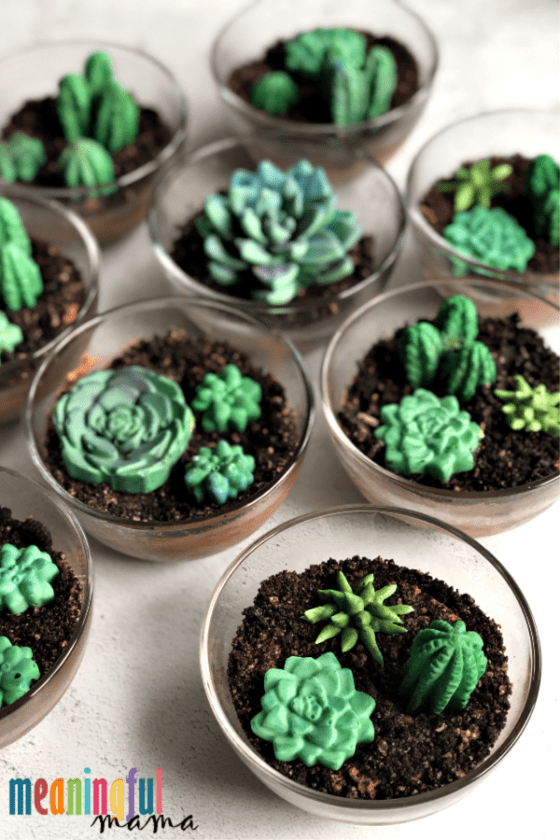
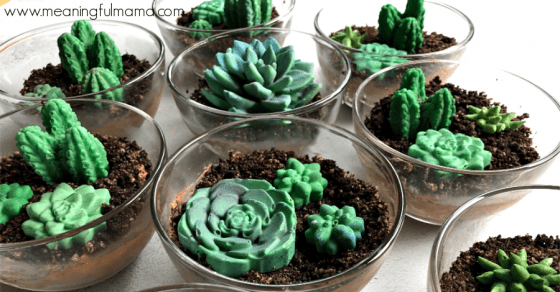
Once the mousse is made fill your dessert dishes a little more than half full.
Using a food processor, pulse Oreo cookies so that you get rough crumbs. You can also pound up the Oreos by putting them in a plastic bag and smashing them. Kids love that!
One great thing about using Oreos is that the result really looks like soil. The white bits come through and look like fertilizer.
Sprinkle a layer of Oreo “dirt” on top of the mousse.
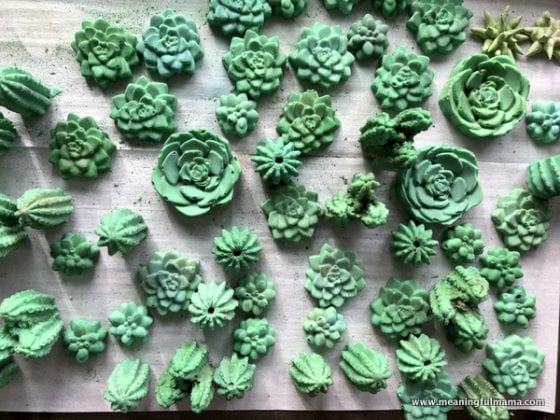
Make your succulents. I did this over a series of days. I was making succulents for both the dark chocolate mousse succulent dessert as well as the cupcakes.
With the 3D cactus’ I could only do three at a time, so it took a while.
Melt Candy Melts by microwaving in 30 second intervals on 50% power. Stir in between each 30 second cook time. Pour the chocolates in the molds. Allow to refrigerate until set. Then, pop them out.
Using the edible pedal powder, brush on the chocolates to create texture. The chocolates looked really flat but came alive by adding the powder.
Another option is to pipe out the spiky succulents using this tutorial.
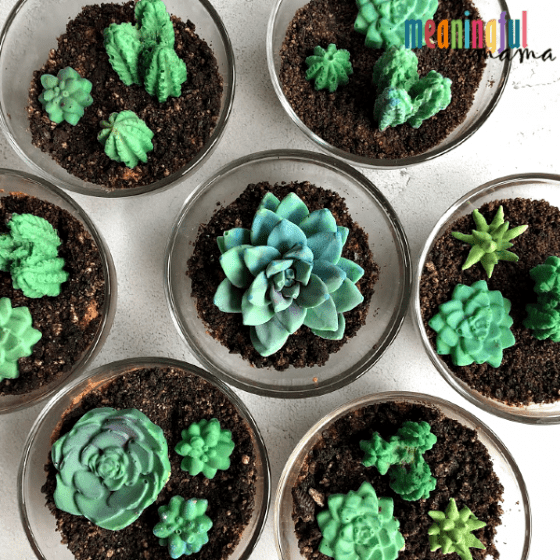
The final step is to add your succulents to the dishes. I did 3 succulents per dish, except for the big one.
Let me know if you have any questions. Hopefully you’ll be able to recreate this fun dessert for a great celebration.
Want More Baby Shower Inspiration?

How to Host a Baby Shower Like a Pro
French Country Lavender and Lace Baby Shower


[…] Get the full tutorial at Meaningful Mama » […]