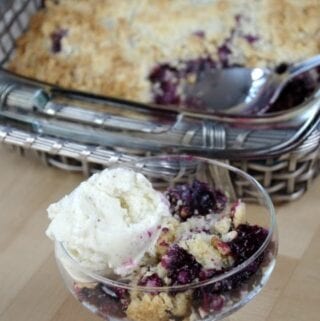
This Easy 4 Ingredient Bisquick Berry Cobbler Recipe is not only the easiest dessert in my repertoire, but it is a family and friend favorite.
This recipe can become a mixed berry cobbler, blueberry cobbler, raspberry, or blackberry cobbler. I have never tried to turn it into a peach cobbler, but if you giver it a go, will you let me know?
While I often use frozen berries, fresh fruit can be used as well.
I have memories as a child of going blackberry picking with my family and then coming home to cook this blackberry Bisquick cobbler with my mom.
I have people ask for the recipe every time I make it. Want another dessert using fresh berries? Try my amazing raspberry cheesecake recipe.
Easy 4 Ingredient Bisquick Berry Cobbler Recipe

Easy 4 Ingredient Bisquick Berry Cobbler Recipe (Serves 12-16) – Ingredients Needed
2 1/2 cups Bisquick
1 1/2 cups sugar
1 cube melted butter (4oz stick)
6 cups frozen berries (blueberries, raspberries, blackberries or a combo of them all together)
Easy 4 Ingredient Bisquick Berry Cobbler Recipe – Instructions
- Preheat the oven to 350 degrees.
- Combine Bisquick, sugar and melted butter together and stir into a rough crumble.
- Place the frozen berries on the bottom of a 9×13 pan.
- Next, add the crumble on top of the berries.
- Bake for 1 hour.
- Let it cool for at least 10 minutes after it comes out of the oven.

When I’m making this for guests, I generally just put the crumble together before guests arrive. Then, right before I serve dinner, I’ll stick the berries in the pan, throw the crumble on top and stick it in the oven so it is ready a little while after dinner.
We generally serve this with vanilla ice cream because that is just classic. It pairs well with a delicious homemade whipped cream also.
I made this for Father’s Day, and my husband actually requested Safeway’s Cinnamon Churro ice cream. It also paired quite well with this easy, fresh and tasty dessert.
After you make this Easy 4 Ingredient Bisquick Berry Cobbler, I’m convinced it will become part of your regular dessert rotation too.

Best Dessert Recipe to Feed a Crowd
I told you that while back that I was on work crew at Malibu. The chef found out I do desserts, and suddenly I was in charge of desserts for 150 most evenings.
I chose to make this berry cobbler because of the ease and delicious nature of this dessert. It’s also one of those desserts where I often have all the ingredients available already, so I don’t need to run to the store. Further, when you are needing to feed a large crowd, this is the perfect dessert to make it happen.

Actually, if you get the opportunity to visit camp Malibu in Canada, and you have a Bisquick berry cobbler, it is most likely this one.
The chef asked for the recipe and decided to put it on the regular rotation.
When I wasn’t making desserts, I was working in “The Pits” doing dishes.
This dessert brought our diners back to the pits to compliment the chef.
I need to give my mom credit for this one because I wouldn’t have the recipe if it weren’t for her.
I even had people emailing me after camp to get the recipe. They were probably pretty surprised to learn that this berry crisp has only 4 ingredients and took virtually no time or effort to create.
What is the Difference Between a Berry Cobbler and a Berry Crisp?
We have always called this easy dessert a cobbler, but it might be better described as a crisp made with a Bisquick crumble.
A cobbler is traditionally a berry bottom with a drop-biscuit top.
A crisp is a berry bottom with a crunchy and crispy layer on top. Therefore, this should probably be called a “Bisquick Berry Crisp Recipe,” but I’ve always called it a cobbler, so that’s what you get.
For more details about cobblers vs. crisps, visit Canadian Living.

Easy 4 Ingredient Bisquick Berry Cobbler Recipe
Ingredients
Easy 4 Ingredient Bisquick Berry Cobbler Recipe (Serves 12-16) – Ingredients Needed
- 2 1/2 cups Bisquick
- 1 1/2 cups sugar
- 1 cube melted butter 4oz stick
- 6 cups frozen berries blueberries, raspberries, blackberries or a combo of them all together
Instructions
Easy 4 Ingredient Bisquick Berry Cobbler Recipe – Instructions
- Preheat the oven to 350 degrees.
- Combine Bisquick, sugar and melted butter together and stir into a rough crumble.
- Place the frozen berries on the bottom of a 9×13 pan.
- Next, add the crumble on top of the berries.
- Bake for 1 hour.
- Let it cool for at least 10 minutes after it comes out of the oven.
Video tutorial for this mixed berry cobbler can also be found on my YouTube channel here.
Want More Great Desserts?
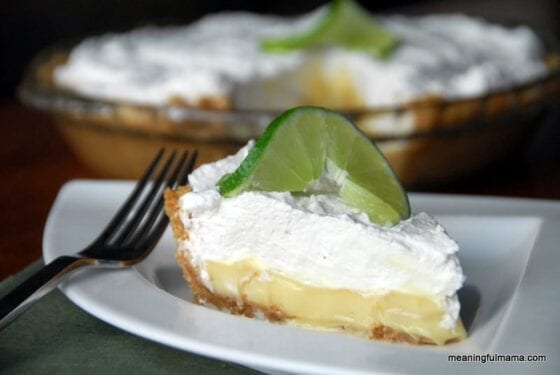
My Favorite Key Lime Pie Recipe
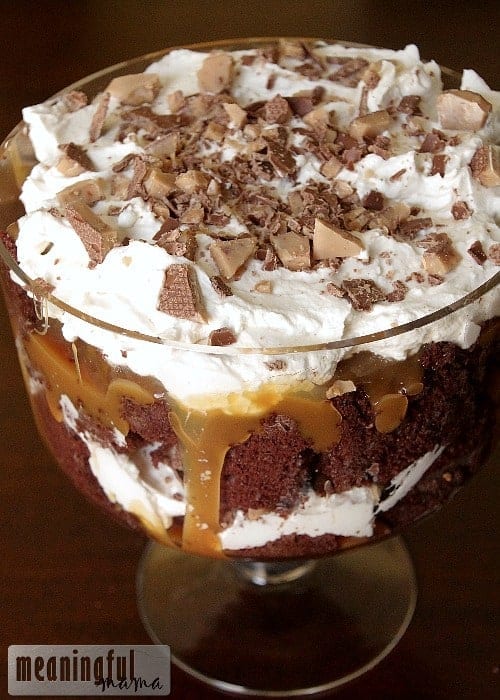
Better Than Anything Chocolate Trifle
Note: This post was originally written in 2013, but was updated with new photos and formatting in January of 2019. The recipe remains the same!


Hi jodi! I always enjoy your posts. My mom used to make something very similar. Just wondering exactly how much you meant by a cube of butter…a 4 oz. stick? I had a neighbor who always referred to it as a cube as well, and she used it interchangeably for “stick”. We are gluten free, but I happen to have some G/F bisquick and a lot of frozen berries on hand that need to be used before we move next week. Thanks! 🙂
Thank so much for commenting and asking. What a good question. I actually just updated the post to not be confusing. Yes, I was referring to a 4oz stick. We grew up calling it a cube. You’ll have to let me know how the gluten free version turns. out. I didn’t even know they made gluten free Bisquick. That’s fabulous. Enjoy!
This is awesome for last minute desserts! I love it Jodi! Featuring you this week on Saturday Show & tell! 🙂
Thanks, Mackenzie. I appreciate the feature, and it is one of those easy desserts for the last minute moments. I always have frozen berries in my freezer for smoothies, so I generally have everything on hand. I’ll share that I was featured on my social media outlets.
thankyou for a quick recipi for berris. After the success I had making the quick and easy crumble,I look forward to making it again next year at berry season. the crumble was recipi of yours was one of the best tasting food i havemade.
What a great compliment. I’m glad you had so much success!
I have homemade canned peaches. Will the fruit sub well? Also salted or unsalted butter? Thanks!,
I think the peaches would work well. I would freeze them first so they don’t overcook. I’m not 100% sure it would work, but I’d love to hear the results. I have always been taught in baking that in baking you want to use unsalted butter because the salt has already been accommodated for in the recipe. That said, I kind of like a little more salt in desserts. I actually just took a bite of our cookie dough we’re doing right now and got that last little flavor of salt and commented on how much I enjoy that. So, I like to use salted sometimes. I guess it’s a personal choice. Let me know how it goes!
Oh lovely. I was looking for an easy crumble/cobbler and this was exactly what I wanted. Thank you so much!
I’m so glad this was helpful. I’d love to hear what you think of it.
Made this tonight for some last minute dessert guests. Rave reviews! Going to keep this one in my bag of tricks! It was especially delicious with the vanilla frozen custard I picked up! Thank you for sharing this recipe!
I’m so glad you enjoyed this. I always keep frozen berries in my freezer because I know I can easily whip this up. Thank you for commenting. It helps my other readers better assess whether they should try it.
I just made with gluten free bisquick and it is delicious! I only added 3/4 cup sugar and 4 cups fruit (all i had). Yum!
So glad you had success with it. I didn’t even know they had gluten free Bisquick. Good to know for friends I’m cooking for or other readers. Thanks so much for commenting!
Just a little tip, you didnt say what to do with the crumble… You only said to put the berries on the bottom of the pan. If you specify that more, it would help a lot!
The recipe says to place the crumble on top of the frozen berries.
Yes, that is correct. Enjoy!
can u help…..just 2 of us….this 2 big of a recipe …..how can u make it 2 serve 2
I would just do the recipe in ramekins. I would cut all of the ingredients by 1/6th. It would be about 1/2 cup Bisquick, 1/4 cup sugar, 1 1/3 TBS butter, and then 1 cup of the berries. You might want to double check my mental math there, but that is what I calculated. I hope that helps.
Can you substitute baking splenda for the sugar? I’m making this for a friend and she can’t have sugar. Thanks!
I have never tried it. I’ve tried the baking alternatives with a couple other things, and I personally don’t like it. However, if that is how the person is used to eating then I imagine it would work just fine. I would just make sure to follow the directions because I am pretty sure it is not a 1:1 ratio. Let me know how it turns out!
My other half is type2 diabetic and I always make it with Slenda! One part Splebda to one part sugar! It’s just as delicious and he loves it!
Great adaptation that I’m sure is helpful to others. Thanks for that.
I have made this many times since finding it last summer. Always delish! Great with fresh whipped cream and vanilla ice cream! Making it today for 4th of July celebration! 🙂
I’m making it for the 4th too. Thanks so much for weighing in, and I’m so glad you like it. It’s always a favorite, and I just love that it is so easy.
Hey!
I found this recipe on pinterest, and I had to try it with my dad. This was just the perfect dessert, and with super easy ingredients and directions- it’s just what we were looking for.
I shared the recipe and my experience on my blog, while giving you credit, please let me know if you’d prefer I take it down.
Thanks so much!!!
So glad you had such a great experience. It’s so easy and always gives the greatest reviews. I couldn’t find your post. All I ask is that you don’t re-post the recipe. If it just shares your experience and then links back with or without one picture, that’s totally perfect, and I really appreciate it. Thanks so much!
Oh yeah! Just found it. I would prefer you to take it down. I discovered, in blogging, that the proper etiquette and legal way of blogging is to always be doing your own recipes. This is actually an infringement on copyright. I didn’t know for so long and had to go back and delete or totally change a number of my blogging mistakes from early on. Sorry to make you take it down. I really appreciate you checking in about it.
I’m so happy I found this! I have a girls dinner coming up and I needed something quick and fabulous. Thanks!!
You are so welcome. You won’t be disappointed! Have a great girls night! I’m hosting one here soon also, and I’m trying to decide between this and the key lime pie. Decisions! Decisions! Probably depends on how on top of things I am.
This cobbler recipe has been a family favorite for years. It’s so easy and people are always wanting the recipe. It’s definitely something you want to have as your family favorite.
Love how easy this berry cobbler recipe is! Thank you!
Thanks so much! It is so easy, which makes it such a great dessert for any time!
This has been my go-to dessert for the last few months. I’m wondering how it might work with apples now that it’s almost Fall. Any thoughts? I might give it a try because I love this recipe so much!
I’m so glad you get as much use out of this dessert as I do. It’s just so easy and yummy. I appreciate you taking the time to comment and rate. You know, I have never tried apples, but I really think that is a great idea. Toss the apples in some cinnamon and sugar before you bake, and I bet it just adds to the experience. I might try that soon. I have some apples in the trees I need to use. Will you report back if you try it too? Love the idea!
Can you use fresh berries instead of frozen?
Yes! I have great childhood memories of going to pick blackberries as a family and then coming home to make this cobbler. Enjoy!
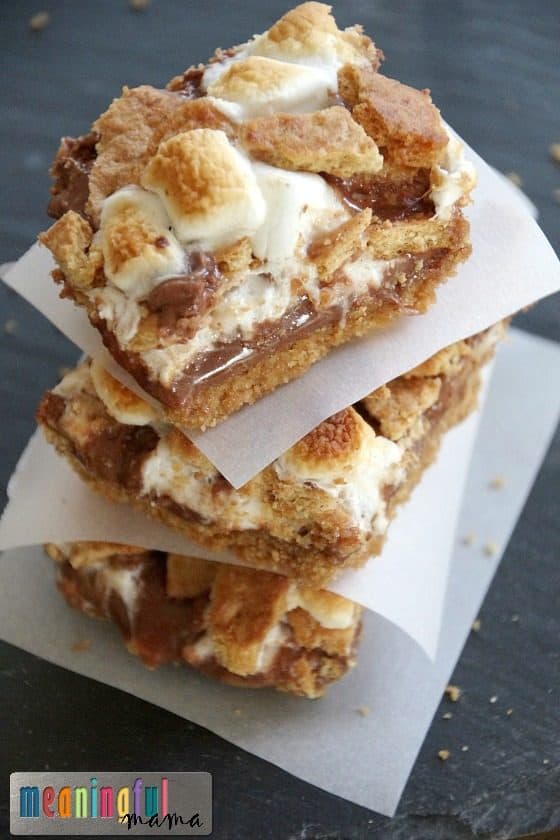
This is literally the best cobbler recipe on the planet! I will never make the one with oats and nuts again. My family fights over the topping. This is the comfort food of desserts for sure.
Totally agree! Thanks so much. It’s our family favorite too!
Thank you for this amazing recipe, Jodi. Itsnow my familys favorite desserr..better than bluebery ie! I did use brown sugar vs white and used all purpose flour vs 1/2 whole wheat. Delicious.
Thank you so much for commenting! It really is such a easy go-to favorite around here too!
I have made this many times because we absolutely love it. Today I am making it with peaches. I’m using part white and part brown sugar. I added extracts to the melted butter before mixing into the dry ingredients. Yum!
Thanks so much for commenting and providing a review. I haven’t done it with peaches yet, but I bet is is so good!