This easy Frozen birthday cake is meant to inspire even the most novice cake decorators. I was asked last minute to make a Frozen cake for someone, and I said I only had time if I could make it pretty simple. This was the result.
Frozen has remained a classic Disney film that still delights, which is why kids continue to ask for Frozen birthday cakes.
Cake decorating has been a loved hobby of mine. If you want to see more of my cake designs, I hope you will check my cakes tab.
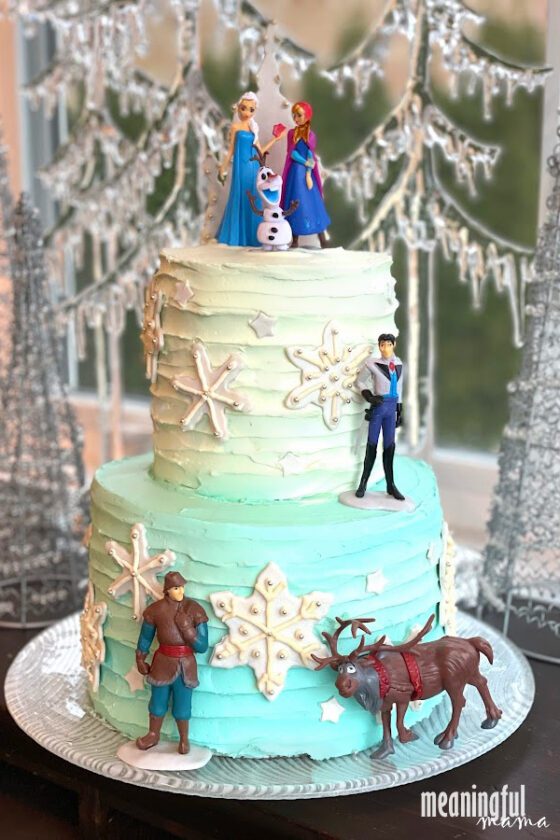
Easy Frozen Birthday Cake
I have a little confession about this Frozen birthday cake. This was not made for a child’s birthday. Here’s a special peek into a blogger’s life as we write a post. I was just going to title it “Easy Frozen Cake,” but in doing research I found that more people would be searching for how to do a Frozen birthday cake. Therefore, I chose this title because it’s a perfectly fine cake for a Frozen birthday party, and the phrase will be searched more often.
This cake was actually made for a child who had just finished her cancer treatment. This little fighter wanted a Frozen cake, and a Frozen cake she would receive.
A friend of mine is a nurse, and a special cake is one of the ways they celebrate the end of treatment at their hospital. I had done a Baby Yoda cake for another patient. What a blessing to be a part of someone’s journey as they reach a cancer milestone.
Materials Needed to Make this Easy Frozen Birthday Cake
The links following those are Amazon affiliate links. Anything you purchase through these links helps support the free resources at Meaningful Mama and the work I do. Thank you for your support.
Part of what makes this cake easier is that it uses purchased Frozen cake toppers. While making fondant, modeling chocolate or gum paste gives an actual edible design, when you are short on time or skill, cake toppers work great.
Cookie cutters also help make cake design easier. I used a variety of snowflake cookie cutters for this Frozen cake.
- Cake – Here’s my favorite white velvet cake, which is what I used for this one. It is a semi-homemade cake.
- Frosting – You will love my favorite buttercream frosting recipe.
- Cake Turntable – While a cake turntable is not a must, it is really helpful in creating the spiral look.
- Small Cake Spatula or butter knife
- Frozen Cake Toppers
- Fondant with Pearl Shimmer – A regular white fondant or gum paste would work as well, but I like the sparkle it adds with the pearl shimmer.
- Snowflake Cookie Cutters
- Fondant Roller
- Pastry Bag
- Number 3 Frosting Tip
- Silver Sugar Pearls
- Teal Food Coloring
Revolving Cake Stand Decorating Set – 12”Food Grade Aluminum Cake Stand | 4-in-1 Cake Decoration Supplies Icing Spatula Comb Smoother | 2-Way Rotation Anti-Slid Turnable Non-Slip Bottom LightweightPUCKWAY Offset Cake Icing Spatula Set of 3 Professional Stainless Steel Decorating Frosting Spatulas (4
6 Pcs Frozen Cake Topper Decorations ,Children Mini Toys Cupcake Topper for Birthday Party Supplies
Satin Ice Pearl Shimmer Fondant, Vanilla, 1 Pound
Snowflake Cookie Cutters Set of 10 pcs, Stainless Steel Snowflake Cookie Cutter Mold Set, Christmas Baking Mold Pastry Biscuit Cake Fondant Decorations Mould Kitchen Tool for Baking DIY Gift for Women
Wilton 12-Inch Disposable Decorating Bags for Piping and Decorating with Assorted Icings, Flexible and Microwave-Safe, Bags Only (24-Count)
Wilton 402-3 No. 3 Round Piping Tip(2pk)
Wilton Sugar Pearls, 4.8-Ounce, Silver
Wilton Icing Color, Teal
How to Make a Frozen Cake with a Spatula Spiral Design
Because I was in such a hurry, I did not take too many in-process photos. However, I have done the spiral cake design in the past, so that should help as you work to duplicate the look. Just check out that visual tutorial here.
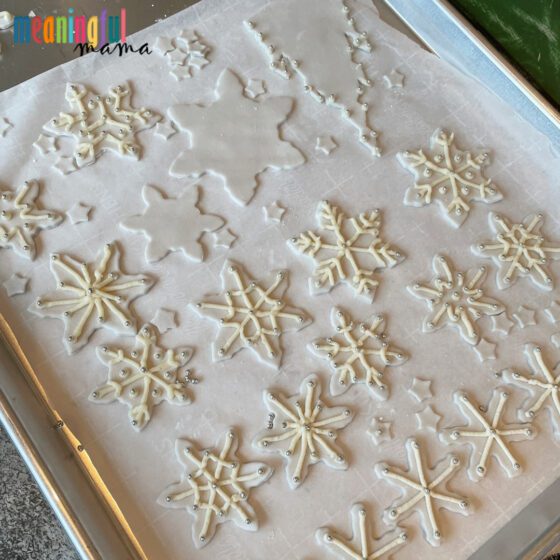
- Roll out fondant to 1/4″. Cut out a variety of snowflake shapes. I also included some small stars.
- Make frosting and pipe varying designs onto your snowflakes. At different endpoints and intersections, add a silver edible ball. Piping takes some practice. You want to touch your frosting down at the beginning, pull away slightly while adding slight pressure, and stay just above the surface. Touch down again at the end of your line.
- For the top of the cake, I also made a little mini-castle. I purchased and then printed out this one. Then, I used an Exacto knife to trace it while cutting it out of fondant.
- Bake your cake. This cake was two tiers, each with four layers. It was a 6″ cake on top of a 10″ cake.
- The first step in decorating is to do a crumb coat on your cake once the cake is cool. This is an important step to seal in crumbs so you don’t get crumbs in your frosting. For more instructions on how to do a crumb coat and other great cake techniques, check out my cake-making 101 post.
- I have made a spiral ombre design with a spatula a couple of times before. You can check out this peach ombre cake, but the technique is really laid out in this cute sweet sixteen cake. I’m sorry I didn’t take more process photos here, but I would click through to the sweet-sixteen cakes to find a better visual tutorial.
- Color your buttercream frosting. You want 3 different shades of the same color. The base gel color was teal. You want to add different amounts of the teal to 3 different frosting bowls to get 3 different shades of the same color – darker to lighter.
- Add the darker frosting at the bottom of the first cake then add your middle color to the top of that same tier. Do the middle shade at the bottom of your top tier and then your lightest shade at the top of that tier.
- The next thing to do is to begin to twirl your cake stand while keeping the tip of your spatula or knife lightly and consistently pressed against the frosting, spiraling from the bottom to the top. If you do not have a cake turntable, you will just need to work your way around the cake as smoothly as possible.
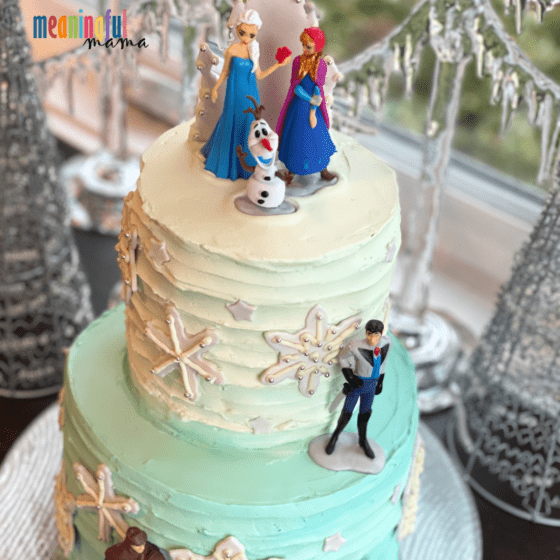
- The final step is to place your snowflakes randomly on the cake and put your Frozen cake topper figurines in place.
Want More Cake Inspiration?
Must-Have Cake Decorating Tools and Supplies
